Managing the Selection

//
//  ManagingSectionViewController.swift
//  CollectionViewPractice
//
//  Created by Martin.Q on 2021/10/15.
//

import UIKit

class ManagingSelectionViewController: UIViewController {
	lazy var list: [MaterialColorDataSource.Color] = {(0...2).map { _ in
		MaterialColorDataSource.generateSingleSectionData()
	}.reduce([], +)
	}()

	lazy var checkImage: UIImage? = UIImage(systemName: "checkmark.cirle")

	@IBOutlet weak var collectionView: UICollectionView!

	func selectRandomItem() {

	}

	func reset() {

	}

	override func viewDidLoad() {
		super.viewDidLoad()

	}


}

extension ManagingSelectionViewController: UICollectionViewDataSource {
	func collectionView(_ collectionView: UICollectionView, numberOfItemsInSection section: Int) -> Int {
		return list.count
	}

	func collectionView(_ collectionView: UICollectionView, cellForItemAt indexPath: IndexPath) -> UICollectionViewCell {
		let cell = collectionView.dequeueReusableCell(withReuseIdentifier: "cell", for: indexPath)
		cell.contentView.backgroundColor = list[indexPath.row].color

		return cell
	}
}

extension ManagingSelectionViewController {
	@objc func showMenu() {
		let actionSheet = UIAlertController(title: nil, message: nil, preferredStyle: .actionSheet)
		let randomAction = UIAlertAction(title: "Selection Random Item", style: .default) { [weak self] (action) in
			self?.selectRandomItem()
		}
		actionSheet.addAction(randomAction)

		let resetPositionAction = UIAlertAction(title: "Reset", style: .default) { [weak self] (action) in
			self?.reset()
		}
		let cancelAction = UIAlertAction(title: "Cancel", style: .cancel, handler: nil)

		actionSheet.addAction(resetPositionAction)
		actionSheet.addAction(cancelAction)

		present(actionSheet, animated: true, completion: nil)
	}
}
사용할 씬과 코드는 위와 같다.
선택 구현하기
Collection은 기본적으로 하나 이상의 셀을 선택할 수 있다.

기본적으로 Single Selection이 활성화된 상태이지만 Attribute Inspector로는 이를 비활성화하거나 변경할 수 없다.
따라서 코드를 통해 변경해야만 한다.
collectionView.allowsSelection = true
collectionView.allowsMultipleSelection = false
CollectionView의 allowsSelection 속성과 allowsMultipleSelection 속성을 변경해 이를 설정한다.
allowsSelection이 true이고 allowsMultipleSelection이 false이면 Single Selection으로 동작한다.
선택 이벤트는 Delegate 패턴으로 처리하며, 관련 메소드는 UICollectionViewDelegate 프로토콜에 선언되어있다.
extension ManagingSelectionViewController: UICollectionViewDelegate {

}
Collection View를 Delegate로 연결하고 extension을 사용해 UICollectionViewDelegate 프로토콜을 채용하도록 수정한다.
extension ManagingSelectionViewController: UICollectionViewDelegate {
	func collectionView(_ collectionView: UICollectionView, didSelectItemAt indexPath: IndexPath) {

	}
}
collectionView(didSelectItemAt:) 메소드는 셀이 선택된 후에 호출된다.
두 번째 파라미터인 indexPath를 통해 선택된 셀의 위치를 알 수 있다.
extension ManagingSelectionViewController: UICollectionViewDelegate {
	func collectionView(_ collectionView: UICollectionView, didSelectItemAt indexPath: IndexPath) {
		let color = list[indexPath.item].color
		view.backgroundColor = color
		print("#1", indexPath, #function)
	}
}
선택된 셀의 색으로 배경색을 변경하고, 호출 시 로그를 남기도록 수정했다.


의도한 대로 동작하며, 콘솔에도 정상적으로 로그가 표시되고 있다.

하지만 한 가지 셀을 반복적으로 선택해도 코드가 계속 호출되고 있는 것을 볼 수 있다.
이는 전혀 효율적이지 못한 작동으로, 이를 수정해 보도록 한다.
extension ManagingSelectionViewController: UICollectionViewDelegate {
	func collectionView(_ collectionView: UICollectionView, didSelectItemAt indexPath: IndexPath) {
		let color = list[indexPath.item].color
		view.backgroundColor = color
		print("#1", indexPath, #function)
	}
	func collectionView(_ collectionView: UICollectionView, shouldSelectItemAt indexPath: IndexPath) -> Bool {

	}
}
UICollectionViewDelegate에 collectionView(shouldSelectItemAt:) 메소드를 추가한다.
해당 메소드는 셀을 선택하기 직전에 호출되며, 해당 메소드가 True를 반환하면 실제로 해당 셀이 선택되게 된다.
여기서 이미 선택되었는지를 판단한 후에 true를 반환하도록 처리한다.
func collectionView(_ collectionView: UICollectionView, shouldSelectItemAt indexPath: IndexPath) -> Bool {
	print("#2", indexPath, #function)

	guard let list = collectionView.indexPathsForSelectedItems else {
		return true
	}

	return !list.contains(indexPath)

}
list가 바인딩되지 못하면 true를 반환하고 셀을 실제로 선택하게 된다.
그 외의 경우 선택을 진행하지 않는다.

처음 셀을 선택했을 때 2번 메소드가 호출되고,
바인딩이 실패하기 때문에 셀이 실제로 선택되고, 1번 메소드가 호출된다.
다시 같은 셀을 선택하면 바인딩이 성공하기 때문에 1번 메소드가 호출되지 못하고 메소드는 종료된다.
extension ManagingSelectionViewController: UICollectionViewDelegate {
	func collectionView(_ collectionView: UICollectionView, didSelectItemAt indexPath: IndexPath) {
		let color = list[indexPath.item].color
		view.backgroundColor = color
		print("#1", indexPath, #function)
	}
	func collectionView(_ collectionView: UICollectionView, shouldSelectItemAt indexPath: IndexPath) -> Bool {
		print("#2", indexPath, #function)

		guard let list = collectionView.indexPathsForSelectedItems else {
			return true
		}

		return !list.contains(indexPath)
	}
	func collectionView(_ collectionView: UICollectionView, shouldDeselectItemAt indexPath: IndexPath) -> Bool {

	}
}
선택 해제할 때도 비슷한 방식으로 구현할 수 있다.
collectionView(shouldDeselectItemAt:)는 선택되어있는 셀을 선택 해제하기 직전에 호출된다.
true를 반환하면 실제로 선택이 해제되고 false를 반환하면 선택이 유지된다.
선택을 해제하기 전에 사용자가 특정 동작을 취해야 한다면, 여기서 경고창을 호출하고, 사용자를 유도할 수 있다.
UI 업데이트 구현하기
func collectionView(_ collectionView: UICollectionView, didDeselectItemAt indexPath: IndexPath) {

}
collectionView(didDeslectItemAt:)메소드는 실제로 해제된 다음 UI를 업데이트해야 할 때 주로 호출된다.
해당 메소드들을 이용해서 선택이 되면 체크마크를 표시하고,
선택이 해제되면 체크마크를 지우도록 구현해 본다.
func collectionView(_ collectionView: UICollectionView, didSelectItemAt indexPath: IndexPath) {
	let color = list[indexPath.item].color
	view.backgroundColor = color
	print("#1", indexPath, #function)

	if let cell = collectionView.cellForItem(at: indexPath) {
		if let imageView = cell.contentView.viewWithTag(100) as? UIImageView {
			imageView.image = checkImage
		}
	}
}
func collectionView(_ collectionView: UICollectionView, didDeselectItemAt indexPath: IndexPath) {
if let cell = collectionView.cellForItem(at: indexPath) {
if let imageView = cell.contentView.viewWithTag(100) as? UIImageView {
imageView.image = nil
}
}
}
의도한 대로 동작하는 것을 확인할 수 있다.
Cell의 UI를 선택 상태에 따라 업데이트해야 한다면 위와 같은 방식으로 구현하게 된다.
만약 Highlight 상태를 지원한다면 이는 조금 더 간편해진다.
예를 들어 imageView는 기본 상태와 Highlight 상태를 둘 다 설정할 수 있고,
Collection View의 셀은 셀이 선택되면 셀의 상태를 업데이트하고 이미지를 Highlight로 설정한다.
이를 사용하면 코드의 작성 없이 같은 결과를 얻을 수 있다.

이렇게 attribute inspector에서 Highlighted image를 설정하는 것으로 완료된다.
터치 이벤트 추가하기
func collectionView(_ collectionView: UICollectionView, shouldHighlightItemAt indexPath: IndexPath) -> Bool {
	print("#3", indexPath, #function)
	return true
}
collectionView(shouldHighlightItemAt:) 메소드는 셀이 HIghlight 상태로 변하기 직전에 호출된다.
해당 메소드에서 true를 반환하면 highlight 상태로 변한다.
func collectionView(_ collectionView: UICollectionView, didHighlightItemAt indexPath: IndexPath) {
	print("#4", indexPath, #function)

	if let cell = collectionView.cellForItem(at: indexPath) {
		cell.layer.borderWidth = 6
	}
}
collectionView(didHighlighItemAt:)메소드는 셀이 Highlight 상태로 전환된 다음 호출된다.
해당 메소드가 호출되면 강조된 셀의 테두리를 6pt로 변환하도록 작성했다.
func collectionView(_ collectionView: UICollectionView, didUnhighlightItemAt indexPath: IndexPath) {
	print("#5",indexPath,#function)

	if let cell = collectionView.cellForItem(at: indexPath) {
		cell.layer.borderWidth = 0
	}
}
collectionView(didUnhighlightItemAt:) 메소드는 셀이 Highlight 상태에서 해제된 다음 호출된다.
이전에 설정했던 테두리를 원래대로 되돌린다.


3, 4, 5 메소드를 순서대로 호출하고, 터치를 해제하면 2, 1 메소드가 호출되는 것을 확인할 수 있다.
func collectionView(_ collectionView: UICollectionView, shouldHighlightItemAt indexPath: IndexPath) -> Bool {
	print("#3", indexPath, #function)
	return false
}
만약 3번 메소드의 반환 값을 false로 변경하면
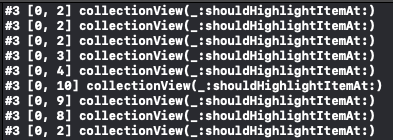
highlight는 물론 선택도 동작하지 않는다.
코드를 통해 셀 선택하기
func selectRandomItem() {
	let item = Int(arc4random_uniform(UInt32(list.count)))
	let targetIndex = IndexPath(item: item, section: 0)

	collectionView.selectItem(at: targetIndex, animated: true, scrollPosition: .top)
}
CollectionView에 존재하는 셀을 선택하기 위해 selectItem 메소드를 사용한다.
첫 번째 메소드로 선택할 대상의 indexPath를,
두 번째 메소드로 애니메이션 여부를,
세 번째 메소드로 스크롤 여부와 스크롤 이후 대상의 위치를 설정한다.
이때 첫 번째 메소드에 nil을 전달하는 것으로 선택을 해제하는 것도 가능하다.
func reset() {
	collectionView.deselectItem(at: IndexPath, animated: true)
}
선택을 해제할 때는 deselectItem 메소드를 사용한다.
전달된 IndexPath의 셀을 선택 해제하는 방식으로 동작하는데,
전체를 초기화하려면 이를 반복 호출해야 하기 때문에 비효율적이다.
func reset() {
	collectionView.selectItem(at: nil, animated: true, scrollPosition: .top)
}
따라서 선택할 때 사용했던 selectItem 메소드를 통해 nil을 전달해 한번에 선택을 해제한다.
단, 이 경우 자동으로 스크롤되지 않기 때문에, 스크롤 위치를 초기화해야 한다면 직접 스크롤을 구현해야 한다.
func reset() {
	collectionView.selectItem(at: nil, animated: true, scrollPosition: .top)

	let headIndex = IndexPath(item: 0, section: 0)
	collectionView.scrollToItem(at: headIndex, at: .top, animated: true)
}
Colelction View의 첫 번째 대상의 indexPath를 생성하고,
scrollToItem 메소드로 해당 indexPath로 스크롤되도록 처리한다.

의도한 대로 동작한다.
단 이 경우 사용자가 직접 선택했을 때와의 차이가 존재한다.
코드를 통해 셀을 선택하게 되면 delegate가 호출되지 않는다.
셀이 선택됐어도 씬의 배경색이 바뀌지 않는 것이 이 때문이다.
따라서 코드를 통해 셀을 선택하게 될 경우 코드를 통해 관련 기능을 실행되도록 구현하는 것이 중요하다.
func selectRandomItem() {
	let item = Int(arc4random_uniform(UInt32(list.count)))
	let targetIndex = IndexPath(item: item, section: 0)

	collectionView.selectItem(at: targetIndex, animated: true, scrollPosition: .top)
	view.backgroundColor = list[targetIndex.item].color
}

func reset() {
	collectionView.selectItem(at: nil, animated: true, scrollPosition: .top)

	let headIndex = IndexPath(item: 0, section: 0)
	collectionView.scrollToItem(at: headIndex, at: .top, animated: true)
	view.backgroundColor = .systemBackground
}
위와 같이 코드를 수정해 기능의 일관성을 유지할 수 있다.
Edit Rows and Section
Collection View는 별도의 편집 모드를 제공하지 않는다.
따라서 필요한 UI들을 직접 구성해야 한다.
대신 편집에 필요한 다양한 API를 제공한다.
- Inert
- Move
- Delete
- Reload
이들을 사용해 셀 개별적으로 편집할 수 있다.

//
//  EditingViewController.swift
//  CollectionViewPractice
//
//  Created by Martin.Q on 2021/10/16.
//

import UIKit

class EditingViewController: UIViewController {

    var selectedList = [UIColor]()
    var list = MaterialColorDataSource.generateMultiSectionData()

    @IBOutlet weak var collectionView: UICollectionView!

    func emptySelectedList() {

    }

    func insertSection() {

    }

    func deleteSecond() {

    }

    func moveSecondToThird() {

    }

    func performBatch() {

    }

    override func viewDidLoad() {
        super.viewDidLoad()

        navigationItem.rightBarButtonItem = UIBarButtonItem(barButtonSystemItem: .action, target: self, action: #selector(showMenu))
    }
}

extension EditingViewController: UICollectionViewDelegate {

}

extension EditingViewController: UICollectionViewDataSource {
    func numberOfSections(in collectionView: UICollectionView) -> Int {
        return list.count + 1
    }
    func collectionView(_ collectionView: UICollectionView, numberOfItemsInSection section: Int) -> Int {
        if section == 0 {
            return selectedList.count
        }

        return list[section - 1].colors.count
    }

    func collectionView(_ collectionView: UICollectionView, cellForItemAt indexPath: IndexPath) -> UICollectionViewCell {
        let cell = collectionView.dequeueReusableCell(withReuseIdentifier: "cell", for: indexPath)

        switch indexPath.section {
        case 0:
            cell.contentView.backgroundColor = selectedList[indexPath.row]
        default:
            cell.contentView.backgroundColor = list[indexPath.section - 1].colors[indexPath.row]
        }

        return cell
    }

    func collectionView(_ collectionView: UICollectionView, viewForSupplementaryElementOfKind kind: String, at indexPath: IndexPath) -> UICollectionReusableView {
        let header = collectionView.dequeueReusableSupplementaryView(ofKind: kind, withReuseIdentifier: "header", for: indexPath) as! EditingHeaderCollectionReusableView

        if indexPath.section == 0 {
            header.titleLabel.text = "Selected Color List"
        } else {
            header.titleLabel.text = list[indexPath.section - 1].title
        }

        return header
    }
}

extension EditingViewController {
    @objc func showMenu() {
        let actionSheet = UIAlertController(title: nil, message: nil, preferredStyle: .actionSheet)

        let emptyListAction = UIAlertAction(title: "Empty Selected List", style: .default) { [weak self] (action) in
            self?.emptySelectedList()
        }

        let insertSectionAction = UIAlertAction(title: "Insert Section", style: .default) { [weak self] (action) in
            self?.insertSection()
        }

        let deleteSecond = UIAlertAction(title: "Delete Second Section", style: .default) { [weak self] (action) in
            self?.deleteSecond()
        }

        let moveSectionAction = UIAlertAction(title: "Move Second Section", style: .default) { [weak self] (action) in
            self?.moveSecondToThird()
        }

        let batchAction = UIAlertAction(title: "Perform Batch Update", style: .default) { [weak self] (action) in
            self?.performBatch()
        }

        let cancelAction = UIAlertAction(title: "Cancel", style: .cancel, handler: nil)

        actionSheet.addAction(emptyListAction)
        actionSheet.addAction(insertSectionAction)
        actionSheet.addAction(deleteSecond)
        actionSheet.addAction(moveSectionAction)
        actionSheet.addAction(batchAction)
        actionSheet.addAction(cancelAction)

        present(actionSheet, animated: true, completion: nil)
    }
}

extension UIColor {
    static var random: UIColor {
        let r = CGFloat.random(in: 1..<256) / 256
        let g = CGFloat.random(in: 1..<256) / 256
        let b = CGFloat.random(in: 1..<256) / 256

        return UIColor(displayP3Red: r, green: g, blue: b, alpha: 1.0)
    }
}
//
// EditingHeaderCollectionReusableView.swift
// CollectionViewPractice
//
// Created by Martin.Q on 2021/10/16.
//
import UIKit
class EditingHeaderCollectionReusableView: UICollectionReusableView {
@IBOutlet weak var titleLabel: UILabel!
}사용할 씬과 코드는 위와 같다.
selectedList는 첫 번째 section에 표시할 데이터를 저장한다.
list에는 나머지 section에 나열될 색상 데이터를 저장한다.
func collectionView(_ collectionView: UICollectionView, cellForItemAt indexPath: IndexPath) -> UICollectionViewCell {
	let cell = collectionView.dequeueReusableCell(withReuseIdentifier: "cell", for: indexPath)

	switch indexPath.section {
	case 0:
		cell.contentView.backgroundColor = selectedList[indexPath.row]
	default:
		cell.contentView.backgroundColor = list[indexPath.section - 1].colors[indexPath.row]
	}

	return cell
}
dataSource의 collectionView(cellForItemAt:)메소드를 보면,
section에 접근할 때는 1을 뺀 상태에서 접근하게 된다.
색상을 담은 list는 두 번째 section에서부터 표시되기 때문에 실제 데이터와 표시 데이터의 차이가 발생하는데, 이를 보정하는 부분이다.
이것에 주의해서 기능을 구현해야 한다.

두 번째 section부터 데이터가 표시된다.
section 간 셀 이동시키기
원하는 색을 선택하면 첫 번째 section으로 이동시키는 기능을 구현해 본다.
extension EditingViewController: UICollectionViewDelegate {
	func collectionView(_ collectionView: UICollectionView, didSelectItemAt indexPath: IndexPath) {

	}
}
셀을 선택했을 때 기능이 동작해야 하므로 delegate에서 collectionView(didSelectItemAt:)메소드를 사용한다.
extension EditingViewController: UICollectionViewDelegate {
	func collectionView(_ collectionView: UICollectionView, didSelectItemAt indexPath: IndexPath) {
		if indexPath.section == 0 {
			selectedList.remove(at: indexPath.item)
			collectionView.deleteItems(at: [indexPath])
		}
	}
}
먼저 첫 번째 section에 존재하는 항목을 선택했을 때 삭제하는 기능을 구현한다.
첫번째 section에 표시되는 데이터인 selectedList에서 해당 데이터를 삭제한 뒤, Collection View에서 삭제한다.
해당 메커니즘은 셀 삭제 구현에 필수적인 메커니즘이다.
func collectionView(_ collectionView: UICollectionView, didSelectItemAt indexPath: IndexPath) {
	if indexPath.section == 0 {
		selectedList.remove(at: indexPath.item)
		collectionView.deleteItems(at: [indexPath])
	} else {
		let deleted = list[indexPath.section - 1].colors.remove(at: indexPath.item)
		collectionView.deleteItems(at: [indexPath])

		let targetIndex = IndexPath(item: selectedList.count, section: 0)
		selectedList.append(deleted)
		collectionView.insertItems(at: [targetIndex])
	}
}
다른 section에서 셀을 선택하면 현재 존재하는 section에서 삭제하고, 첫번째 section으로 이동시킨다.
이 때도 list가 표현되는 section이 첫번째 section이 아님에 주의하고,
셀 추가. 삭제 메커니즘에 따라 진행해야 한다.

결과를 확인해 보면 Fade Animation이 적용된 것을 볼 수 있다.
지금과 같이 한 Collection View 내에서 셀을 삭제하고 추가하는 대신 셀을 직접 이동시키는 것이 가능하다.
func collectionView(_ collectionView: UICollectionView, didSelectItemAt indexPath: IndexPath) {
	if indexPath.section == 0 {
		selectedList.remove(at: indexPath.item)
		collectionView.deleteItems(at: [indexPath])
	} else {
		let deleted = list[indexPath.section - 1].colors.remove(at: indexPath.item)
//            collectionView.deleteItems(at: [indexPath])

		let targetIndex = IndexPath(item: selectedList.count, section: 0)
		selectedList.append(deleted)
//            collectionView.insertItems(at: [targetIndex])
		collectionView.moveItem(at: indexPath, to: targetIndex)
	}
}
moveItem 메소드를 사용하면 셀을 삭제하고 추가하는 대신 시작 indexPath에서 도착 indexPath로 셀을 이동시킬 수 있다.

이 경우 Fade가 아닌 Move Animation이 적용된다.
section 편집하기

우측 상단의 공유 버튼을 선택하면 미리 작성해 둔 Action Sheet가 표시된다.
func emptySelectedList() {

}

func insertSection() {

}

func deleteSecond() {

}

func moveSecondToThird() {

}

func performBatch() {

}
해당 액션들은 각각의 메소드와 연결되어있다.
func emptySelectedList() {
	selectedList.removeAll()
	let targetIndex = IndexSet(integer: 0)
	collectionView.reloadSections(targetIndex)
}
emptySelectedList 메소드는 selectedList와 section을 초기화한다.
deleteItems 메소드를 사용하면 삭제할 indexPath를 모두 만들어야 하는 상황이 생기기 때문에,
데이터를 다시 불러오는 reloadSection 메소드가 효율적이다.

또한 reloadSections는 IndexSet을 통해 새로고침 할 section을 받아오게 되므로,
indexSet을 미리 생성해 이를 전달한다.
func insertSection() {
	let sectionData = MaterialColorDataSource.Section()
	list.insert(sectionData, at: 0)
}
insertSection 메소드는 새로운 section을 추가한다.
해당 section에 표시할 데이터를 생성하고, list 가장 앞에 이를 추가한다.
func insertSection() {
	let sectionData = MaterialColorDataSource.Section()
	list.insert(sectionData, at: 0)

	let targetIndex = IndexSet(integer: 1)
	collectionView.insertSections(targetIndex)
}
section을 삽입할 때에도 IndexSet이 필요하다.
두 번째 section에 추가될 수 있도록 1로 지정해 insertSections 메소드에 전달한다.
func deleteSecond() {
	list.remove(at: 0)
	let targetSection = IndexSet(integer: 1)
	collectionView.deleteSections(targetSection)
}
deleteSecond 메소드는 방금 추가했던 두 번째 section을 삭제한다.
list에서 지우고, IndexSet을 생성해 deleteSections 메소드에 전달한다.
func moveSecondToThird() {
	let target = list.remove(at: 0)
	list.insert(target, at: 1)

	collectionView.moveSection(1, toSection: 2)
}
moveSecondToThird 메소드는 두번째 section을 세번째 section으로 이동시킨다.


각각의 기능들이 의도한 대로 동작하는 것을 볼 수 있다.
func performBatch() {
	let deleteIndex = (1..<3).compactMap { _ in
		Int(arc4random_uniform(UInt32(list[0].colors.count)))
	}.sorted(by: >).map { IndexPath(item: $0, section: 1) }
	let insertIndex = (0..<4).compactMap { _ in
		Int(arc4random_uniform(UInt32(list[0].colors.count)))
	}.sorted(by: <).map { IndexPath(item: $0, section: 1) }
}
performBatch 메소드는 삭제와 추가를 동시에 진행하도록 구현한다.
삭제할 IndexPath와 추가할 IndexPath는 무작위로 생성해 각각 내림차순과 오름차순으로 정렬한다.
func performBatch() {
	let deleteIndex = (1..<3).compactMap { _ in
		Int(arc4random_uniform(UInt32(list[0].colors.count)))
	}.sorted(by: >).map { IndexPath(item: $0, section: 1) }
	let insertIndex = (0..<4).compactMap { _ in
		Int(arc4random_uniform(UInt32(list[0].colors.count)))
	}.sorted(by: <).map { IndexPath(item: $0, section: 1) }

	deleteIndex.forEach { list[0].colors.remove(at: $0.item) }
	insertIndex.forEach { list[0].colors.insert(UIColor.random, at: $0.item) }

	collectionView.performBatchUpdates({
		collectionView.deleteItems(at: deleteIndex)
		collectionView.insertItems(at: insertIndex)
	}, completion: nil)
}
삭제와 추가를 동시에 진행할 때에는 순서가 매우 중요하다.
반드시 삭제를 먼저 진행해야 충돌이 발생하지 않는다.
또한 셀이나 section을 삭제할 때에는 내림차순으로 삭제해야 한다.
반대로 추가할 때는 오름차순으로 추가해야 한다.
또, insert, delete, move, reload를 두 번 이상 연달아 사용할 때는
반드시 performBatchUpdates 메소드를 통해 변경 사항을 한 번에 처리할 수 있도록 구현해야 한다.


