View Controller
View Controller는 다음의 3가지 역할을 수행한다.
- 화면에 표시되는 View를 관리한다.
모든 View Controller는 하나의 Root View를 가진다.
Root View는 UI를 표시할 Frame을 제공하고, View 계층을 관리한다.
따라서 화면을 구성하는 모든 View는 항상 Root View 아래에 존재한다.
Root View에 접근할 때에는 view 속성을 사용한다.
Root View 이하에 있는 View에 접근할 때에는 Outlet으로 연결하거나 View Tagging을 사용한다. - View에서 발생하는 이벤트를 처리한다.
예를 들어 Button에서 발생한 이벤트는 Controller와 연결해 Action으로 처리한다.
Table View의 DataSource와 Delegate를 View Controller로 지정하고 기능을 구현한다. - 화면 전환.
CocoaTouch framework는 화면 전환에 필요한 모든 기능을 제공한다.
모든 앱은 Window를 가지고 있다.
Window는 UI를 출력할 Frame을 정의하고, 실제 출력은 View Controller이다.
앱 시작 시 새로운 View Controller를 생성하고, Window에 Root View Controller로 지정해야 한다.
새로운 StoryBoard를 생성하면 자동으로 진행되므로, 별다른 작업이 필요 없다.
따라서 StoryBoard를 사용하지 않는다면 코드로 직접 구현해야 한다.
View Controller는 두 가지 카테고리로 구분한다.
- Content View Controller
화면에 표시할 UI를 구성한다.
앱을 개발하면서 만들어야 하는 대부분의 View Controller가 여기에 속한다. - Container View Controller
직접 UI를 구성하지는 않는다.
하나 이상의 Child View Controller를 관리하면서 배치와 화면 전환을 담당한다.
Navigation Controller, Tab Bar Controller, Split View Controller 등이 이에 해당한다.
View Controller는 UIViewController 클래스로 구현되어있다.
그대로 사용하기보다는 Subclassing 하여 기능을 추가한다.
사용하기 위해서는 해당 클래스를 상속받는 새 클래스 파일을 만들고,
파일을 해당 씬의 Custom Class로 지정해야 한다.
화면에 표시되는 시점에 따라 이벤트를 처리할 때도 Subclassing이 필요할 수 있다.
특정한 시점에 호출되는 Callback 메소드들이 존재한다.
View Controller는 새로운 View Controller를 화면에 표시할 수 있다.
이 둘의 관계는 Presenting 관계로,
새로운 View Controller를 요청한 쪽은 Presenting View Controller,
새롭게 표시된 View Controller는 Presented View Controller라고 부른다.
Presented View Controller는 기본적으로 Modal 방식으로 표시되고, 다른 방식을 선택할 수도, 직접 구현할 수도 있다.
View Controller는 화면에 표시할 데이터를 관리한다.
View Controller 내부에 속성을 생성하고 데이터를 저장한다.
따라서 View Controller가 종료되면 저장된 데이터도 함께 삭제된다.
iOS 내부에선 적은 양의 메모리를 여러 앱이 공유한다.
일단 사용되지 않는 앱은 바로 종료되지 않고, Background 상태로 전환되고,
메모리가 부족하게 되면 특별한 메소드를 호출하고, 불필요한 메모리를 제거한다.
이후에도 메모리가 부족하면 오랫동안 사용하지 않았거나, 많이 점유하고 있는 앱을 강제로 종료한다.
Custom View Controller에서 didReceiveMemoryWarning 메소드를 오버 라이딩해 사용하지 않는 메모리를 정리하면
사용자 경험의 개선을 기대할 수 있다.
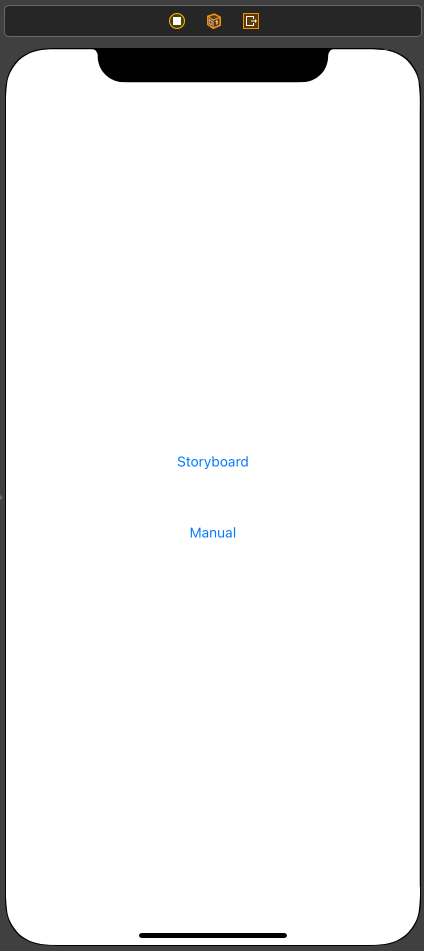
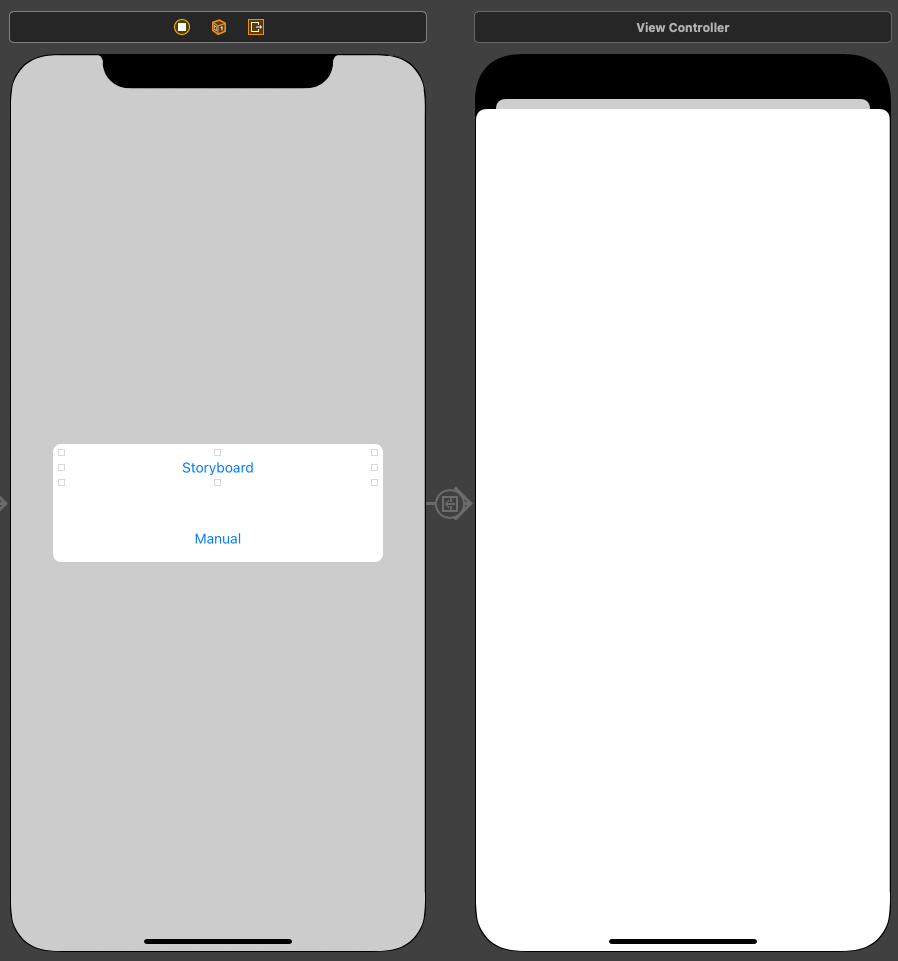
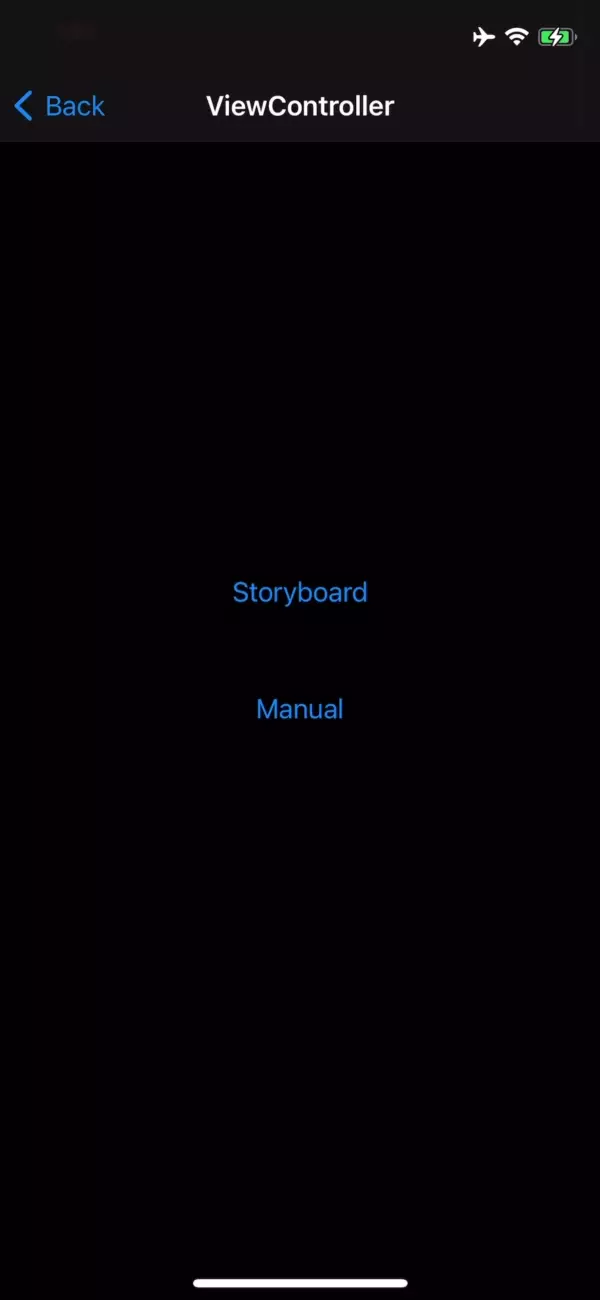
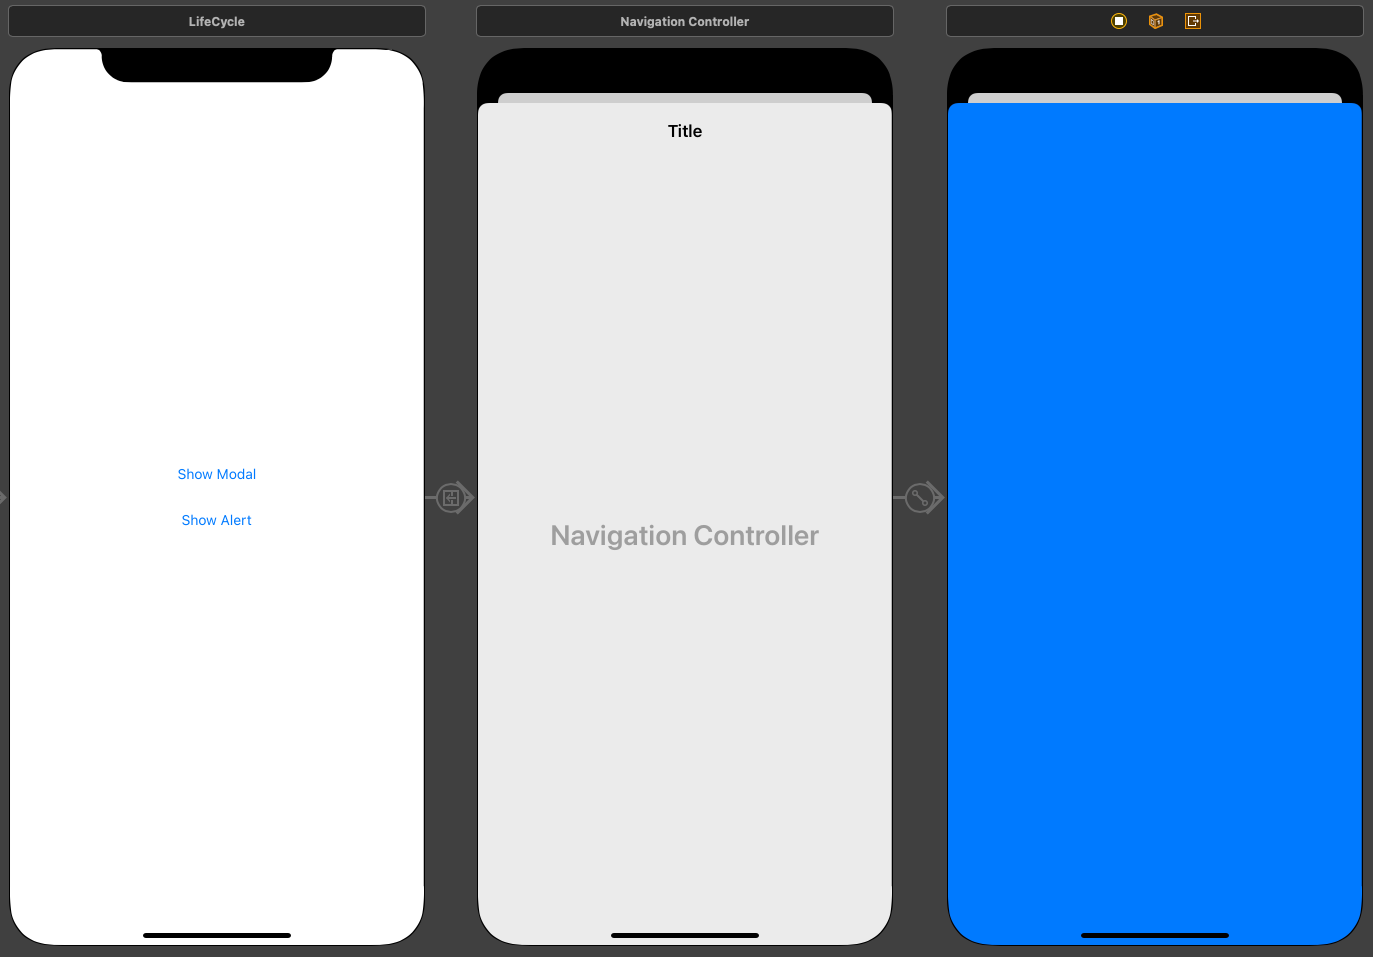
사용할 씬은 위와 같다.
Storyboard Button을 누르면 Segue를 통해 View Controller를 생성한다.
Manual Button을 누르면 코드를 통해 View Controller를 생성한다.
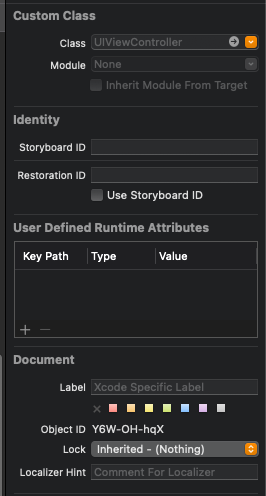
해당 씬의 Identity Inspector를 확인해 보면 Custom Class가 설정되지 않은 것을 확인할 수 있다.
Place Holder와 같이 기본적으로 UIViewController와 연결되고,
해당 클래스에는 기본 코드가 구현되어있기 때문에 지금 상태로도 정상적으로 실행되지만,
outlet이나 action을 연결해 이벤트를 처리하는 것은 불가능하다.
따라서 새로운 UIViewController 클래스를 상속한 클래스를 만들고, 이를 Custom Class로 설정해 사용한다.

UIViewController를 상속받도록 Subclass로 지정하고 파일을 생성한다.
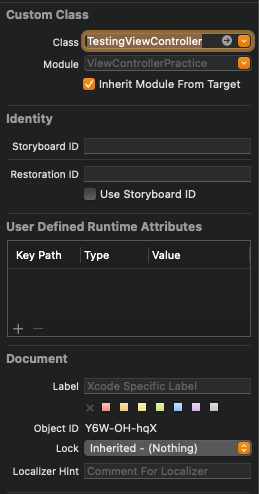
이렇게 Custom Class에 새로 만든 클래스 파일을 설정해 주면 된다.
이제는 outlet과 action으로 이벤트를 처리할 수 있다.
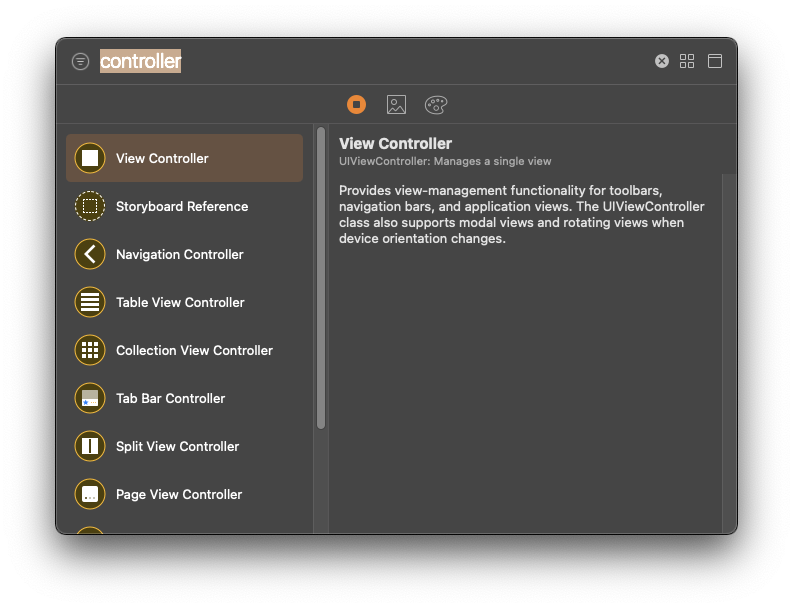
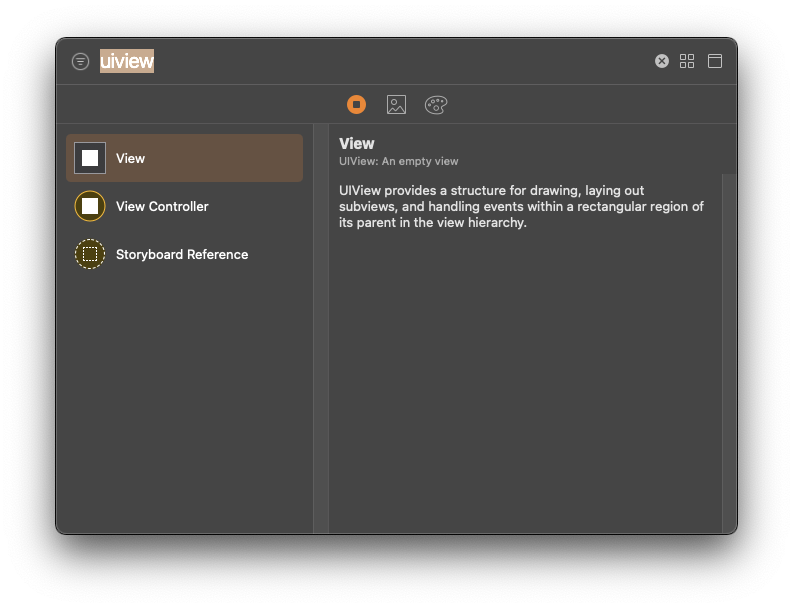
라이브러리에 노란 원으로 표시된 항목들은 그 자체로 하나의 화면을 구성한다.
대부분 UIViewContoller를 상속받고 있다.
Control View Controller를 추가할 때는 첫 번째의 View Controller를 주로 사용한다.
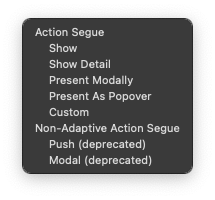
Storyboard Button과 새로운 View Controller를 연결하고,
Action Segue를 show로 설정한다.
지금부터는 해당 버튼을 누르면 Segue가 실행되고, 연결된 씬이 자동으로 생성된다.
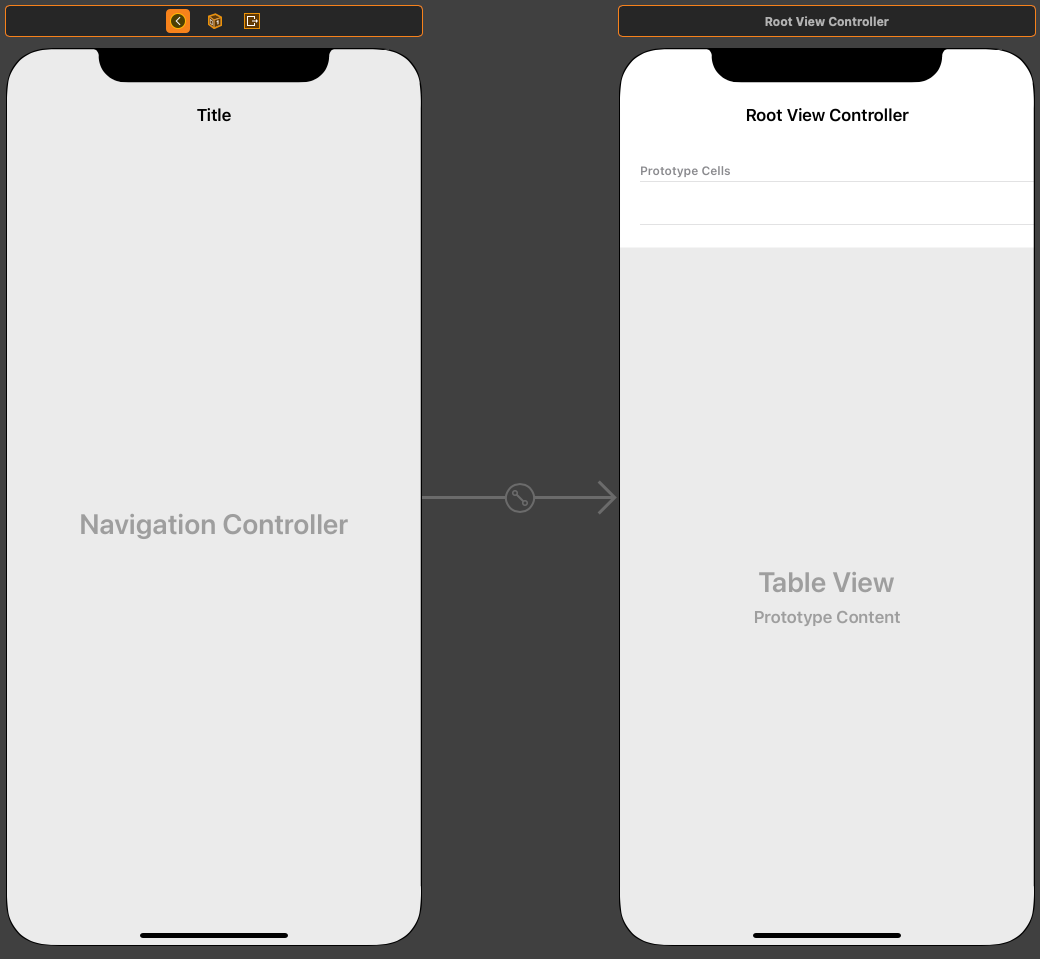
Navigation Controller를 추가하면 이전과는 다르게 두 개의 씬이 추가된다.
Navigation Controller를 포함한 Container Controller는 Child View Controller를 관리한다.
왼쪽에 존재하는 것이 실제 Navigation Controller이고, 오른쪽에 존재하는 것이 Child View Controller이다.
Navigation Controller는 실제 화면에는 표시되지 않고, 따라서 별도의 View를 추가할 수도 없다.
Child View Controller는 다른 View Controller들과 마찬가지로
Content View Controller이기 때문에 별도의 View를 추가할 수 있다.
기본적으로 Table View Contoller가 연결되어 있지만, 다른 View Controller로 대체할 수 있다.
//
//  TestingViewController.swift
//  ViewControllerPractice
//
//  Created by Martin.Q on 2021/10/18.
//

import UIKit

class TestingViewController: UIViewController {
	@IBAction func ManualAction(_ sender: Any) {
	}


	override func viewDidLoad() {
		super.viewDidLoad()

	}

}
연결했던 TestingViewController 클래스 파일에 Manual Button을 Action으로 연결한다.
//
//  TestingViewController.swift
//  ViewControllerPractice
//
//  Created by Martin.Q on 2021/10/18.
//

import UIKit

class TestingViewController: UIViewController {
	@IBAction func ManualAction(_ sender: Any) {
		let vc = UIViewController()
		vc.view.backgroundColor = .red

		navigationController?.pushViewController(vc, animated: true)
	}


	override func viewDidLoad() {
		super.viewDidLoad()

	}

}
새로운 View Controller를 생성하고, 배경색을 붉은색으로 설정했다.
이번 실습은 Navigation Controller를 사용하고 있기 때문에 새로운 View Controller를 push 해야 화면이 전환된다.
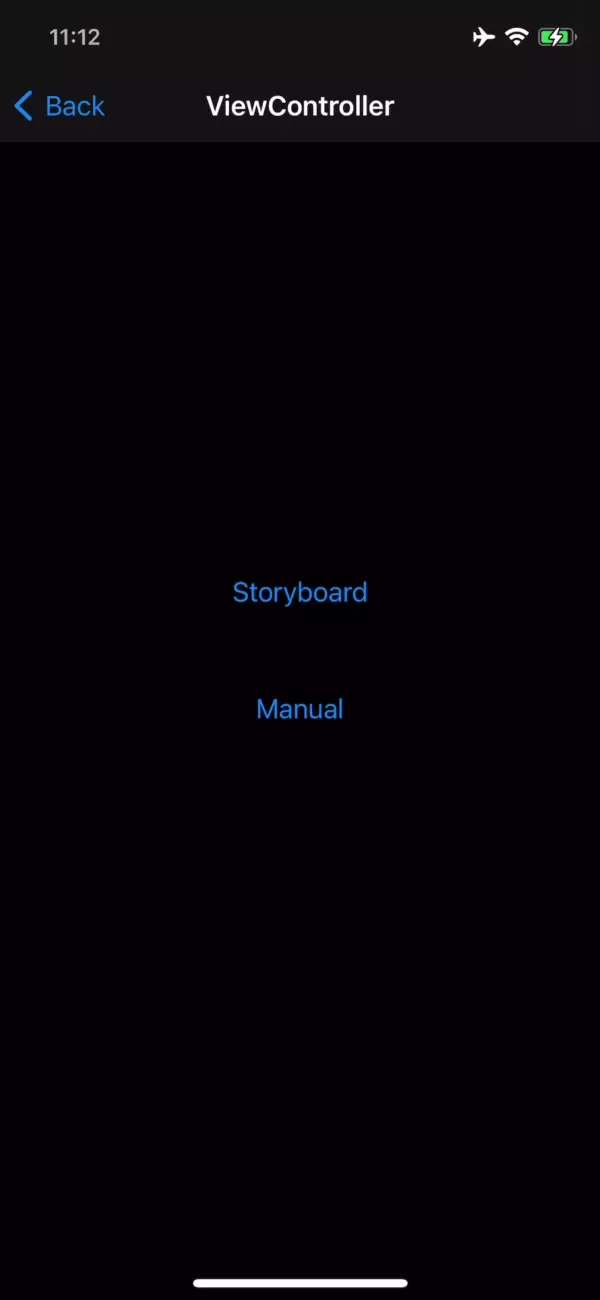
Storyboard Button을 누르면 Storyboard에서 작성한 View Controller가 표시되고,
Manual Button을 누르면 코드로 작성한 View Controller가 표시된다.
let vc = UIViewController()지금은 이렇게 빈 생성자로 View Controller를 생성했지만,
보통은 Custom Class를 만들고, 연관된 Nib 파일을 만들거나 Storyboard ID를 통해 생성한다.
이번엔 Nib 파일을 만들어 본다.

Class 파일을 만드는 것과 동일하게 진행하지만 'Also create XIB file'을 체크한다는 것이 다른 점이다.
만들어진 Nib 파일을 위와 같다.
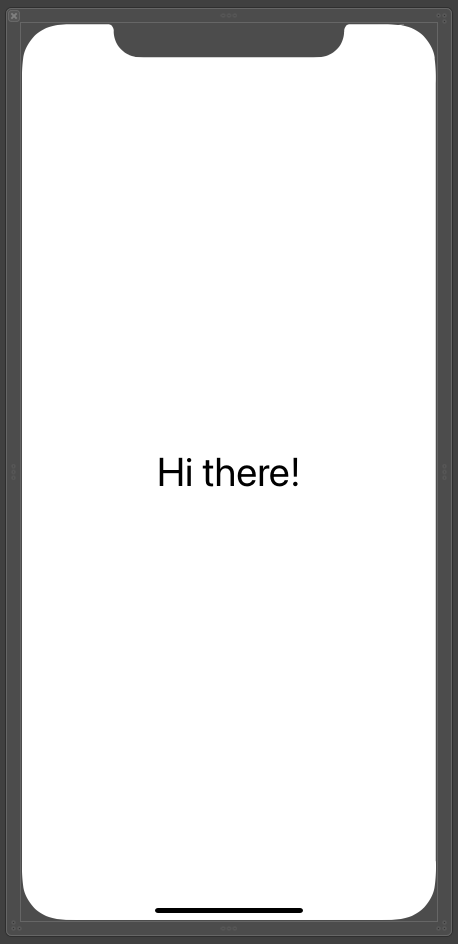
화면의 가운데에 Label을 하나 추가하고, 문구를 변경한다.
//
//  TestingViewController.swift
//  ViewControllerPractice
//
//  Created by Martin.Q on 2021/10/18.
//

import UIKit

class TestingViewController: UIViewController {
	@IBAction func ManualAction(_ sender: Any) {
		let vc = CustomNibViewController(nibName: "CustomNibViewController", bundle: nil)
		//vc.view.backgroundColor = .red

		navigationController?.pushViewController(vc, animated: true)
	}


	override func viewDidLoad() {
		super.viewDidLoad()

	}

}
UIViewController 생성자에서 CustomNibViewController(nibName:bundle:) 생성자로 교체한 뒤,
nibName에는 ViewContoller의 이름을 전달하고, bundle엔 nil을 전달한다.
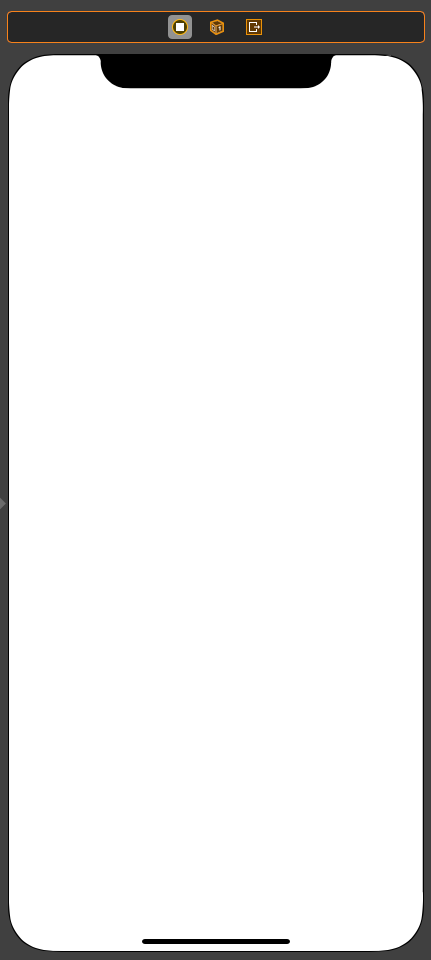
제대로 새롭게 작성한 View Controller가 표시된다.
View Management
모든 View Controller는 Root View를 가지고 있고,
View Controller에 속한 모든 View들은 여기에 추가된다.
Root View도 내용을 직접 출력할 수 있지만, 대부분 다른 View의 Container 역할을 수행한다.
Root View는 UIControllerView에 선언되어있는 view 속성을 통해 접근한다.
해당 속성을 통해 접근할 때에 view가 생성되어있지 않다면 자동으로 생성한다.
또한 Root View의 Frame은 Parent View Controller나 Window의 Root View Controller가 결정한다.
따라서 Root View에는 신경 쓸 것이 없다.
대신 화면을 구성하는 요소들을 Root View 내부에 추가하고,
이들을 올바르게 배치하는데 집중해야 한다.
Root View 내부에 새로운 View를 추가하면 새로운 계층이 함께 생성된다.
이때 View 사이에는 Parent-Child 관계가 생성된다.
Parent View는 Superview라고 부르고, Child View를 Subview라고 부른다.
Superview 아래에는 여러 개의 Subview가 존재할 수 있지만, 한 개의 Subview 위에는 여러 Superview가 존재할 수 없다.
이들이 모여서 앱 전체의 계층을 구성한다.
계층은 가시성에 영향을 준다.
View는 자신에 속한 Subview 목록을 배열로 관리하고, 이는 특정 순서로 정렬되어 있음을 의미한다.
Subview를 추가하면 배열의 끝부분에 추가되고, 화면에서는 가장 위쪽에 표시된다.
UIView 클래스는 이들을 관리하는 여러 API를 제공한다.
//
//  ViewManagementViewController.swift
//  ViewControllerPractice
//
//  Created by Martin.Q on 2021/10/19.
//

import UIKit

class ViewManagementViewController: UIViewController {

    var gView: UIView?

    func addRandomView() {

    }

    func insertRandomView2Back() {

    }

    func removeTopmostRandomView() {

    }

    func bringRView2Front() {

    }

    func sendRView2Back() {

    }

    func switchGViewWithBView() {

    }

    func addgView2RView() {

    }

    func movegView2RootView() {

    }

    override func viewDidLoad() {
        super.viewDidLoad()

        navigationItem.rightBarButtonItem = UIBarButtonItem(barButtonSystemItem: .action, target: self, action: #selector(showMenu))
    }
}

extension ViewManagementViewController {
    @objc func showMenu() {
        let menu = UIAlertController(title: nil, message: nil, preferredStyle: .actionSheet)
        let addRandomViewAction = UIAlertAction(title: "Add Random View", style: .default) { [ weak self ] (action) in
            self?.addRandomView()
        }
        let insertRandomView2BackAction = UIAlertAction(title: "Insert Random View to Back", style: .default) { [weak self] (action) in
            self?.insertRandomView2Back()
        }
        let removeTomostView2BackAction = UIAlertAction(title: "Remove Topmost Random View to Back", style: .default) { [weak self] (action) in
            self?.removeTopmostRandomView()
        }
        let bringRView2FrontAction = UIAlertAction(title: "Bring Red View to Front", style: .default) { [weak self] (action) in
            self?.bringRView2Front()
        }
        let sendRView2BackAction = UIAlertAction(title: "Send Red View to Back", style: .default) { [weak self] (action) in
            self?.sendRView2Back()
        }
        let switchGViewWithBViewAction = UIAlertAction(title: "switch Green View with Blue View", style: .default) { [weak self] (action) in
            self?.switchGViewWithBView()
        }
        let addgView2RViewAction = UIAlertAction(title: "Add Gray View to Red View", style: .default) { [weak self] (action) in
            self?.addgView2RView()
        }
        let movegView2RootViewAction = UIAlertAction(title: "Move Gray View to Root View", style: .default) { [weak self] (action) in
            self?.movegView2RootView()
        }
        let cancelAction = UIAlertAction(title: "Cancel", style: .cancel, handler: nil)

        menu.addAction(addRandomViewAction)
        menu.addAction(insertRandomView2BackAction)
        menu.addAction(removeTomostView2BackAction)
        menu.addAction(bringRView2FrontAction)
        menu.addAction(sendRView2BackAction)
        menu.addAction(switchGViewWithBViewAction)
        menu.addAction(addgView2RViewAction)
        menu.addAction(movegView2RootViewAction)
        menu.addAction(cancelAction)

        present(menu, animated: true, completion: nil)
    }

    func generateRandomView() -> UIView {
        let frame = CGRect(x: 0, y: 0, width: 200, height: 200)
        let v = UIView(frame: frame)
        v.center = view.center
        v.backgroundColor = UIColor.random
        v.tag = Int.random(in: 0..<Int(Int16.max)) + 1

        return v
    }

    func generateGrayView() -> UIView {
        let frame = CGRect(x: 100, y: 100, width: 50, height: 50)
        let v = UIView(frame: frame)
        v.backgroundColor = UIColor.gray

        return v
    }
}

extension UIColor {
    static var random: UIColor {
        let r = CGFloat.random(in: 0..<256) / 256
        let g = CGFloat.random(in: 0..<256) / 256
        let b = CGFloat.random(in: 0..<256) / 256

        return UIColor(red: r, green: g, blue: b, alpha: 1.0)
    }
}
사용할 씬과 코드는 위와 같다.
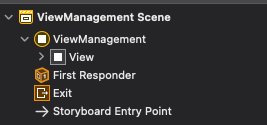
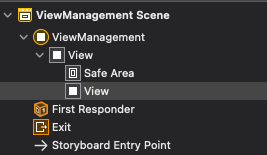
현재 씬에는 ViewController 아래에 View가 하나 추가되어있다.
이것이 Root View이다.
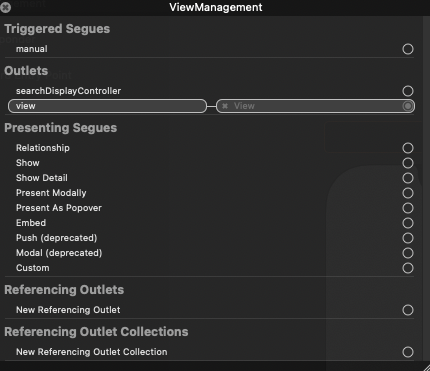
View Controller의 Connection Pannel을 확인해 보면 Root View는 View 속성과 연결되어있고, 삭제할 수 없다.
코드를 통해 강제로 삭제한다면 View Controller가 정상적으로 동작하지 않는다.
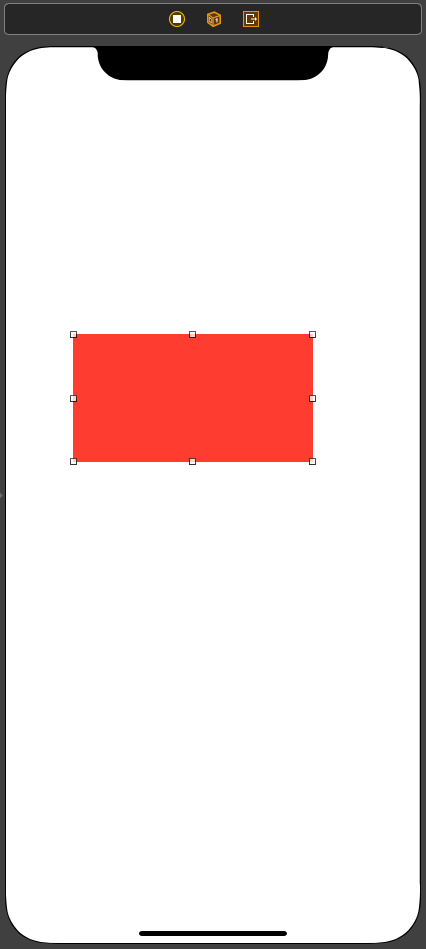
라이브러리에서 View를 하나 추가하고, 배경색을 붉은색으로 변경한다.
이 View는 지금부터 RedView이다.
지금처럼 새로운 View를 추가하면 자동으로 Root View 아래에 추가된다.
따라서 Root View는 RedView의 Superview이고, RedView는 Root View의 Subview이다.
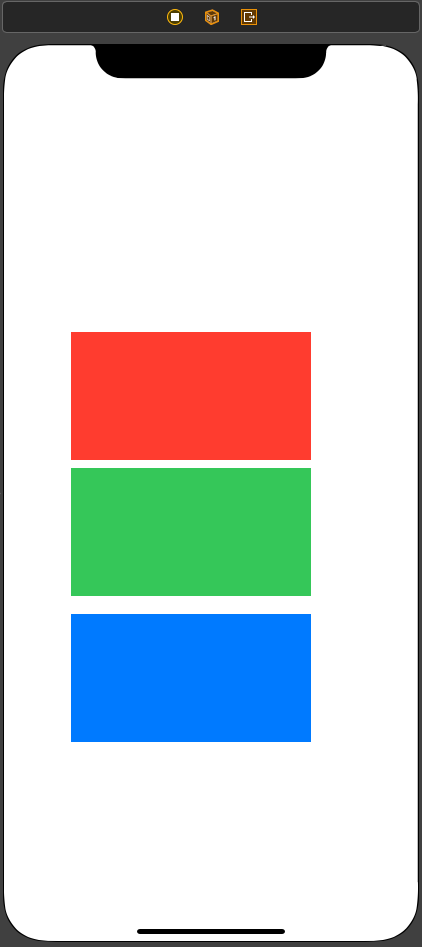
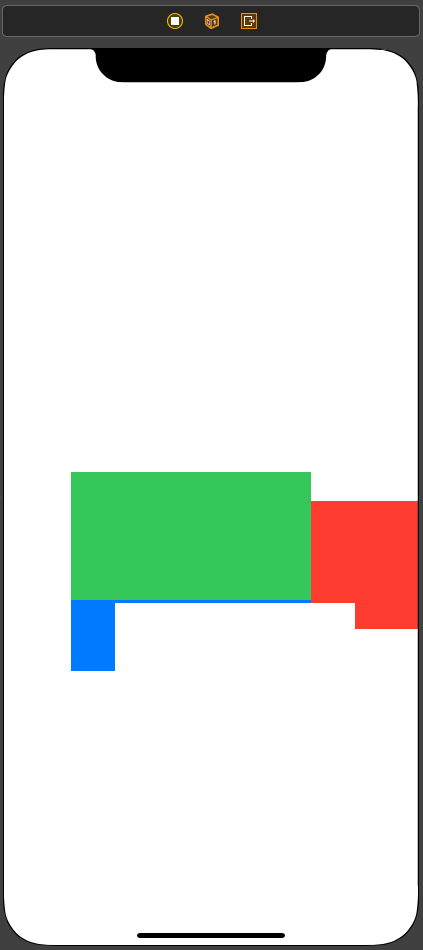
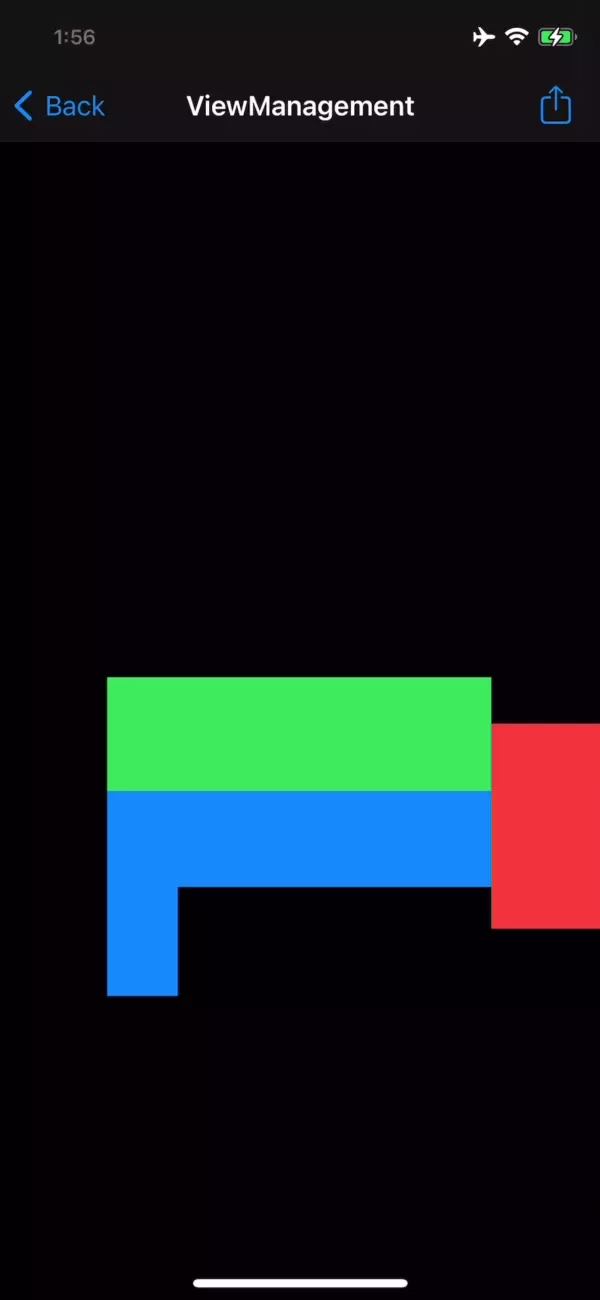
같은 방식으로 View를 두 개 더 추가하고, 각각 녹색과 파란색으로 배경색을 설정한다.

지금까지 추가한 모든 View는 RootView의 Subview이다.
계층에서의 위치는 동일하지만 화면에 표시되는 순서는 다르다.
View들을 조금씩 옮겨 서로 겹치도록 조정하면 RedView위에 GreenView가,
그 위에 다시 BlueView가 위치하는 것을 확인할 수 있다.
따라서 먼저 추가된 View가 나중에 추가된 View의 아래에 위치하게 된다.

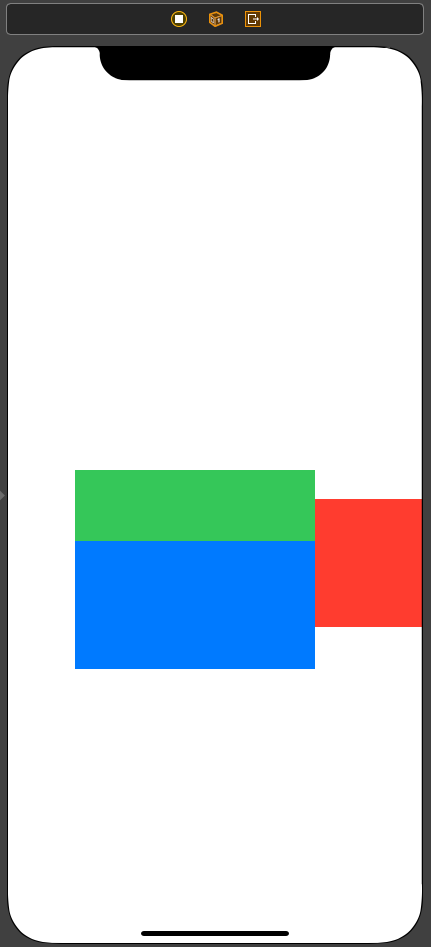
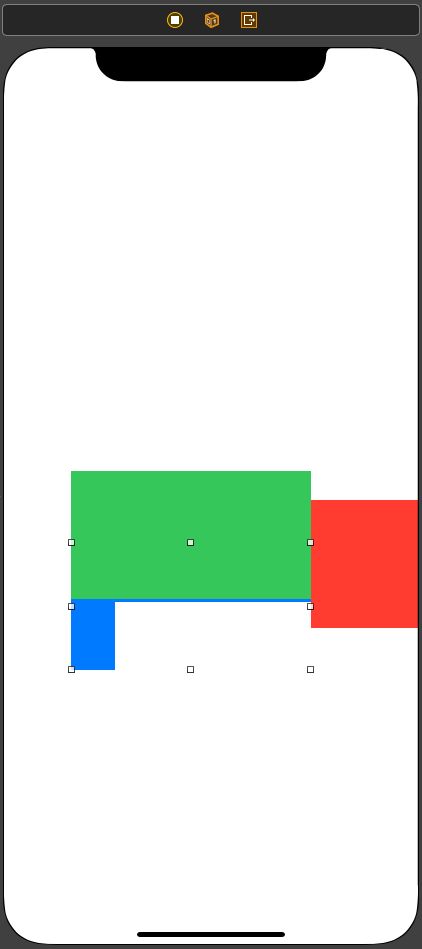
순서를 바꿀 수도 있는데, 해당 View를 선택하고,
Xcode 메뉴에서 Editor > Arrange
에서 원하는 옵션을 선택하면 된다.
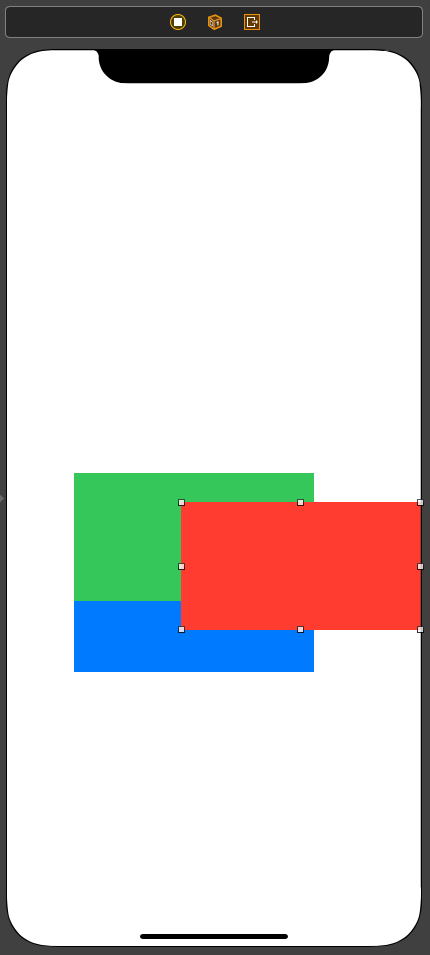

Send to Front를 선택하면 씬에서 표시되는 순서가 변경되고, Subview의 배열 순서도 달라지게 된다.
단순히 드래그해서 순서를 바꿀 수도 있다. 이 때는 정확한 계층으로 이동시키도록 주의한다.
BlueView 아래에 새 View를 추가하면 시각적으로는 동일한 계층에 존재하는 것 같아 보인다.

하지만 BlueView에서 Clip to Bounds 옵션을 활성화하면 BlueView 내부에 존재하는 것이 명확해지며,
BlueView를 이동할 시 따라 움직인다.
또한 새 View는 BlueView의 Subview이기 때문에 BlueView의 속성에 영향을 받게 된다.
계층은 코드를 통해서도 관리가 가능하다.
class ViewManagementViewController: UIViewController {
	@IBOutlet weak var RedView: UIView!
	@IBOutlet weak var GreenView: UIView!
	@IBOutlet weak var BlueView: UIView!


	var gView: UIView?

	func addRandomView() {

	}

	func insertRandomView2Back() {

	}

	func removeTopmostRandomView() {

	}

	func bringRView2Front() {

	}

	func sendRView2Back() {

	}

	func switchGViewWithBView() {

	}

	func addgView2RView() {

	}

	func movegView2RootView() {

	}

	override func viewDidLoad() {
		super.viewDidLoad()

		navigationItem.rightBarButtonItem = UIBarButtonItem(barButtonSystemItem: .action, target: self, action: #selector(showMenu))
	}
}
각각의 View들을 outlet으로 연결한다.
override func viewDidLoad() {
	super.viewDidLoad()

	navigationItem.rightBarButtonItem = UIBarButtonItem(barButtonSystemItem: .action, target: self, action: #selector(showMenu))
}
아래의 viewDidLoad에는 navigation Bar에 Button을 추가하고,
해당 버튼을 누르면 Action Sheet를 표시해, 각각의 Action들을 위에서 선언된 메소드를 호출하도록 되어있다.
func generateRandomView() -> UIView {
	let frame = CGRect(x: 0, y: 0, width: 200, height: 200)
	let v = UIView(frame: frame)
	v.center = view.center
	v.backgroundColor = UIColor.random
	v.tag = Int.random(in: 0..<Int(Int16.max)) + 1

	return v
}
extension에는 무작위의 새로운 View를 만드는 메소드도 선언되어있다.
이 때는 배경색을 무작위로 선정하고, Tag를 0보다 큰 무작위의 값으로 설정한다.
func addRandomView() {
	let v = generateRandomView()
	view.addSubview(v)
}
무작위의 View를 생성하고, Root View에 접근해 addSubview 메소드를 호출한다.
새롭게 생성된 View는 Root View의 Subview가 되고, 모든 Subview들 중 가장 앞에 표시된다.
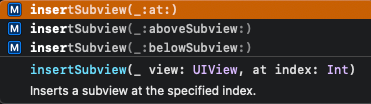
특정 위치에 View를 삽입하는 insertSubview 메소드는 총 세 가지로,
- at
해당 위치에 삽입한다. - aboveSubview
해당 View의 바로 앞에 삽입한다. - belowSubview
해당 View의 바로 뒤에 삽입한다.
func insertRandomView2Back() {
	let v = generateRandomView()
	view.insertSubview(v, at: 0)
}
가장 뒤에 삽입할 때에는 0을 전달해 배열에서 가장 앞에 위치하도록 해야,
시각적으로 가장 뒤에 표시되게 된다.
func removeTopmostRandomView() {
	let topmostRandomView = view.subviews.reversed().first {
		$0.tag > 0
	}
	topmostRandomView?.removeFromSuperview()
}
View를 삽입할 때는 Superview에서 메소드를 호출하지만,
삭제할 때에는 Subview에서 메소드를 호출해야 한다.
Subview들은 Superview의 subviews 배열 안에 저장되어있고,
생성한 무작위 View들은 이들 중 tag값이 0 이상이라는 특징을 가지고 있다.
조건에 맞게 Subview를 찾아낸 뒤, removeFromSuperview 메소드를 호출해 제거한다.
func bringRView2Front() {
	view.bringSubviewToFront(RedView)
}
Subview의 순서를 바꾸는 메소드는 Superview에서 호출한다.
bringSubviewToFront 메소드는 파라미터로 전달된 View를 가장 앞으로 이동시킨다.
func sendRView2Back() {
	view.sendSubviewToBack(RedView)
}
sendSubviewToBack은 반대로 가장 뒤로 이동시킨다.
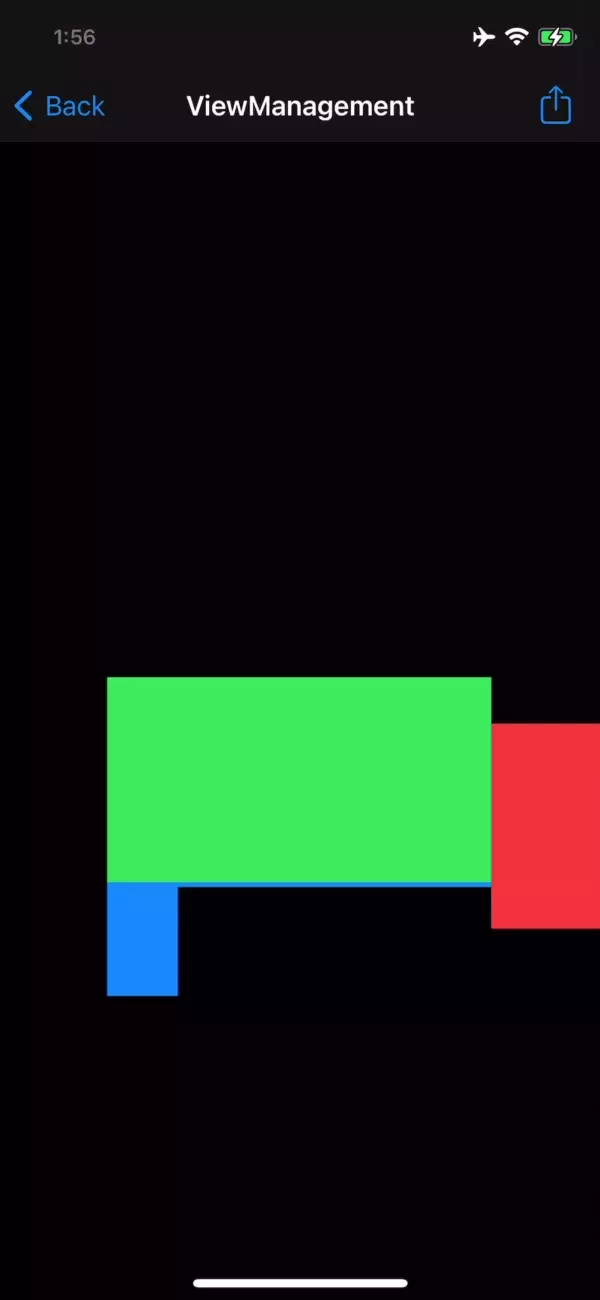
func switchGViewWithBView() {
	guard let GreenViewIndex = view.subviews.firstIndex(of: GreenView) else {
		return
	}
	guard let BlueViewIndex = view.subviews.firstIndex(of: BlueView) else {
		return
	}
	view.exchangeSubview(at: GreenViewIndex, withSubviewAt: BlueViewIndex)
}
exchangeSubview 메소드는 Subview를 교체할 때 사용한다.
인덱스를 전달해야 하기 때문에 대상 View의 인덱스를 먼저 구해야 한다.
func addgView2RView() {
	gView = generateGrayView()
	RedView.addSubview(gView!)
}
gView는 배경색이 회색인 View이다.
RedView의 Subview로 추가해야 하기 때문에 RedView에서 addSubview를 호출한다.
func movegView2RootView() {
	if let gView = gView {
		view.addSubview(gView)
	}
}
Root View로 Subview를 이동할 때는 목적지에서 addSubView를 호출한다.
잡다한 작업은 역시 자동으로 처리된다.


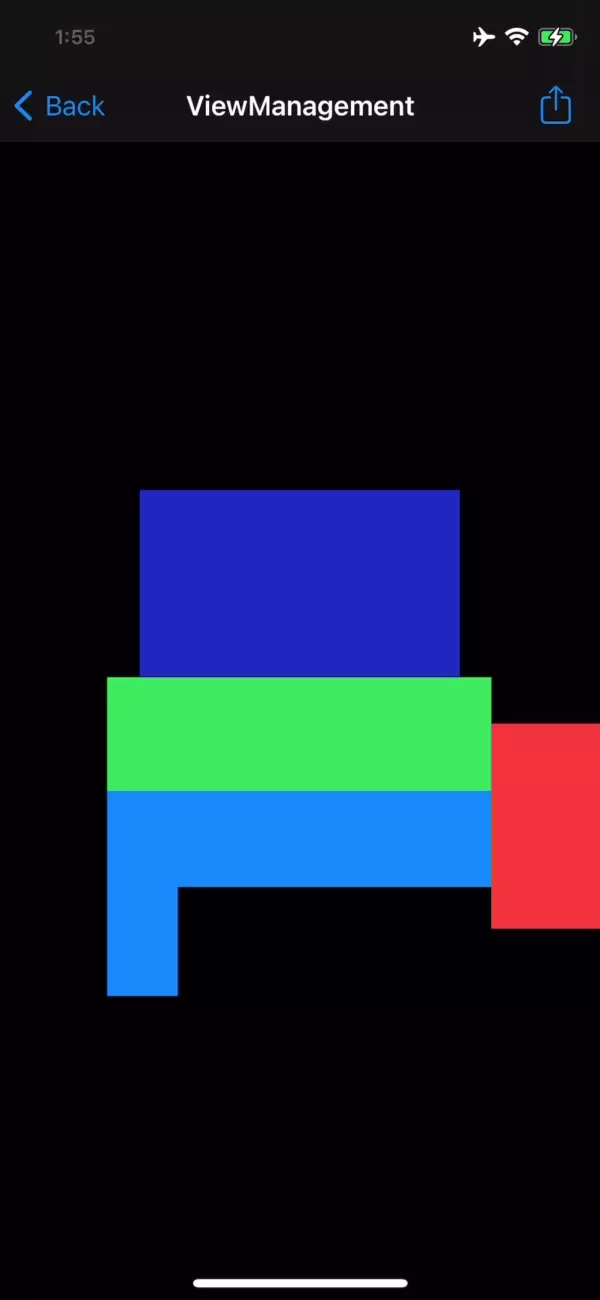


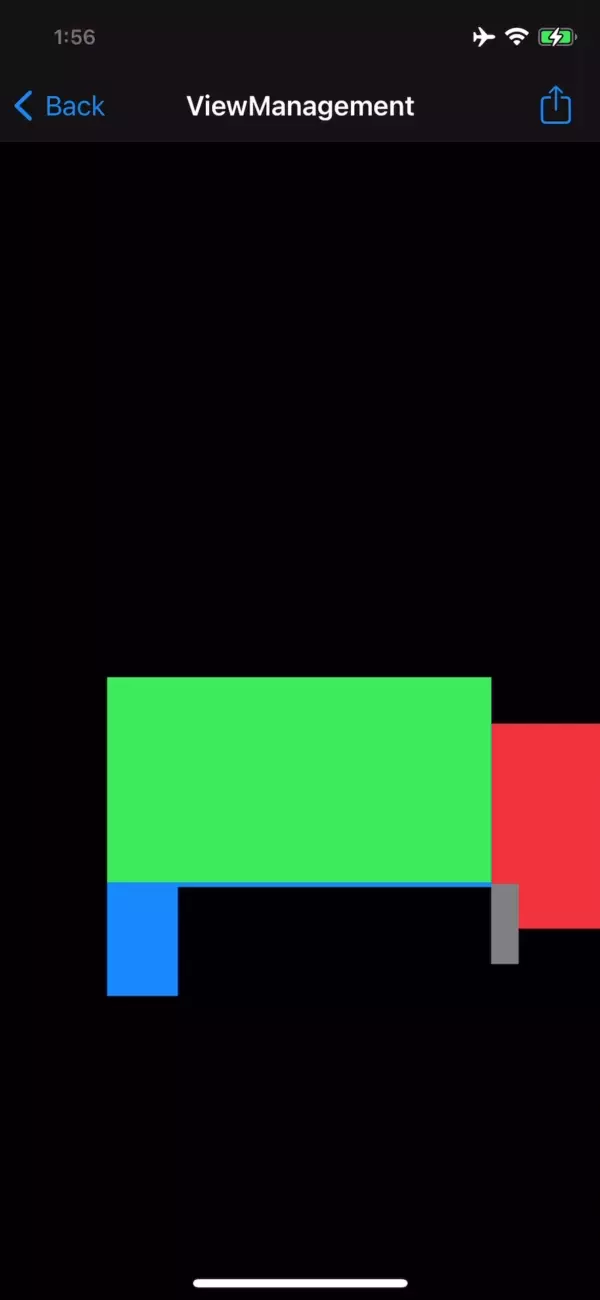
각각의 기능들은 위와 같이 작동한다.
View Controller Life Cycle
View Controller의 Life Cycle은 비교적 단순하다.
Storyboard나 코드를 통해 생성된 다음 Root View가 화면에 표시되는 동안 계속 유지된다.
Root View가 화면에서 사라지고, View Controller의 Reference Count가 0이 되면 메모리에서 제거된다.
생성되는 시점에는 생성자가 호출되고, 메모리에서 제거되는 시점에는 소멸자가 호출된다.
View Controller가 메모리에 상주하는 동안에는 Root View의 가시성에 따라 이벤트가 발생한다.
그럴 때마다 View Controller는 특별한 메소드를 호출한다.
- viewDidLoad
Root View가 메모리에 생성되면 호출된다.
해당 메소드가 호출되는 시점에는 outlet과 action이 모두 연결돼 있기 때문에 초기화 코드에 주로 사용한다. - viewWillAppear
Root View가 화면에 표시되려면 계층에 추가되어야 하고, 추가되기 직전에 호출된다. - viewDidAppear
Root View가 계층에 추가된 직후 호출된다.
이때엔 Root View가 화면에 표시된다. - viewWillDisappear
화면이 전환되면 Root View가 계층에서 제거되고, 제거되기 직전에 호출된다. - viewDidDisappear
화면이 전환되고 Root View가 계층에서 제거된 직후 호출된다.
해당 View Controller의 Root View는 계층에서 사라지고 다른 View Controller의 Root View가 계층에 추가된다.
View Controller를 소유한 객체가 더 이상 존재하지 않으면 소멸자를 호출해 메모리에서 제거한다.
단, 전환 방식에 따라서 사라진 Root View가 다시 표시되기도 한다.
Modal이 이에 해당한다.
이러한 경우에는 WillAppear, DidAppear, WillDissppear, DidDisappear가 반복적으로 호출되기도 한다.
단, DidLoad는 View Controller Life Cycle에서 단 한 번만 호출된다.
위에서 언급한 메소드들은 UIViewController 클래스에 구현되어있다.
따라서 해당 클래스를 SubClassing 하고 메소드를 Overriding 해서 구현한다.
Overriding을 시도할 때에는 동작에 필요한 기본 코드들이 실행되도록 상위 구현을 반드시 호출해야 한다.
그러지 않으면 정상 동작하지 않거나 충돌이 발생한다.
//
//  LifeCycleViewController.swift
//  ViewControllerPractice
//
//  Created by Martin.Q on 2021/10/19.
//

import UIKit

class LifeCycleViewController: UIViewController {

    @IBAction func showAlert(_ sender: Any) {
        let alert = UIAlertController(title: "Alert", message: "test", preferredStyle: .alert)
        let okAction = UIAlertAction(title: "OK", style: .default, handler: nil)
        alert.addAction(okAction)
        present(alert, animated: true, completion: nil)
    }

    override func viewDidLoad() {
        super.viewDidLoad()

        print(className, #function)
    }

    override func viewWillAppear(_ animated: Bool) {
        super.viewWillAppear(animated)

        print(className, #function)
    }

    override func viewDidAppear(_ animated: Bool) {
        super.viewDidAppear(animated)

        print(className, #function)
    }

    override func viewWillDisappear(_ animated: Bool) {
        super.viewWillDisappear(animated)

        print(className, #function)
    }

    override func viewDidDisappear(_ animated: Bool) {
        super.viewDidDisappear(animated)

        print(className, #function)
    }

    deinit {
        print(className, #function)
    }
}

extension UIViewController {
    var className: String {
        return String(describing: type(of: self))
    }
}
//
// ModalViewController.swift
// ViewControllerPractice
//
// Created by Martin.Q on 2021/10/19.
//
import UIKit
class ModalViewController: UIViewController {
@objc func close() {
dismiss(animated: true, completion: nil)
}
override func viewDidLoad() {
super.viewDidLoad()
navigationItem.leftBarButtonItem = UIBarButtonItem(barButtonSystemItem: .cancel, target: self, action: #selector(close))
print(className, #function)
}
override func viewWillAppear(_ animated: Bool) {
super.viewWillAppear(animated)
print(className, #function)
}
override func viewDidAppear(_ animated: Bool) {
super.viewDidAppear(animated)
print(className, #function)
}
override func viewWillDisappear(_ animated: Bool) {
super.viewWillDisappear(animated)
print(className, #function)
}
override func viewDidDisappear(_ animated: Bool) {
super.viewDidDisappear(animated)
print(className, #function)
}
deinit {
print(className, #function)
}
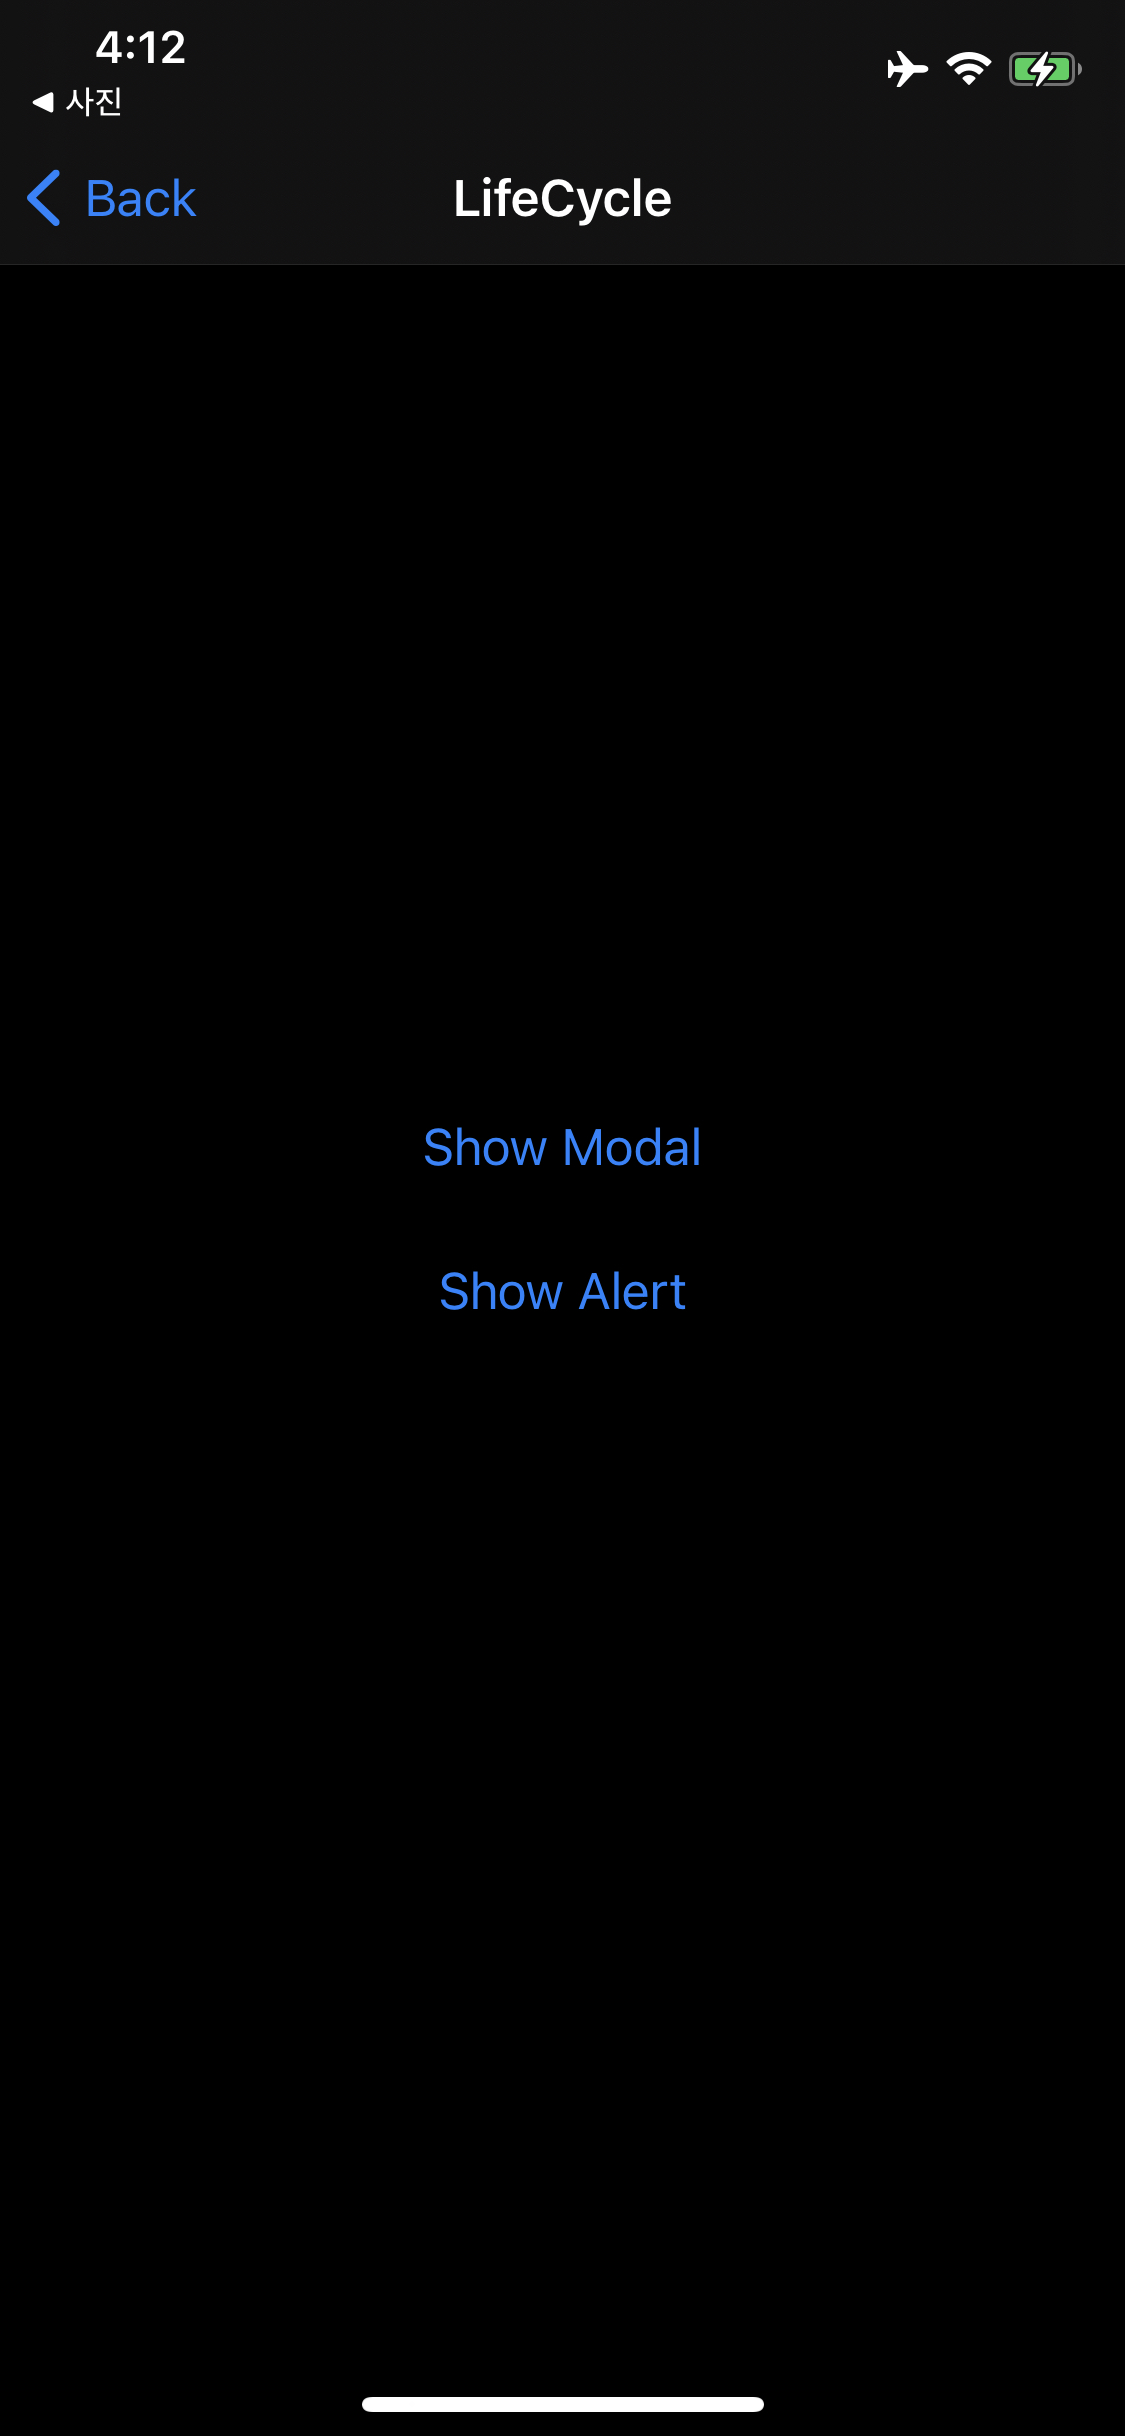
}사용할 씬과 코드들은 위와 같다.
앞서 언급한 메소드들이 Overriding 되어있고, 이들이 호출될 때 콘솔에 출력되도록 구현되어있다.
실행해서 메소드가 호출되는 순서를 확인한다.
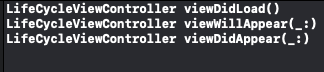
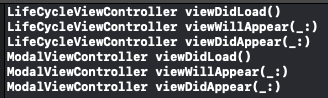
LifeCycle View Controller가 표시될 때 Root View가 제대로 생성되면 viewDidLoad가 호출된다.
이어서 viewWillAppear 메소드가 호출되고, RootView가 계층에 추가되면 곧바로 viewDidAppear가 호출된다.
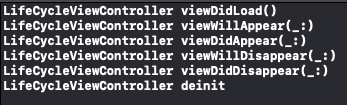
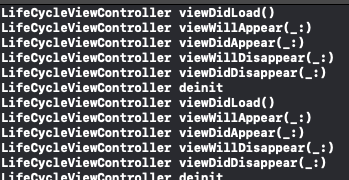
이전 화면으로 복귀하면 viewWillDisappear 메소드가 호출되고, 계층에서 Root View가 제거되면
곧바로 viewDidDisappear가 호출된다. 이후엔 해당 신을 소유한 객체가 없기 때문에 소멸자가 호출된다.

Show Alert Button을 클릭하면 경고창이 표시된다.

경고창이 표시될 때 Root View는 여전히 계층에 존재하므로 viewDidAppear 까지만 호출된 상태다.
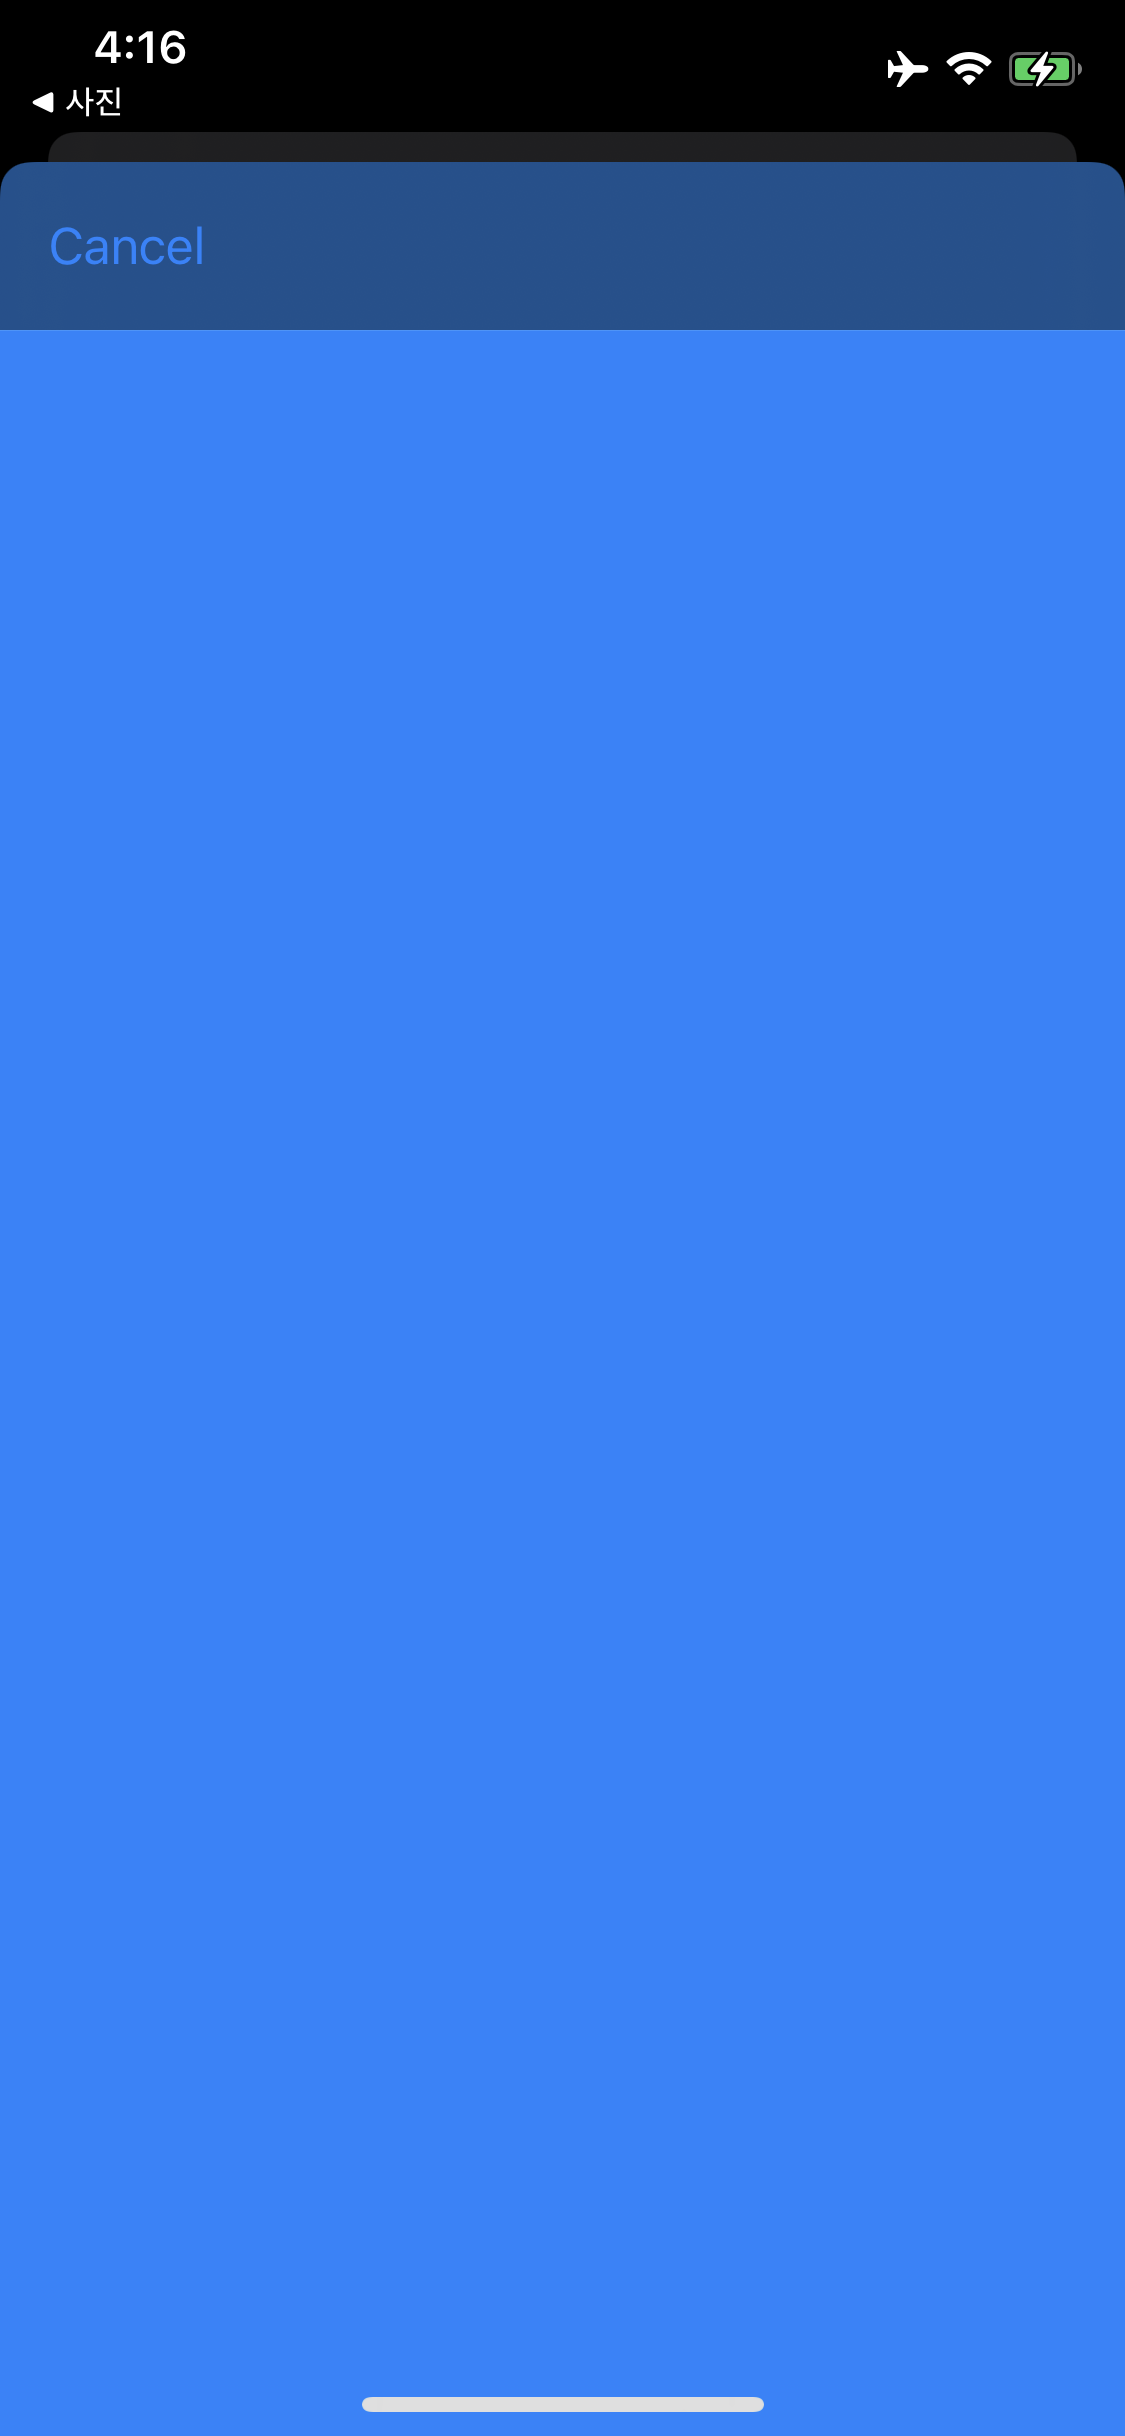
Show Modal Button을 클릭하면 Modal View Controller로 화면이 전환된다.

화면 전환이 완료되면 새로운 Root View가 계층에 추가되고,
되돌아 가면 계층에서 사라진다.
이 상태에서 스프링보드로 나가도 추가적인 로그가 생성되지 않고, 다시 앱으로 복귀해도 마찬가지인데
계층 업데이트가 진행되지 않았고, 따라서 아직 메모리에도 상주하고 있는 상태이다.
상위 구현을 호출하지 않거나 super대신 self를 사용하는 실수는 빈번하게 일어난다.
override func viewWillAppear(_ animated: Bool) {
	//super.viewWillAppear(animated)

	print(className, #function)
}
상위 구현을 주석 처리하고 결과를 확인해 보면
의외로 정상 동작하는 것을 볼 수 있다.
하지만 경우에 따라 화면 전환이 정상적으로 실행되지 않거나 충돌이 발생할 수 있다.
override func viewWillAppear(_ animated: Bool) {
	self.viewWillAppear(animated)

	print(className, #function)
}
이번엔 super 대신 self를 사용해 봤다.

viewDidLoad만 호출되고 앱이 더 이상 동작하지 않는다.
또한 시간이 조금 더 흐르면 충돌이 발생하고 앱이 종료된다.
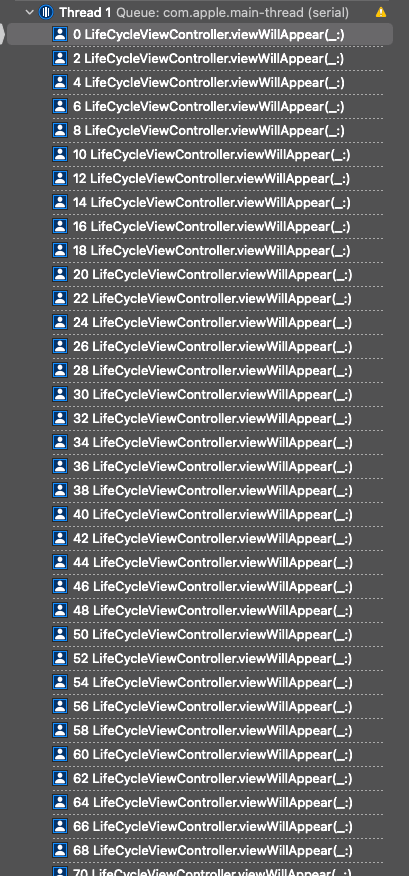
에러 내역을 보면 viewWillAppear가 반복 호출된 것을 볼 수 있다.
이는 viewWillAppear가 호출되면 다시 동일한 메소드를 반복해 호출하는 재귀 호출이 무한히 반복된다.
비슷한 유형의 에러가 발생한다면 재귀 호출 여부를 판단해 봐야 한다.


