Custom Presentation
Custom Presentation을 구현하기 위해서 Presentation에 대해 조금 자세히 알 필요가 있다.
UI를 구성하는 기능은 View Controller가 담당한다.
View Controller에 화면을 표시하는 것은 Presentation Controller가 담당한다.
이전까지 언급한 Builtin Presentation을 사용하면 Presentation Controller가 자동으로 생성된다.
해당 Controller는 Presented View Controller가 Dismiss 되기 전까지 View Controller를 관리한다.
Presentation Controller는 Presented View Controller를 표시할 Frame을 설정하고, Transition을 실행한다.
Transition 중에 추가되는 Custom View를 관리하는 것도 Presentation Controller의 역할이다.
Presentation Controller는 UIPresentationController클래스로 구현되어있다.
Builtin Presentation을 사용하는 경우 UIKit이 알아서 처리하기 때문에 이를 직접 다루는 일은 거의 없다.
Custom Presentation을 구현할 때는 해당 클래스를 Subclassing 하고, Transitioning Delegate를 구현한다.
Presentation은 세 단계로 실행된다.
- Presentation
Transition이 시작되고, 새로운 화면이 표시되는 단계이다.
View Controller에서 새로운 화면을 표시하면 Transitioning Delegate에게 Custom Presentation Controller를 요청한다.
Transitioning Delegate에서 Controller를 반환하면 Custom Presentation이 시작된다.
Presentation Controller에서는 presentationTransitionWillBegin 메서드가 호출된다.
해당 메서드에서는 Custom View를 추가하고, Animation을 설정하는 코드를 구현한다.
Transition이 실행되고, 실제로 화면이 전환된다.
Transition이 실행되는 동안 Presentation Controller에서
containerViewWollLayoutSubviews 메서드와 containerViewDidLayoutSubviews 메서드를 호출한다.
해당 메서드들을 활용해서 Transition에 사용되는 Custom View의 배치를 구현한다.
Transition이 완료되면 Presentation Controller에서 presentationTransitionDidEnd 메서드가 호출된다.
이렇게 Presented View Controller가 화면에 표시되고, 다음 단계로 전환된다.
- Management
기기 회전과 같은 이벤트를 처리한다.
Frame의 크기가 업데이트되면 Presentation Controller에서 viewWillTransition 메서드가 호출된다.
Auto Layout으로 화면을 구현했다면 Management 단계에서 처리되는 작업이 자동으로 진행된다.
그렇지 않다면 Frame을 직접 업데이트해야 한다.
- Dismissal
Presented View Controller가 닫히면 실행된다.
Presentation Controller에서 dismissalTransitionWillBegin 메서드가 호출되고,
실제 Transition이 실행된다.
Presentation 단계와 마찬가지로 Animation이 실행되는 동안
containerViewWillLayoutSubviews 메서드와 containerViewDidLayoutSubviews 메서드가 호출된다.
Transition이 완료되면 Presentation Controller에서 dismissaTransitionDidEnd 메서드를 호출한다.

사용할 Scene은 위와 같고,
Present 버튼은 오른쪽의 Scene과 Modal 방식으로 연결되어있다.

UIPresentationController를 상속하는 클래스 파일을 하나 생성한다.
//
//  Custom1PresentationController.swift
//  Transition Practice
//
//  Created by Martin.Q on 2021/11/19.
//

import UIKit

class Custom1PresentationController: UIPresentationController {
    let dimmingView = UIVisualEffectView(effect: UIBlurEffect(style: .dark))
}
전환 시 여백에 추가할 Dimming 존을 위해 view를 하나 생성한다.
UIVisualEffectView를 사용해 어두운 색의 Blur 효과를 부여한다.
class Custom1PresentationController: UIPresentationController {
    let dimmingView = UIVisualEffectView(effect: UIBlurEffect(style: .dark))
    let closeButton = UIButton(type: .custom)
    var closeButtonTopConst: NSLayoutConstraint?
}
닫기 버튼으로 사용할 속성과 제약을 저장할 속성을 추가한다.
제약 속성은 Animation을 적용할 때 사용된다.
override init(presentedViewController: UIViewController, presenting presentingViewController: UIViewController?) {
    super.init(presentedViewController: presentedViewController, presenting: presentingViewController)
}
지정 생성자를 Overriding 해 수정한다.
지정 생성자는 Presentation 대상 View Controller를 파라미터로 받는다.
생성자를 Overriding 하는 경우 지금처럼 super 키워드를 통해 반드시 상위 구현을 호출해야 한다.
override init(presentedViewController: UIViewController, presenting presentingViewController: UIViewController?) {
    super.init(presentedViewController: presentedViewController, presenting: presentingViewController)

    closeButton.setImage(UIImage(systemName: "heart"), for: .normal)
    closeButton.addTarget(self, action: #selector(dismiss), for: .touchUpInside)
}
Button Image를 추가하고 Action을 생성한다.
override init(presentedViewController: UIViewController, presenting presentingViewController: UIViewController?) {
    super.init(presentedViewController: presentedViewController, presenting: presentingViewController)

    closeButton.setImage(UIImage(systemName: "heart"), for: .normal)
    closeButton.addTarget(self, action: #selector(dismiss), for: .touchUpInside)
    closeButton.translatesAutoresizingMaskIntoConstraints = false
}
Prototypeing 제약이 추가되지 않도록 설정한다.
class Custom1PresentationController: UIPresentationController {
    let dimmingView = UIVisualEffectView(effect: UIBlurEffect(style: .dark))
    let closeButton = UIButton(type: .custom)
    var closeButtonTopConst: NSLayoutConstraint?

    override init(presentedViewController: UIViewController, presenting presentingViewController: UIViewController?) {
        super.init(presentedViewController: presentedViewController, presenting: presentingViewController)

        closeButton.setImage(UIImage(systemName: "heart"), for: .normal)
        closeButton.addTarget(self, action: #selector(dismiss), for: .touchUpInside)
        closeButton.translatesAutoresizingMaskIntoConstraints = false
    }

    @objc func dismiss() {
        presentingViewController.dismiss(animated: true, completion: nil)
    }
}
이후 dismiss 메서드를 추가한다.
해당 메서드는 닫기 버튼을 누르면 호출된다.
override var frameOfPresentedViewInContainerView: CGRect {

}
framOfPresentedViewInContainerView 속성을 overriding 한다.
Presentation은 Container라는 특별한 View에서 실행된다.
Presented View Controller는 Container View 전체를 채우지만 해당 속성을 통해 원하는 구역을 설정할 수 있다.
override var frameOfPresentedViewInContainerView: CGRect {
    print(String(describing: type(of: self)), #function)
    guard var frame = containerView?.frame else { return .zero }
    frame.origin.y = frame.size.height / 2
    frame.size.height = frame.size.height / 2

    return frame
}
로그를 추가하고,
전체 영역의 절반만 사용하도록 frame을 조정했다.
해당 속성은 Transition 중 반복적으로 호출되기 때문에 빠르게 반환이 이루어져야 한다.
override func presentationTransitionWillBegin() {

}
presentationTransitionWillBegin 메서드에서 원하는 Animation을 구현한다.
override func presentationTransitionWillBegin() {
    print(String(describing: type(of: self)), #function)

    guard let containerView = containerView else { fatalError() }

}
Contatiner View를 바인딩한다.
Transition에 사용되는 모든 Custom View는 반드시 Container 속성이 반환하는 View에 추가해야 한다.
override func presentationTransitionWillBegin() {
    print(String(describing: type(of: self)), #function)

    guard let containerView = containerView else { fatalError() }
    dimmingView.alpha = 0.0
    dimmingView.frame = containerView.bounds
    containerView.insertSubview(dimmingView, at: 0)
}
Dimming View의 Frame과 Alpha 속성으로 투명도를 설정하고, Container View에 추가한다.
override func presentationTransitionWillBegin() {
    print(String(describing: type(of: self)), #function)

    guard let containerView = containerView else { fatalError() }
    dimmingView.alpha = 0.0
    dimmingView.frame = containerView.bounds
    containerView.insertSubview(dimmingView, at: 0)

    containerView.addSubview(closeButton)
    closeButton.centerXAnchor.constraint(equalTo: containerView.centerXAnchor).isActive = true
}
닫기 버튼을 Container View에 추가하고 제약을 적용한다.
override func presentationTransitionWillBegin() {
    print(String(describing: type(of: self)), #function)

    guard let containerView = containerView else { fatalError() }
    dimmingView.alpha = 0.0
    dimmingView.frame = containerView.bounds
    containerView.insertSubview(dimmingView, at: 0)

    containerView.addSubview(closeButton)
    closeButton.centerXAnchor.constraint(equalTo: containerView.centerXAnchor).isActive = true
    closeButtonTopConst = closeButton.topAnchor.constraint(equalTo: containerView.topAnchor, constant: -80)
}
Top제약을 생성하고, constant 값을 -80으로 설정한 다음 closeButtonTopConst에 저장한다.
override func presentationTransitionWillBegin() {
    print(String(describing: type(of: self)), #function)

    guard let containerView = containerView else { fatalError() }
    dimmingView.alpha = 0.0
    dimmingView.frame = containerView.bounds
    containerView.insertSubview(dimmingView, at: 0)

    containerView.addSubview(closeButton)
    closeButton.centerXAnchor.constraint(equalTo: containerView.centerXAnchor).isActive = true
    closeButtonTopConst = closeButton.topAnchor.constraint(equalTo: containerView.topAnchor, constant: -80)
    closeButtonTopConst?.isActive = true
}
이제 설정한 제약을 활성화시킨다.
override func presentationTransitionWillBegin() {
    print(String(describing: type(of: self)), #function)

    guard let containerView = containerView else { fatalError() }
    dimmingView.alpha = 0.0
    dimmingView.frame = containerView.bounds
    containerView.insertSubview(dimmingView, at: 0)

    containerView.addSubview(closeButton)
    closeButton.centerXAnchor.constraint(equalTo: containerView.centerXAnchor).isActive = true
    closeButtonTopConst = closeButton.topAnchor.constraint(equalTo: containerView.topAnchor, constant: -80)
    closeButtonTopConst?.isActive = true

    containerView.layoutIfNeeded()
}
layoutIfNeeded 메서드를 호출해 활성화된 제약을 시각적으로 적용한다.
이렇게 되면 닫기 버튼이 보이지 않는 frame으로 이동한다.
override func presentationTransitionWillBegin() {
    print(String(describing: type(of: self)), #function)

    guard let containerView = containerView else { fatalError() }
    dimmingView.alpha = 0.0
    dimmingView.frame = containerView.bounds
    containerView.insertSubview(dimmingView, at: 0)

    containerView.addSubview(closeButton)
    closeButton.centerXAnchor.constraint(equalTo: containerView.centerXAnchor).isActive = true
    closeButtonTopConst = closeButton.topAnchor.constraint(equalTo: containerView.topAnchor, constant: -80)
    closeButtonTopConst?.isActive = true

    containerView.layoutIfNeeded()

    closeButtonTopConst?.constant = 150

    guard let coordinator = presentedViewController.transitionCoordinator else {
        dimmingView.alpha = 1.0
        presentingViewController.view.transform = CGAffineTransform(scaleX: 0.8, y: 0.8)
        containerView.layoutIfNeeded()
        return
    }
}
닫기 버튼의 제약을 변경하고,
transitionCorrdinate를 사용해 animation을 구현한다.
else 블록에는 만약을 대비한 fallback code가 구현되어있다.
override func presentationTransitionWillBegin() {
    print(String(describing: type(of: self)), #function)

    guard let containerView = containerView else { fatalError() }
    dimmingView.alpha = 0.0
    dimmingView.frame = containerView.bounds
    containerView.insertSubview(dimmingView, at: 0)

    containerView.addSubview(closeButton)
    closeButton.centerXAnchor.constraint(equalTo: containerView.centerXAnchor).isActive = true
    closeButtonTopConst = closeButton.topAnchor.constraint(equalTo: containerView.topAnchor, constant: -80)
    closeButtonTopConst?.isActive = true

    containerView.layoutIfNeeded()

    closeButtonTopConst?.constant = 60

    guard let coordinator = presentedViewController.transitionCoordinator else {
        dimmingView.alpha = 1.0
        presentingViewController.view.transform = CGAffineTransform(scaleX: 0.8, y: 0.8)
        containerView.layoutIfNeeded()
        return
    }

    coordinator.animate { (context) in
        self.dimmingView.alpha = 1.0
        self.presentingViewController.view.transform = CGAffineTransform(scaleX: 0.8, y: 0.8)
        containerView.layoutIfNeeded()
    } completion: { _ in
    }
}
블록에서 구현한 코드는 다른 Transition과 함께 실행된다.
override func presentationTransitionDidEnd(_ completed: Bool) {
    print(String(describing: type(of: self)), #function)
}
presentationTransitionDidEnd 메서드는 Transition이 완료된 이후에 호출된다.
간단하게 로그만 추가한다.
override func dismissalTransitionWillBegin() {

}
dismissalTransitionWillBegin 메서드를 호출해 dismissal을 구현한다.
이 메서드는 presentationTransitionWillBegin 메서드와 함께 중요한 부분이다.
override func dismissalTransitionWillBegin() {
    print(String(describing: type(of: self)), #function)

    closeButtonTopConst?.constant = -80
    guard let coordinator = presentedViewController.transitionCoordinator else {
        dimmingView.alpha = 0.0
        presentingViewController.view.transform = CGAffineTransform.identity
        containerView?.layoutIfNeeded()
        return
    }

    coordinator.animate { (context) in
        self.dimmingView.alpha = 0.0
        self.presentingViewController.view.transform = CGAffineTransform.identity
        self.containerView?.layoutIfNeeded()
    } completion: { _ in
    }
}
Presentation 과정에서 추가한 닫기 버튼과 Dimming View는 여전히 Presentation Controller가 관리하고 있다.
따라서 이들을 제거하고 Presenting View Controller를 원래의 크기로 되돌린다.
구현 패턴은 동일하다.
override func dismissalTransitionDidEnd(_ completed: Bool) {
    print(String(describing: type(of: self)), #function)
}
dismissalTransitionDidEnd 메서드는 dismissal이 끝난 다음에 호출된다.
로그만 추가한다.
override func containerViewWillLayoutSubviews() {
    print(String(describing: type(of: self)), #function)
}
override func containerViewDidLayoutSubviews() {
    print(String(describing: type(of: self)), #function)
}
containerViewWillLayoutSubViews와 containerViewDidLayoutSubviews 메서드는
Transition이 실행되는 동안 호출된다.
주로 Container View에 추가한 Custom View를 대체할 때 사용한다.
지금은 로그만 추가했다.
여기까지가 Custom Presentation을 위한 기본 구성이다.
//
//  CustomPresentationViewController.swift
//  Transition Practice
//
//  Created by Martin.Q on 2021/11/18.
//

import UIKit

class CustomPresentationViewController: UIViewController {

    override func prepare(for segue: UIStoryboardSegue, sender: Any?) {

    }

    override func viewDidLoad() {
        super.viewDidLoad()
    }
}
Scene과 연결된 기본 코드이다.
지금은 Modal로 연결되어있지만 Segue를 실행하기 전에 Modal Presentation Style을 Custom으로 바꾸고
방금 구현한 Presentation Controller를 사용하도록 delegate를 구현한다.
Presenting View Contoller는 이미 화면에 표시되어있기 때문에 속성을 변경해도 변화가 없다.
새로운 화면을 표시할 때 Custom Presetation을 사용하도록 Presented View Controller의 속성을 변경한다.
override func prepare(for segue: UIStoryboardSegue, sender: Any?) {
    segue.destination.modalPresentationStyle = .custom
    segue.destination.transitioningDelegate = self
}
UIKit은 transitioningDelegate에게 Custom Presentation controller를 요청한다.
delegate에서 구현해야 하는 메서드는 UIViewControllerTransitioningDelegate 프로토콜에 선언되어있다.
extension CustomPresentationViewController: UIViewControllerTransitioningDelegate {
    func presentationController(forPresented presented: UIViewController, presenting: UIViewController?, source: UIViewController) -> UIPresentationController? {

    }
}
extention으로 프로토콜을 채용하고 presentationController(presented:presenting:source:) 메서드를 구현한다.
해당 메서드는 CustomPresentationContoller가 필요할 때마다 호출된다.
여기서 반환하는 Contoller가 기본 Controller 대신 사용된다.
extension CustomPresentationViewController: UIViewControllerTransitioningDelegate {
    func presentationController(forPresented presented: UIViewController, presenting: UIViewController?, source: UIViewController) -> UIPresentationController? {
        return Custom1PresentationController(presentedViewController: presented, presenting: presenting)
    }
}
새 인스턴스를 생성하고 이를 반환한다.

제대로 동작하는 듯 보이지만 닫기 버튼을 눌렀을 때 조금 어색하게 동작한다.
순간이긴 하지만 좌상단으로 이동했다가 원래의 위치로 돌아간다.
Custom Presentation을 구현할 때 Auto Layout을 사용하면 이런 문제가 발생하곤 한다.
class Custom1PresentationController: UIPresentationController {
    let dimmingView = UIVisualEffectView(effect: UIBlurEffect(style: .dark))
    let closeButton = UIButton(type: .custom)
    var closeButtonTopConst: NSLayoutConstraint?
    let workaroundView = UIView()
이를 해결하기 위해 새로운 View를 생성하고 인스턴스에 저장한다.
override func presentationTransitionWillBegin() {
    print(String(describing: type(of: self)), #function)

    guard let containerView = containerView else { fatalError() }
    dimmingView.alpha = 0.0
    dimmingView.frame = containerView.bounds
    containerView.insertSubview(dimmingView, at: 0)

    workaroundView.frame = dimmingView.bounds
    workaroundView.isUserInteractionEnabled = false
    containerView.insertSubview(workaroundView, aboveSubview: dimmingView)

    containerView.addSubview(closeButton)
    closeButton.centerXAnchor.constraint(equalTo: containerView.centerXAnchor).isActive = true
    closeButtonTopConst = closeButton.topAnchor.constraint(equalTo: containerView.topAnchor, constant: -80)
    closeButtonTopConst?.isActive = true

    containerView.layoutIfNeeded()

    closeButtonTopConst?.constant = 150

    guard let coordinator = presentedViewController.transitionCoordinator else {
        dimmingView.alpha = 1.0
        presentingViewController.view.transform = CGAffineTransform(scaleX: 0.8, y: 0.8)
        containerView.layoutIfNeeded()
        return
    }

    coordinator.animate { (context) in
        self.dimmingView.alpha = 1.0
        self.presentingViewController.view.transform = CGAffineTransform(scaleX: 0.8, y: 0.8)
        containerView.layoutIfNeeded()
    } completion: { _ in
    }
}
그리고 새로운 View를 Dimming View 앞에 배치해 Dummy View로 활용한다.
이를 통해 해당 문제가 해결된다.
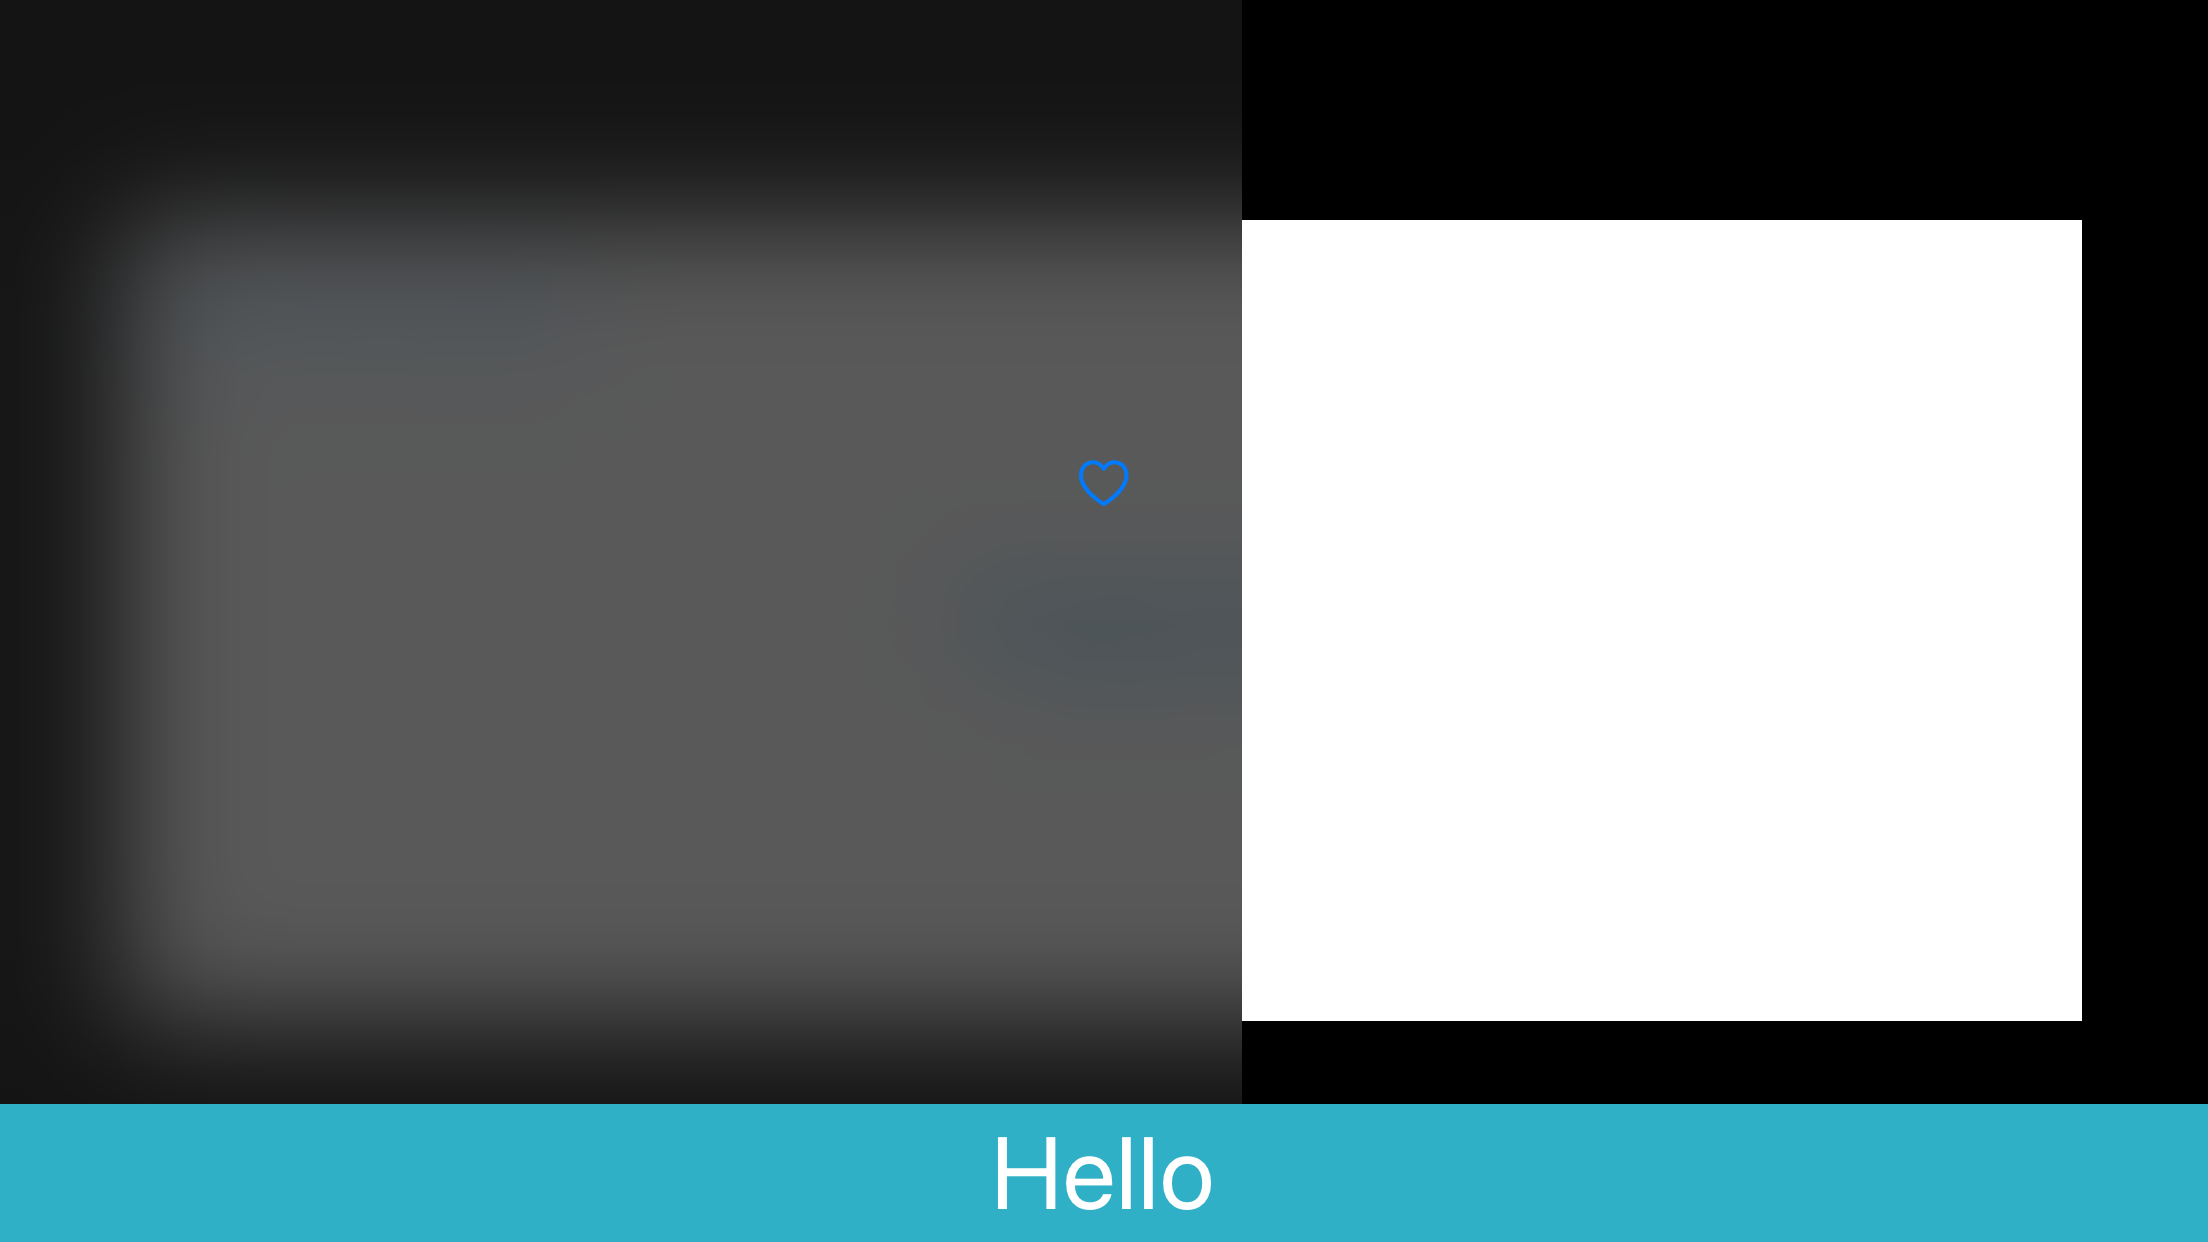
Custom Presentation을 사용한 상태에서 Landscape 모드로 전환하면 위 사진처럼 Layout이 망가진다.
AutoLayout이 적용되어있는 닫기 버튼과 Presenting View Controller는 문제가 없지만 나머지 모두가 비정상이다.

또한 닫기 버튼을 눌러 이전 화면으로 돌아가면 위아래로 검은 여백이 생기고 왼쪽과 오른쪽이 잘린다.
Transform을 초기화할 때 잘못된 Scale이 적용됐기 때문이다.
Presented View Controller의 크기는 frameOfPresentedViewInContainerView 속성이 반환한다.
Container View의 크기가 업데이트되면 두 가지 방법으로 이벤트를 처리한다.
- containerViewWillLayoutSubviews메서드에서 frame 업데이트하기
override func containerViewWillLayoutSubviews() {
    print(String(describing: type(of: self)), #function)
    presentedView?.frame = frameOfPresentedViewInContainerView
    dimmingView.frame = containerView!.bounds
}- viewWillTransition 메서드 override 하기
override func viewWillTransition(to size: CGSize, with coordinator: UIViewControllerTransitionCoordinator) {
    super.viewWillTransition(to: size, with: coordinator)

    presentingViewController.view.transform = CGAffineTransform.identity

    coordinator.animate { (context) in
        self.presentingViewController.view.transform = CGAffineTransform(scaleX: 0.8, y: 0.8)
    } completion: { _ in
    }
}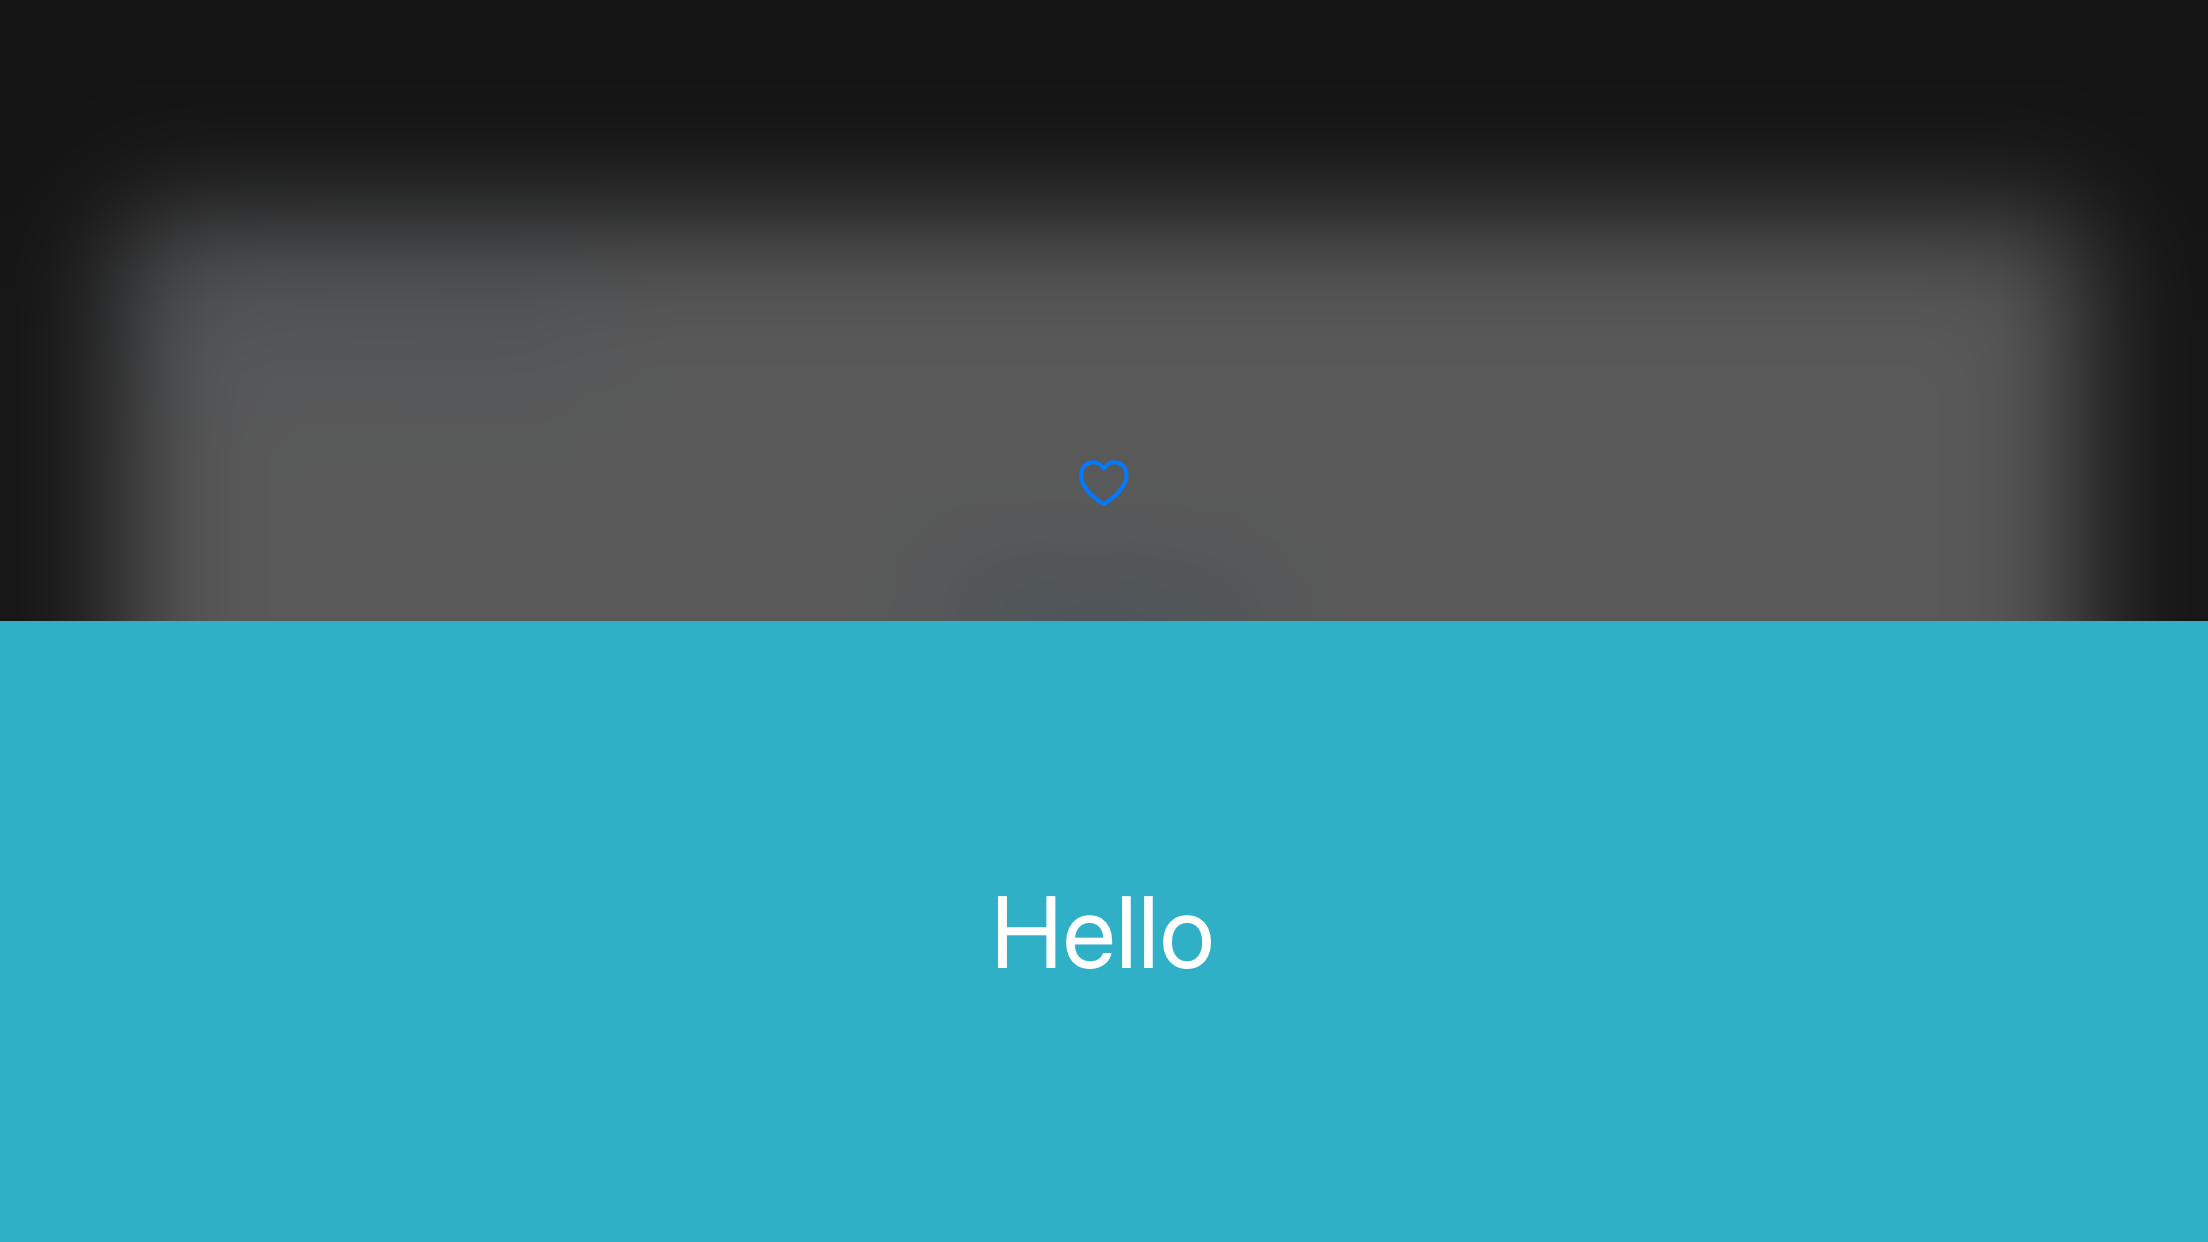
Landscpae 모드에서도 정상적으로 표시되고, 닫기 버튼을 눌러 돌아갔을 때도 정상적인 것을 확인할 수 있다.
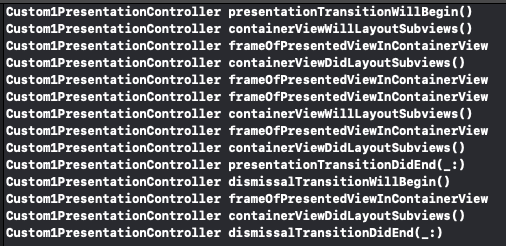
로그를 확인해 보면 presentationTransitionWillBegin 메서드가 호출되고,
presentationTransitionDidEnd 메서드가 호출될 때까지 나머지 callback 메서드와 속성이 반복적으로 호출된다.
구현에 따라 수가 늘어날 수도 있다. 반복적으로 호출되는 메서드는 가능한 빠르게 처리해 반환해야 부드럽게 동작할 수 있다.
Custom Transition
View Controller Transition은 6가지 객체를 통해 구현된다.
- Animation Controller
Transition Animation을 구현하는 객체이다.
Animator라고 부르기도 한다.
UIViewControllerAnimatedTransitioning 프로토콜을 통해 구현한다.
Transition 시간과 Animation, Interuptable Transition을 구현하는 메서드가 선언되어있다.
보통 하나의 Animator가 양방향 Transition을 모두 구현하지만,
Presentation Animator와 Dismissal Animator를 별도로 구현하는 경우도 있다. - Presentation Controller
새로운 화면을 표시할 Frame을 설정하고 Transition Animation을 실행한다.
Transition에 사용되는 Custom View를 관리한다. - Interactive Animator
Interactive Transition을 구현하는 객체이다.
UIViewControllerInteractiveTransitioning 프로토콜을 구현하고, Gesture Recognizer로 터치 이벤트를 처리한다.
가장 단순한 구현은 UIPrecentDrivenInteractiveTransition 클래스를 Subclassing 하는 것이다. - Transition Delegate
UIKit은 Transition을 실행할 때 Transition Delegate에게 Animator와 Interactive Animator를 요청한다.
직접 구현한 Animator를 반환하면 기본 Animator 대신 사용된다.
UIViewControllerTransitioningDelegate 프로토콜을 통해 구현한다. - Transitioning Context
UIKit은 Transition이 시작되기 전에 Transitioning Context를 생성하고, Transition에 필요한 속성을 저장한다.
UIViewControllerContextTransitioning 프로토콜을 통해 구현한다.
직접 구현하는 경우는 드물고 Animator로 전달되는 Context를 그대로 사용한다. - Transition Coordinator
Transition과 함께 실행할 Animation을 구현할 때 사용된다.
UIViewControllerTransitionCoordinatorContext 프로토콜을 통해 구현하고,
실행 중인 Transition에 대한 다양한 정보를 제공한다.
Transition Context와 마찬가지로 UIKit이 자동으로 생성한 Coordinator를 그대로 사용한다.
위의 객체들은 서로 상호작용하면서 Transition을 처리한다.
UIKit은 새로운 화면을 표시하기 전에 Transition Dlegate에게 Animator를 요청한다.
Delegate가 구현되어있지 않거나 nil을 반환하면 기본 Animator를 사용한다.
Animator를 반환하면 Custom Transition을 실행한다.
Delegate에게 Interactive Animator를 요청하고, 최종적인 Transition 방식을 결정한다.
Transitioning Context가 생성되고, Transition에 필요한 정보가 저장된다.
Context는 Animator로 전달되고, Transtion 실행시간을 확인한 다음 Animator에 구현되어있는 Transition을 실행한다.
Animation이 완료되면 Transitioning Context에서 completeTransition 메서드를 호출하고 Presentation이 완료된다.
Dismissal은 모든 과정에 transition 대신 dismiss가 붙는 걸 제외하면 이전의 과정과 유사하다.
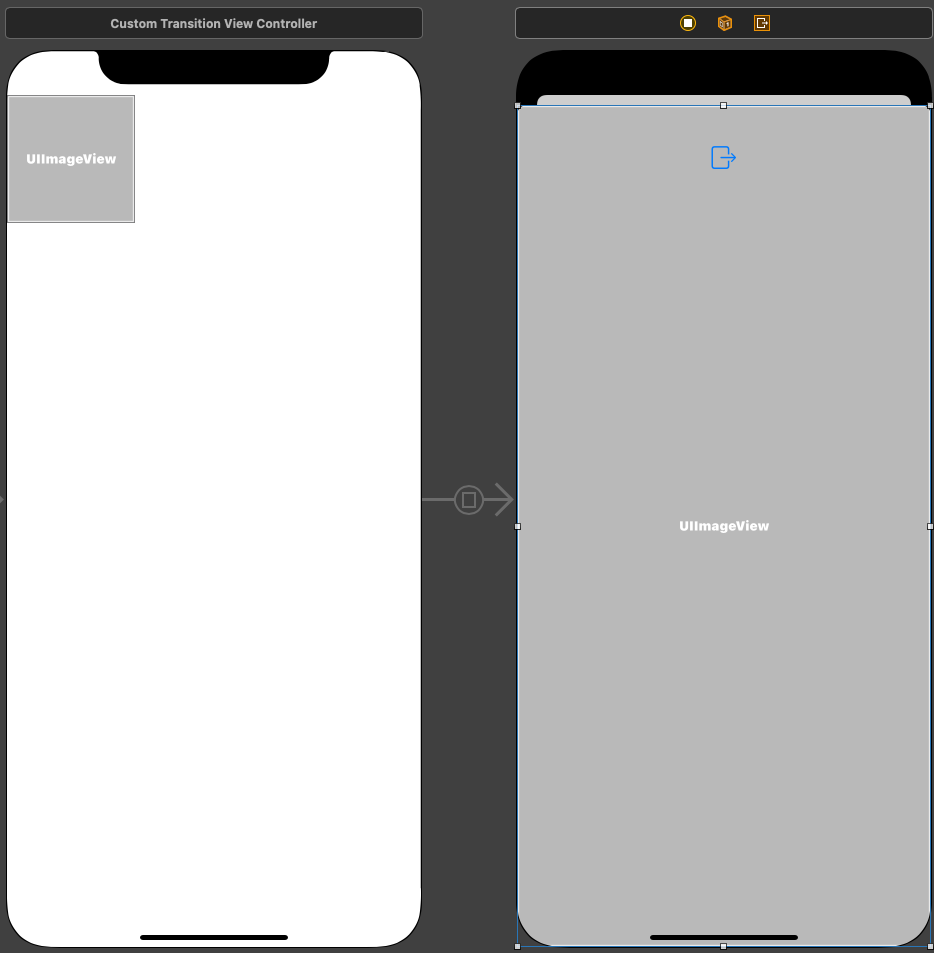
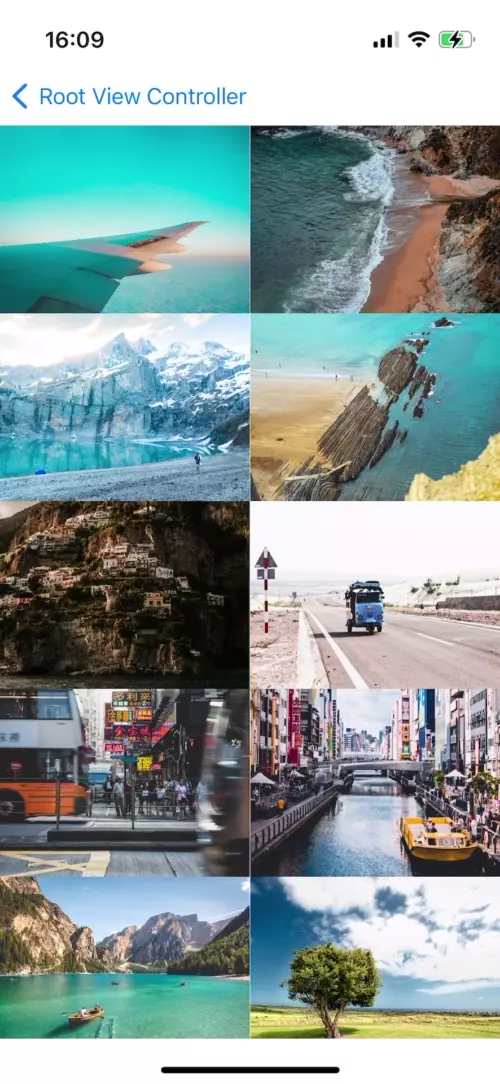
사용할 Scene은 위와 같다.
//
//  CustomTransitionViewController.swift
//  Transition Practice
//
//  Created by Martin.Q on 2021/11/19.
//

import UIKit

class CustomTransitionViewController: UIViewController {

    var list = (1 ... 10).map {
        return UIImage(named: "\($0)")!
    }

    @IBOutlet weak var listCollectionView: UICollectionView!

    override func prepare(for segue: UIStoryboardSegue, sender: Any?) {
        if let VC = segue.destination as? ImageViewController {
            if let cell = sender as? UICollectionViewCell, let indexPath = listCollectionView.indexPath(for: cell) {
                VC.image = list[indexPath.item]
            }
        }
    }

    override func viewDidLoad() {
        super.viewDidLoad()
    }
}

extension CustomTransitionViewController: UICollectionViewDataSource {
    func collectionView(_ collectionView: UICollectionView, numberOfItemsInSection section: Int) -> Int {
        return list.count
    }

    func collectionView(_ collectionView: UICollectionView, cellForItemAt indexPath: IndexPath) -> UICollectionViewCell {
        let cell = collectionView.dequeueReusableCell(withReuseIdentifier: "cell", for: indexPath)

        if let imgView = cell.contentView.viewWithTag(100) as? UIImageView {
            imgView.image = list[indexPath.item]
        }

        return cell
    }
}

extension CustomTransitionViewController: UICollectionViewDelegateFlowLayout {
    func collectionView(_ collectionView: UICollectionView, layout collectionViewLayout: UICollectionViewLayout, sizeForItemAt indexPath: IndexPath) -> CGSize {
        return CGSize(width: (collectionView.bounds.width / 2), height: (collectionView.bounds.width / 2) * (768.0 / 1024.0))
    }
}
Custom Transition Scene에 연결된 코드는 위와 같다.
asset에 미리 추가한 sample Image를 순서대로 불러와 Collection View의 Cell에 표시하고,
셀을 선택하면 prepare 메서드를 통해 연결된 view로 이미지를 전달한다.
//
//  ImageViewController.swift
//  Transition Practice
//
//  Created by Martin.Q on 2021/11/19.
//

import UIKit

class ImageViewController: UIViewController {
    @IBOutlet weak var imageView: UIImageView!

    var image: UIImage?

    @IBOutlet weak var topConst: NSLayoutConstraint!

    @IBAction func dismiss(_ sender: Any) {
        dismiss(animated: true, completion: nil)
    }


    override func viewDidLoad() {
        super.viewDidLoad()

        imageView.image = image
    }
}
연결된 Image View Scene에서는 전달된 이미지를 받아 view에 표시한다.
연결된 dismiss 메서드로 이전 화면으로 돌아가도록 구현됐다.
CollectionView의 사진을 선택하면 선택한 사진이 새 화면에 표시된다.
또한 상단의 버튼을 선택하면 이전 화면으로 돌아간다.

Animation을 만들기 위해 NSObject를 Subclassing 하는 파일을 하나 생성한다.
//
//  ZoomAnimationController.swift
//  Transition Practice
//
//  Created by Martin.Q on 2021/11/20.
//

import UIKit

class ZoomAnimationController: NSObject, UIViewControllerAnimatedTransitioning {
    func transitionDuration(using transitionContext: UIViewControllerContextTransitioning?) -> TimeInterval {

    }

    func animateTransition(using transitionContext: UIViewControllerContextTransitioning) {

    }
}
UIViewControllerContextTransitioning 프로토콜을 채용하도록 하고,
필수 메서드를 추가해 구현해야 한다.
class ZoomAnimationController: NSObject, UIViewControllerAnimatedTransitioning {
    let duration = TimeInterval(1)
    var targetIndex: IndexPath?
    var targetImage: UIImage?
    var presenting = true

    func transitionDuration(using transitionContext: UIViewControllerContextTransitioning?) -> TimeInterval {

    }

    func animateTransition(using transitionContext: UIViewControllerContextTransitioning) {

    }
}
우선 클래스에 필요한 속성을 추가한다.
duration은 Transition의 실행시간으로 사용된다.
targetIndex는 대상의 Index로 사용된다.
targetImage는 표시할 Image로 사용된다.
presenting은 Transition의 방향을 구별할 때 사용된다.
이번 실습은 하나의 Animatior에서 모든 Transition을 구현한다.
따라서 presenting 속성으로 Transition의 방향을 구별한다.
func transitionDuration(using transitionContext: UIViewControllerContextTransitioning?) -> TimeInterval {
    return duration
}
transitionDuration 메서드에서는 Transtion의 실행 시간을 반환해야 한다.
앞에서 선언한 속성을 반환한다.
animateTransition 메서드는 Animator에서 가장 중요도가 높은 메서드이다.
실제 Transition 코드를 해당 메서드에서 구현하게 된다.
Transition과 관련된 모든 속성은 transitionContext 파라미터로 모두 전달된다.
func animateTransition(using transitionContext: UIViewControllerContextTransitioning) {
    let containerView = transitionContext.containerView
}
Transition은 반드시 특별한 View 내에서 처리되어야 한다.
이는 직접 생성하지 않고 Context가 제공하는 Container View를 사용한다.
따라서 transitionContext로 전달된 containerView를 그대로 바인딩한다.
func animateTransition(using transitionContext: UIViewControllerContextTransitioning) {
    let containerView = transitionContext.containerView

    if presenting {
        guard let fromVC = transitionContext.viewController(forKey: .from)?.children.last as? CustomTransitionViewController else { fatalError() }
    } else {

    }
}
if문에서 presenting의 값에 따라 분기해 else에서는 dismiss를 구현한다.
파라미터로 전달된 Context에는 Transition 대상 View Controller가 저장되어있다.
View Controller에 접근할 때는
viewController(forKey:) 메서드를 사용한다.
파라미터인 forKey에는 'from'을 전달한다.
보통 Transtition을 시작하는 Controller를 From View Controller라고 부른다.
From View Controller는 Navigation View Controller에 Embed 되어있다.
따라서 가장 마지막에 위치하는 Child에 접근해야 한다.
func animateTransition(using transitionContext: UIViewControllerContextTransitioning) {
    let containerView = transitionContext.containerView

    if presenting {
        guard let fromVC = transitionContext.viewController(forKey: .from)?.children.last as? CustomTransitionViewController else { fatalError() }
        guard let toVC = transitionContext.viewController(forKey: .to) as? ImageViewController else { fatalError() }
    } else {

    }
}
Transition을 통해 새로 표시되는 View Controller를 To View Controller라고 부른다.
같은 방법으로 상수에 바인딩한다.
func animateTransition(using transitionContext: UIViewControllerContextTransitioning) {
    let containerView = transitionContext.containerView

    if presenting {
        guard let fromVC = transitionContext.viewController(forKey: .from)?.children.last as? CustomTransitionViewController else { fatalError() }
        guard let toVC = transitionContext.viewController(forKey: .to) as? ImageViewController else { fatalError() }
        guard let fromView = transitionContext.viewController(forKey: .from)?.view else { fatalError() }
        guard let toView = transitionContext.viewController(forKey: .to)?.view else { fatalError() }
    } else {

    }
}
Root View에 접근할 때는 위에서 바인딩 한 상수를 통해 접근하는 것도 가능하지만 view(forKey:) 메서드를 사용할 수도 있다.
func animateTransition(using transitionContext: UIViewControllerContextTransitioning) {
    let containerView = transitionContext.containerView

    if presenting {
        guard let fromVC = transitionContext.viewController(forKey: .from)?.children.last as? CustomTransitionViewController else { fatalError() }
        guard let toVC = transitionContext.viewController(forKey: .to) as? ImageViewController else { fatalError() }
        guard let fromView = transitionContext.viewController(forKey: .from)?.view else { fatalError() }
        guard let toView = transitionContext.viewController(forKey: .to)?.view else { fatalError() }

        toView.alpha = 0.0
        containerView.addSubview(toView)
    } else {

    }
}
구현할 Transition은 임시 Image view를 활용해서 Collection View Cell 위치에서 전체 Frame으로 확대하고,
To View Controller를 표시하는 방식이다.
따라서 To View Controller를 Transition이 완료되기 전까지 감춰야 한다.
따라서 Alpha를 0으로 설정하고 Container에 추가한다.
fromView는 자동으로 추가되지만 toView는 직접 추가해야 만한다.
func animateTransition(using transitionContext: UIViewControllerContextTransitioning) {
    let containerView = transitionContext.containerView

    if presenting {
        guard let fromVC = transitionContext.viewController(forKey: .from)?.children.last as? CustomTransitionViewController else { fatalError() }
        guard let toVC = transitionContext.viewController(forKey: .to) as? ImageViewController else { fatalError() }
        guard let fromView = transitionContext.viewController(forKey: .from)?.view else { fatalError() }
        guard let toView = transitionContext.viewController(forKey: .to)?.view else { fatalError() }

        toView.alpha = 0.0
        containerView.addSubview(toView)

        let targetCell = fromVC.listCollectionView.cellForItem(at: targetIndex!)
        let startFrame = fromVC.listCollectionView.convert(targetCell!.frame, to: fromView)
    } else {

    }
}
사용자가 선택한 Cell에 접근해 Cell Frame을 얻고, Root View 좌표로 변환해 저장한다.
func animateTransition(using transitionContext: UIViewControllerContextTransitioning) {
        let containerView = transitionContext.containerView

        if presenting {
        guard let fromVC = transitionContext.viewController(forKey: .from)?.children.last as? CustomTransitionViewController else { fatalError() }
        guard let toVC = transitionContext.viewController(forKey: .to) as? ImageViewController else { fatalError() }
        guard let fromView = transitionContext.viewController(forKey: .from)?.view else { fatalError() }
        guard let toView = transitionContext.viewController(forKey: .to)?.view else { fatalError() }

        toView.alpha = 0.0
        containerView.addSubview(toView)

        let targetCell = fromVC.listCollectionView.cellForItem(at: targetIndex!)
        let startFrame = fromVC.listCollectionView.convert(targetCell!.frame, to: fromView)

        let imgView = UIImageView(frame: startFrame)
        imgView.clipsToBounds = true
        imgView.contentMode = .scaleAspectFill
        imgView.image = targetImage
        containerView.addSubview(imgView)
    } else {

    }
}
Transition에 사용할 Image View를 생성하고, 이미지를 설정한 뒤 container에 추가한다.
여기까지 하면 Transition을 시작할 준비가 완료되었다.
최종 Frame을 저장하고, imgView의 Frame 속성에 Animation을 적용한다.
func animateTransition(using transitionContext: UIViewControllerContextTransitioning) {
    let containerView = transitionContext.containerView

    if presenting {
        guard let fromVC = transitionContext.viewController(forKey: .from)?.children.last as? CustomTransitionViewController else { fatalError() }
        guard let toVC = transitionContext.viewController(forKey: .to) as? ImageViewController else { fatalError() }
        guard let fromView = transitionContext.viewController(forKey: .from)?.view else { fatalError() }
        guard let toView = transitionContext.viewController(forKey: .to)?.view else { fatalError() }

        toView.alpha = 0.0
        containerView.addSubview(toView)

        let targetCell = fromVC.listCollectionView.cellForItem(at: targetIndex!)
        let startFrame = fromVC.listCollectionView.convert(targetCell!.frame, to: fromView)

        let imgView = UIImageView(frame: startFrame)
        imgView.clipsToBounds = true
        imgView.contentMode = .scaleAspectFill
        imgView.image = targetImage
        containerView.addSubview(imgView)

        let finalFrame = containerView.bounds

        UIView.animate(withDuration: duration) {
            imgView.frame = finalFrame
        } completion: { finished in
            toView.alpha = 1.0
            imgView.alpha = 0.0
            imgView.removeFromSuperview()
            transitionContext.completeTransition(!transitionContext.transitionWasCancelled)
        }

    } else {

    }
}
Transition이 완료되면 임시로 추가한 imgView가 여전히 화면에 표시된 상태이다.
Completion Handler에서 imgView를 제거하고 To View Controller를 표시한다.
또한 Transition이 완료되면 Context에서 completeTransition 메서드를 반드시 호출해야 한다.
해당 메서드를 호출해야 UIKit이 Transition의 종료를 인지할 수 있다.
파라미터로는 Transition의 성공 플래그를 전달하는데 취소 플래그를 반전해 전달하면 된다.
class CustomTransitionViewController: UIViewController {

    var list = (1 ... 10).map {
        return UIImage(named: "\($0)")!
    }

    @IBOutlet weak var listCollectionView: UICollectionView!

    let animator = ZoomAnimationController()

    override func prepare(for segue: UIStoryboardSegue, sender: Any?) {
        if let VC = segue.destination as? ImageViewController {
            if let cell = sender as? UICollectionViewCell, let indexPath = listCollectionView.indexPath(for: cell) {
                VC.image = list[indexPath.item]
            }
        }
    }

    override func viewDidLoad() {
        super.viewDidLoad()
    }
}
CustomTransitionViewController로 돌아와 방금 만든 Animator를 상수에 저장한다.
override func prepare(for segue: UIStoryboardSegue, sender: Any?) {
    if let VC = segue.destination as? ImageViewController {
        if let cell = sender as? UICollectionViewCell, let indexPath = listCollectionView.indexPath(for: cell) {
            VC.image = list[indexPath.item]

            animator.targetIndex = indexPath
            animator.targetImage = list[indexPath.item]
        }
    }
}
prepare 메서드에서 전달된 image와 indexpath를 animator의 속성에 저장한다.
override func prepare(for segue: UIStoryboardSegue, sender: Any?) {
    if let VC = segue.destination as? ImageViewController {
        if let cell = sender as? UICollectionViewCell, let indexPath = listCollectionView.indexPath(for: cell) {
            VC.image = list[indexPath.item]

            animator.targetIndex = indexPath
            animator.targetImage = list[indexPath.item]
        }
    }
    segue.destination.transitioningDelegate = self
}
이후 현재 View Controller를 TransitioningDelegete로 지정한다.
extension CustomTransitionViewController: UIViewControllerTransitioningDelegate {
    func animationController(forPresented presented: UIViewController, presenting: UIViewController, source: UIViewController) -> UIViewControllerAnimatedTransitioning? {
        animator.presenting = true
        return animator
    }
}
extenstion을 추가하고 UIViewControllerTransitioningDelegate 프로토콜을 채용하도록 작성하고 메서드를 추가한다.
animate(forPresented:presenting:source:) 메서드는 Transition에 사용될 Animator가 필요할 때마다 호출된다.
지금까지 구현한 Animator는 presenting 속성을 통해 Presentation과 Dismissal을 구분한다.
해당 속성을 true로 설정하고 반환한다.

실행해보면 초반에 사용됐던 Modal Transition 대신 Custom Transition이 실행된다.
버튼을 보면 Transtition이 완료되고, toViewController가 표시되는 과정이 자연스럽지 못한 것을 알 수 있다.
버튼이 Animation을 통해 표시되도록 수정한다.
해당 부분은 Animator에서도 구현할 수 있고, To View Controller에서도 구현할 수 있다.
실습에선 To View Controller에서 구현하고 Completion에서 호출한다.
//
//  ImageViewController.swift
//  Transition Practice
//
//  Created by Martin.Q on 2021/11/19.
//

import UIKit

class ImageViewController: UIViewController {
    @IBOutlet weak var imageView: UIImageView!

    var image: UIImage?

    @IBOutlet weak var topConst: NSLayoutConstraint!

    @IBAction func dismiss(_ sender: Any) {
        dismiss(animated: true, completion: nil)
    }


    override func viewDidLoad() {
        super.viewDidLoad()

        imageView.image = image
    }
}
To View Controller인 Image View Controller에서 버튼의 위치를 조정한다.
override func viewDidLoad() {
    super.viewDidLoad()
    topConst.constant = -100
    imageView.image = image
}
viewDidLoad에서 제약을 수정한다.
func showCloseButton() {
    topConst.constant = 40

    UIView.animate(withDuration: 0.3) {
        self.view.layoutIfNeeded()
    }
}
새로운 메서드를 추가하고, Animation을 통해 버튼을 표시하도록 구현한다.
func animateTransition(using transitionContext: UIViewControllerContextTransitioning) {
    let containerView = transitionContext.containerView

    if presenting {
        guard let fromVC = transitionContext.viewController(forKey: .from)?.children.last as? CustomTransitionViewController else { fatalError() }
        guard let toVC = transitionContext.viewController(forKey: .to) as? ImageViewController else { fatalError() }
        guard let fromView = transitionContext.viewController(forKey: .from)?.view else { fatalError() }
        guard let toView = transitionContext.viewController(forKey: .to)?.view else { fatalError() }

        toView.alpha = 0.0
        containerView.addSubview(toView)

        let targetCell = fromVC.listCollectionView.cellForItem(at: targetIndex!)
        let startFrame = fromVC.listCollectionView.convert(targetCell!.frame, to: fromView)

        let imgView = UIImageView(frame: startFrame)
        imgView.clipsToBounds = true
        imgView.contentMode = .scaleAspectFill
        imgView.image = targetImage
        containerView.addSubview(imgView)

        let finalFrame = containerView.bounds

        UIView.animate(withDuration: duration) {
            imgView.frame = finalFrame
        } completion: { finished in
            toView.alpha = 1.0
            imgView.alpha = 0.0
            imgView.removeFromSuperview()
            toVC.showCloseButton()
            transitionContext.completeTransition(!transitionContext.transitionWasCancelled)

    } else {

    }
}
다시 Animator로 돌아와 Completion에서 해당 메서드를 호출한다.

버튼이 화면 밖에서 정해진 위치로 Animation을 통해 표시된다.
아직 Dismissal을 따로 구현하지 않았기 때문에 버튼을 누르면 기본적인 Modal의 Dismiss Transition이 실행된다.
} else {
    guard let fromVC = transitionContext.viewController(forKey: .from) as? ImageViewController else { fatalError() }
    guard let toVC = transitionContext.viewController(forKey: .to)?.children.last as? CustomTransitionViewController else { fatalError() }
}
Animator의 else 블록에서 구현한다.
동일하게 From View Controller와 To View Controller를 바인딩하지만 방향이 반대가 되어야 함에 주의하자.
} else {
    guard let fromVC = transitionContext.viewController(forKey: .from) as? ImageViewController else { fatalError() }
    guard let toVC = transitionContext.viewController(forKey: .to)?.children.last as? CustomTransitionViewController else { fatalError() }

    containerView.addSubview(toVC.navigationController!.view)


}
fromView와 toView도 비슷하게 바인딩하면 되지만 toViewController는 NavigationController에 Embed 되어있으므로
Navigation Controller에 root View를 추가해야 한다.
} else {
    guard let fromVC = transitionContext.viewController(forKey: .from) as? ImageViewController else { fatalError() }
    guard let toVC = transitionContext.viewController(forKey: .to)?.children.last as? CustomTransitionViewController else { fatalError() }

    containerView.addSubview(toVC.navigationController!.view)

    let startFrame = fromVC.imageView.frame
    let imgView = UIImageView(frame: startFrame)
    imgView.clipsToBounds = true
    imgView.contentMode = .scaleAspectFill
    imgView.image = targetImage

    containerView.addSubview(imgView)
}
Transition에 사용할 ImageView를 생성한다.
Presentation에서 사용했던 것과 동일하지만 시작 Frame이 From View Controller의 Frame과 동일하게 설정해야 한다.
그리고 containerView에 추가한다.
} else {
    guard let fromVC = transitionContext.viewController(forKey: .from) as? ImageViewController else { fatalError() }
    guard let toVC = transitionContext.viewController(forKey: .to)?.children.last as? CustomTransitionViewController else { fatalError() }

    containerView.addSubview(toVC.navigationController!.view)

    let startFrame = fromVC.imageView.frame
    let imgView = UIImageView(frame: startFrame)
    imgView.clipsToBounds = true
    imgView.contentMode = .scaleAspectFill
    imgView.image = targetImage

    containerView.addSubview(imgView)

    fromVC.view.alpha = 0.0

    let targetCell = toVC.listCollectionView.cellForItem(at: targetIndex!)
    let finalFrame = toVC.listCollectionView.convert(targetCell!.frame, to: toVC.view)
}
이제는 From View Controller를 화면에서 감춰야 한다.
원래의 위치로 돌아가려면 From View Controller가 표시되지 않는 상태에서 Transition이 실행되어야 한다.
이어서 이미지가 표시된 Cell에 접근한 다음 최종 Frame을 생성한다.
} else {
    guard let fromVC = transitionContext.viewController(forKey: .from) as? ImageViewController else { fatalError() }
    guard let toVC = transitionContext.viewController(forKey: .to)?.children.last as? CustomTransitionViewController else { fatalError() }

    containerView.addSubview(toVC.navigationController!.view)

    let startFrame = fromVC.imageView.frame
    let imgView = UIImageView(frame: startFrame)
    imgView.clipsToBounds = true
    imgView.contentMode = .scaleAspectFill
    imgView.image = targetImage

    containerView.addSubview(imgView)

    fromVC.view.alpha = 0.0

    let targetCell = toVC.listCollectionView.cellForItem(at: targetIndex!)
    let finalFrame = toVC.listCollectionView.convert(targetCell!.frame, to: toVC.view)

    UIView.animate(withDuration: duration) {
        imgView.frame = finalFrame
    } completion: { finished in
        let success = !transitionContext.transitionWasCancelled

        imgView.alpha = 0.0
        imgView.removeFromSuperview()

        transitionContext.completeTransition(success)
    }
}
Image View를 최종 Frame으로 Animation 시킨 다음 Completion Handler에서 image View를 제거한다.
Presentation과 마찬가지로 completeTransition 메서드를 호출해야 한다.
extension CustomTransitionViewController: UIViewControllerTransitioningDelegate {
    func animationController(forPresented presented: UIViewController, presenting: UIViewController, source: UIViewController) -> UIViewControllerAnimatedTransitioning? {
        animator.presenting = true
        return animator
    }

    func animationController(forDismissed dismissed: UIViewController) -> UIViewControllerAnimatedTransitioning? {
        animator.presenting = false
        return animator
    }
}
CustomTransitionViewContoller로 돌아와 animationController(forDismissed:) 메서드를 호출한다.
해당 메서드는 Dismissal시 animator가 필요할 때마다 호출된다.
presenting 속성의 값을 false로 변경하고 이를 반환한다.

Dismiss시에도 Custom Transition이 잘 적용된 것 같지만 마찬가지로 버튼이 어색하다.
@IBAction func dismiss(_ sender: Any) {
    topConst.constant = -100

    UIView.animate(withDuration: 0.3) {
        self.view.layoutIfNeeded()
    } completion: { finished in
        self.dismiss(animated: true, completion: nil)
    }
}
버튼과 연결된 메서드에서 dismiss를 바로 호출해 진행하던 것을 버튼에 Animation을 적용하고,
Animation이 완료되면 호출하도록 변경했다.

이제는 버튼에 Animation이 적용돼 조금 더 자연스럽게 Transition이 실행된다.

Presentation 때와 마찬가지로 Landscape 상태에서 Transition을 실행하면 이전 화면이 이상하게 출력된다.
} else {
    guard let fromVC = transitionContext.viewController(forKey: .from) as? ImageViewController else { fatalError() }
    guard let toVC = transitionContext.viewController(forKey: .to)?.children.last as? CustomTransitionViewController else { fatalError() }

    toVC.navigationController?.view.frame = containerView.bounds
    containerView.addSubview(toVC.navigationController!.view)

    let startFrame = fromVC.imageView.frame
    let imgView = UIImageView(frame: startFrame)
Animator로 돌아와서 containerView를 추가하기 전에 Frame을 업데이트한다.
} else {
    guard let fromVC = transitionContext.viewController(forKey: .from) as? ImageViewController else { fatalError() }
    guard let toVC = transitionContext.viewController(forKey: .to)?.children.last as? CustomTransitionViewController else { fatalError() }

    toVC.navigationController?.view.frame = containerView.bounds
    containerView.addSubview(toVC.navigationController!.view)
    toVC.view.layoutIfNeeded()

    let startFrame = fromVC.imageView.frame
    let imgView = UIImageView(frame: startFrame)
이후 layoutIfNeeded 메서드를 호출해 화면을 Frame으로 업데이트한다.
Interactive Transition
Interactive Transition을 구현하기 위해서는 Interactive Animator가 필요하다.
Interactive Animator는 UIViewControllerInteractiveTransitioning 프로토콜을 통해 구현한다.
단순하게는 UIPercentDrivenInteractiveTransition 클래스를 Subclassing 하는 것이다.
Touch 이벤트는 주로 Gesture Recognizer로 처리한다.
Interactive Animator가 이전에 작성한 Animator를 대체하는 것은 아니다.
Animator는 여전히 Transition Animation을 실행하고, Interactive Animator는 사용자의 Touch에 따라서
Transition 상태와 진행 비율을 업데이트한다.
이번에 구현할 Interactive Animator는 새로운 화면을 닫을 때 사용된다.
Pinch를 통해 이미지를 축소하면 이전 화면으로 돌아간다.
만약 지정된 비율만큼 축소하지 않으면 Transition을 취소한다.
Scene과 Transition은 이전에 작성한 Custom Transition의 것을 그대로 사용한다.

앞서 설명한 대로 UIPercentDrivenInteractiveTransition을 Subclass로 지정하고 클래스를 생성한다.
//
//  PinchTransitionController.swift
//  Transition Practice
//
//  Created by Martin.Q on 2021/11/20.
//

import UIKit

class PinchTransitionController: UIPercentDrivenInteractiveTransition {
    var shouldCompleteTransition = true
    weak var targetVC: UIViewController?
    var startScale: CGFloat = 0.0
}
Interactive Animator은 Transition의 진행상황에 따라서 나머지를 완료하거나 취소할 수 있다.
따라서 이를 정할 속성인 shouldCompleteTransition을 생성한다.
또한 Touch 이벤트를 처리할 View Controller를 저장할 targetVC를 생성한다.
이때 강한 참조 Cycle을 방지하기 위해 약한 참조를 사용한다.
구현할 Interactive Animator는 Pinch Gesture Recognizer를 활용해 Touch 이벤트를 처리한다.
따라서 Pinch 계산에 사용할 속성인 startScale을 선언한다.
@objc func handleGesture(_ gestureRecognizer: UIPinchGestureRecognizer) {
    let scale = gestureRecognizer.scale

    switch gestureRecognizer.state {
       case .began:
       targetVC?.dismiss(animated: true, completion: nil)
       startScale = scale
    }
}
Gesture Handler를 구현한다.
현재 scale을 상수에 저장하고, Swith문을 사용해 gestur 상태에 따라 분기한다.
began 상태일 경우 dismiss 메서드를 호출한다.
해당 메서드를 호출한다고 즉시 실행되지는 않고, UIKit에 Dismissal Transition이 시작되었다는 것을 알려준다.
이어서 Gesture가 시작된 scale을 저장한다.
@objc func handleGesture(_ gestureRecognizer: UIPinchGestureRecognizer) {
    let scale = gestureRecognizer.scale

    switch gestureRecognizer.state {
    case .began:
        targetVC?.dismiss(animated: true, completion: nil)
        startScale = scale
    case .changed:
        var progess = 1.0 - (scale / startScale)
        progess = CGFloat(fminf(fmaxf(Float(progess), 0.0), 1.0))
        shouldCompleteTransition = progess > 0.5
        update(progess)
    }
}
changed 상태에서는 진행 상태를 계산해야 한다.
시작 scale과 현재 scale을 기준으로 최대 1.0의 값을 계산해야 한다.
계산된 값이 0.5를 초과하는 경우 Transition을 완료하도록 설정한다.
이후 update 메서드를 호출해야 한다.
해당 메서드는 Animator에 진행상태를 알려주는 역할을 한다.
이렇게 되면 Animator는 Transition을 진행상태에 맞게 동적으로 업데이트한다.
@objc func handleGesture(_ gestureRecognizer: UIPinchGestureRecognizer) {
    let scale = gestureRecognizer.scale

    switch gestureRecognizer.state {
    case .began:
        targetVC?.dismiss(animated: true, completion: nil)
        startScale = scale
    case .changed:
        var progess = 1.0 - (scale / startScale)
        progess = CGFloat(fminf(fmaxf(Float(progess), 0.0), 1.0))
        shouldCompleteTransition = progess > 0.5
        update(progess)
    case .cancelled:
        cancel()
    }
}
cnacelled 상태에서는 cancel 메서드를 호출한다.
해당 메서드가 호출되면 Transition이 취소되고, 이전 상태로 돌아간다.
@objc func handleGesture(_ gestureRecognizer: UIPinchGestureRecognizer) {
    let scale = gestureRecognizer.scale

    switch gestureRecognizer.state {
    case .began:
        targetVC?.dismiss(animated: true, completion: nil)
        startScale = scale
    case .changed:
        var progess = 1.0 - (scale / startScale)
        progess = CGFloat(fminf(fmaxf(Float(progess), 0.0), 1.0))
        shouldCompleteTransition = progess > 0.5
        update(progess)
    case .cancelled:
        cancel()
    case .ended:
        if shouldCompleteTransition {
            finish()
        } else {
            cancel()
        }
    default:
        break
    }
}
ended 상태에서는 finish 메서드를 호출해야 한다.
shouldComplete 속성에 따라 finish 메서드를 호출하거나 cancel 메서드를 호출한다.
class PinchTransitionController: UIPercentDrivenInteractiveTransition {
    var shouldCompleteTransition = true
    weak var targetVC: UIViewController?
    var startScale: CGFloat = 0.0

    @objc func handleGesture(_ gestureRecognizer: UIPinchGestureRecognizer) {
        let scale = gestureRecognizer.scale

        switch gestureRecognizer.state {
        case .began:
            targetVC?.dismiss(animated: true, completion: nil)
            startScale = scale
        case .changed:
            var progess = 1.0 - (scale / startScale)
            progess = CGFloat(fminf(fmaxf(Float(progess), 0.0), 1.0))
            shouldCompleteTransition = progess > 0.5
            update(progess)
        case .cancelled:
            cancel()
        case .ended:
            if shouldCompleteTransition {
                finish()
            } else {
                cancel()
            }
        default:
            break
        }
    }

    init(viewController: UIViewController?) {
        super.init()

        targetVC = viewController
        let gesture = UIPinchGestureRecognizer(target: self, action: #selector(handleGesture(_:)))
        targetVC?.view.addGestureRecognizer(gesture)
    }
}
생성자를 구현하고 targetVC와 pinchGesture를 초기화한다.
//
//  CustomTransitionViewController.swift
//  Transition Practice
//
//  Created by Martin.Q on 2021/11/19.
//

import UIKit

class CustomTransitionViewController: UIViewController {

    var list = (1 ... 10).map {
        return UIImage(named: "\($0)")!
    }

    @IBOutlet weak var listCollectionView: UICollectionView!

    let animator = ZoomAnimationController()

    override func prepare(for segue: UIStoryboardSegue, sender: Any?) {
        if let VC = segue.destination as? ImageViewController {
            if let cell = sender as? UICollectionViewCell, let indexPath = listCollectionView.indexPath(for: cell) {
                VC.image = list[indexPath.item]

                animator.targetIndex = indexPath
                animator.targetImage = list[indexPath.item]
            }
        }
        segue.destination.transitioningDelegate = self
    }

    override func viewDidLoad() {
        super.viewDidLoad()
    }
}

extension CustomTransitionViewController: UIViewControllerTransitioningDelegate {
    func animationController(forPresented presented: UIViewController, presenting: UIViewController, source: UIViewController) -> UIViewControllerAnimatedTransitioning? {
        animator.presenting = true
        return animator
    }

    func animationController(forDismissed dismissed: UIViewController) -> UIViewControllerAnimatedTransitioning? {
        animator.presenting = false
        return animator
    }
}

extension CustomTransitionViewController: UICollectionViewDataSource {
    func collectionView(_ collectionView: UICollectionView, numberOfItemsInSection section: Int) -> Int {
        return list.count
    }

    func collectionView(_ collectionView: UICollectionView, cellForItemAt indexPath: IndexPath) -> UICollectionViewCell {
        let cell = collectionView.dequeueReusableCell(withReuseIdentifier: "cell", for: indexPath)

        if let imgView = cell.contentView.viewWithTag(100) as? UIImageView {
            imgView.image = list[indexPath.item]
        }

        return cell
    }
}

extension CustomTransitionViewController: UICollectionViewDelegateFlowLayout {
    func collectionView(_ collectionView: UICollectionView, layout collectionViewLayout: UICollectionViewLayout, sizeForItemAt indexPath: IndexPath) -> CGSize {
        return CGSize(width: (collectionView.bounds.width / 2), height: (collectionView.bounds.width / 2) * (768.0 / 1024.0))
    }
}
CustomTransitionViewController의 클래스로 돌아와 Interactive Animator를 저장할 속성을 선언한다.
class CustomTransitionViewController: UIViewController {

    var list = (1 ... 10).map {
        return UIImage(named: "\($0)")!
    }

    @IBOutlet weak var listCollectionView: UICollectionView!

    let animator = ZoomAnimationController()
    var interactiveAnimator: PinchTransitionController?

    override func prepare(for segue: UIStoryboardSegue, sender: Any?) {
        if let VC = segue.destination as? ImageViewController {
            if let cell = sender as? UICollectionViewCell, let indexPath = listCollectionView.indexPath(for: cell) {
                VC.image = list[indexPath.item]

                animator.targetIndex = indexPath
                animator.targetImage = list[indexPath.item]
            }
        }
        segue.destination.transitioningDelegate = self
    }

    .
    .
    .
interactiveAnimator에 저장될 것이다.
override func prepare(for segue: UIStoryboardSegue, sender: Any?) {
    if let VC = segue.destination as? ImageViewController {
        if let cell = sender as? UICollectionViewCell, let indexPath = listCollectionView.indexPath(for: cell) {
            VC.image = list[indexPath.item]

            animator.targetIndex = indexPath
            animator.targetImage = list[indexPath.item]

            interactiveAnimator = PinchTransitionController(viewController: segue.destination)
        }
    }
    segue.destination.transitioningDelegate = self
}
prepare 메서드에서 새로운 Interactive Animator를 생성하고 새로 표시할 View Controller를 Target으로 설정한다.
UIViewControllerTransitionDelegate를 채용한 extension을 확인해 보면 animator를 반환하도록 작성되어있다.
Interactive Animator는 이 animator와 함께 동작하기 때문에 따라서 둘을 모두 반환해야 한다.
만약 일반 Animator을 반환하지 않으면 Interactive Animator는 작동할 수 없다.
func interactionControllerForDismissal(using animator: UIViewControllerAnimatedTransitioning) -> UIViewControllerInteractiveTransitioning? {
    return interactiveAnimator
}
interactionControllerForDismissal 메서드를 추가하고 interactiveAnimator를 반환하도록 한다.

실제 동작을 확인해 보면
gesture를 완료하는 경우 정상적으로 동작하지만,
중간에 gesture를 취소하는 경우 정상적으로 Transition이 취소되지 않는다.
이유는 Animator를 구현할 때 Interactive Animator를 고려하지 않았기 때문이다.
UIView.animate(withDuration: duration) {
    imgView.frame = finalFrame
} completion: { finished in
    let success = !transitionContext.transitionWasCancelled

    imgView.alpha = 0.0
    imgView.removeFromSuperview()

    transitionContext.completeTransition(success)
}
Animator 클래스의 Dismissal 부분을 확인해 보면,
취소여부에 관계없이 Image View를 제거하고, Complete를 호출하도록 되어있다.
Transition이 취소되면 transitionWasCancelled 속성에 true가 저장된다.
transition이 완전히 종료되면 해당 속성의 반전 값을 sucess에 저장하도록 되어있고,
해당 속성을 통해 completeTansition 메서드를 호출하고 있다.
} else {
    guard let fromVC = transitionContext.viewController(forKey: .from) as? ImageViewController else { fatalError() }
    guard let toVC = transitionContext.viewController(forKey: .to)?.children.last as? CustomTransitionViewController else { fatalError() }

    toVC.navigationController?.view.frame = containerView.bounds
    containerView.addSubview(toVC.navigationController!.view)
    toVC.view.layoutIfNeeded()

    let startFrame = fromVC.imageView.frame
    let imgView = UIImageView(frame: startFrame)
    imgView.clipsToBounds = true
    imgView.contentMode = .scaleAspectFill
    imgView.image = targetImage

    containerView.addSubview(imgView)

    fromVC.view.alpha = 0.0

    let targetCell = toVC.listCollectionView.cellForItem(at: targetIndex!)
    let finalFrame = toVC.listCollectionView.convert(targetCell!.frame, to: toVC.view)

    UIView.animate(withDuration: duration) {
        imgView.frame = finalFrame
    } completion: { finished in
        let success = !transitionContext.transitionWasCancelled

        imgView.alpha = 0.0
        imgView.removeFromSuperview()

        transitionContext.completeTransition(success)
    }
}
즉 취소되면 transitionWasCancelled의 값을 받아와
imgView의 alpha 값을 다시 원복 하고,
Transition을 위해 추가했던 toVC를 제거하도록 구현해야 한다.
} completion: { finished in
    let success = !transitionContext.transitionWasCancelled

    if !success {
        fromVC.view.alpha = 1.0
        toVC.navigationController!.view.removeFromSuperview()
    }

    imgView.alpha = 0.0
    imgView.removeFromSuperview()

    transitionContext.completeTransition(success)
}
이제는 Transition이 취소되면 원래대로 돌아온다.
'학습 노트 > iOS (2021)' 카테고리의 다른 글
| 135 ~ 136. Local Notification, Custom Notification Sound & Attachment (0) | 2021.11.24 |
|---|---|
| 133 ~ 134. Notification Center and Notification (0) | 2021.11.23 |
| 128 ~ 129. View Transition and View Controller Presentation (0) | 2021.11.20 |
| 124 ~ 127. UIVIew Animation, Spring Animation & Keyframe Animation, Property Animator and Motion Effect (0) | 2021.11.13 |
| 123. Status Bar and Home Indicator (0) | 2021.11.11 |


