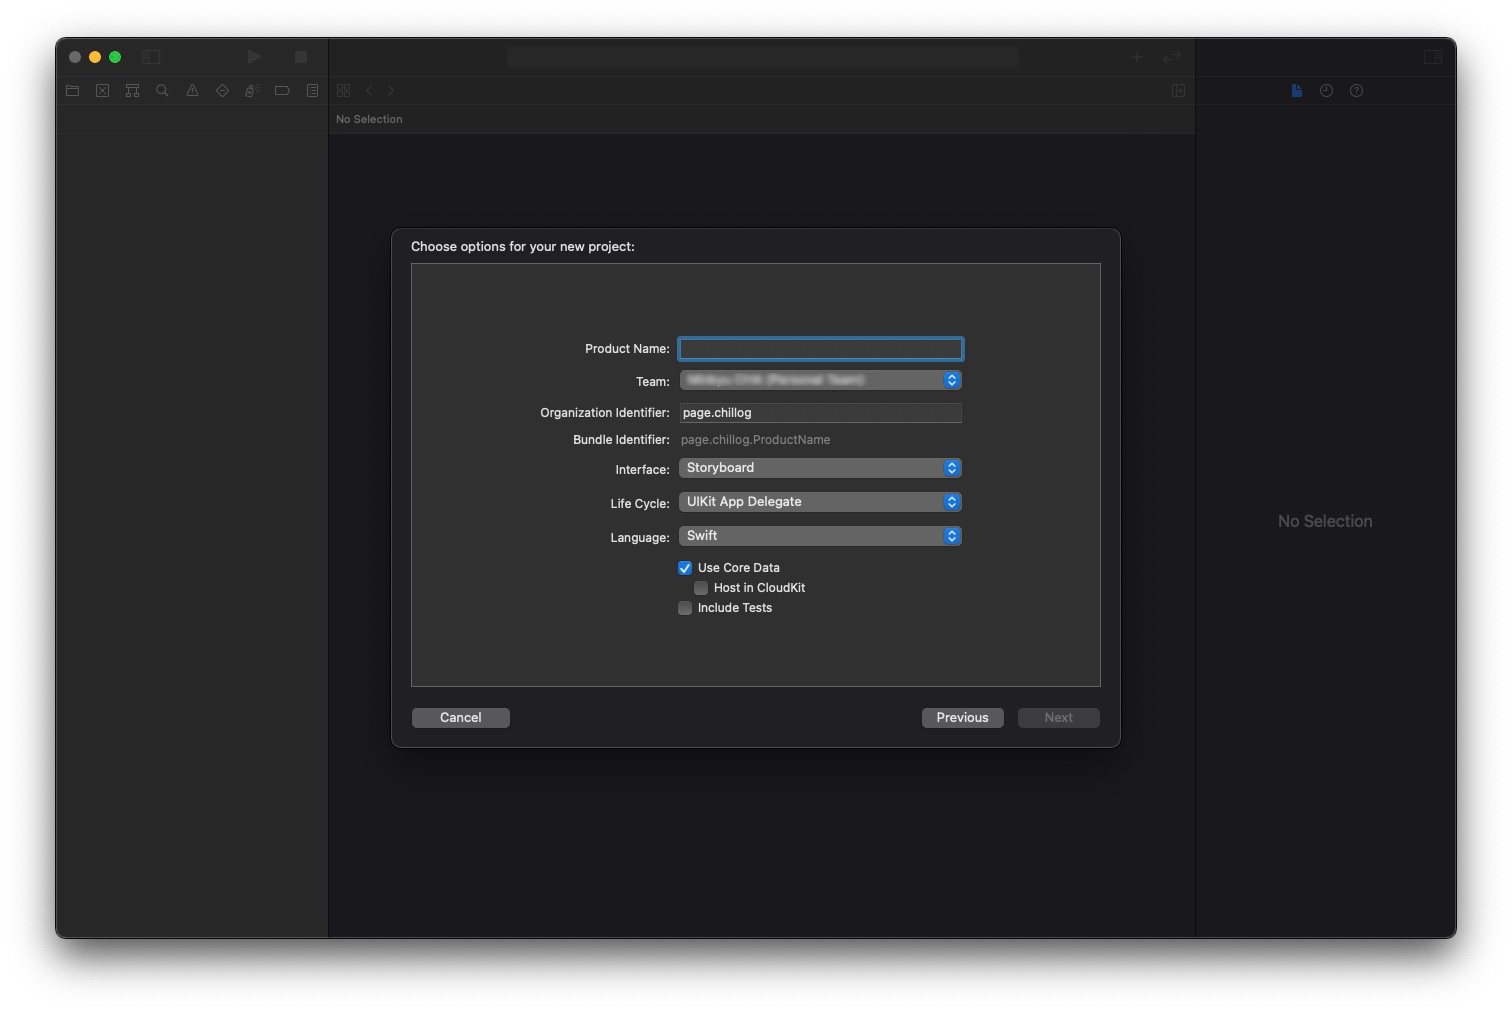
DB (데이터베이스)
DB 작성
iOS 앱의 DB는 CoreData를 사용해서 만들어 진다.
CoreData는 프로젝트 생성 시에 이미 활성화 해 둔 상태이고,
기본적인 내용 또한 자동으로 추가 된다.
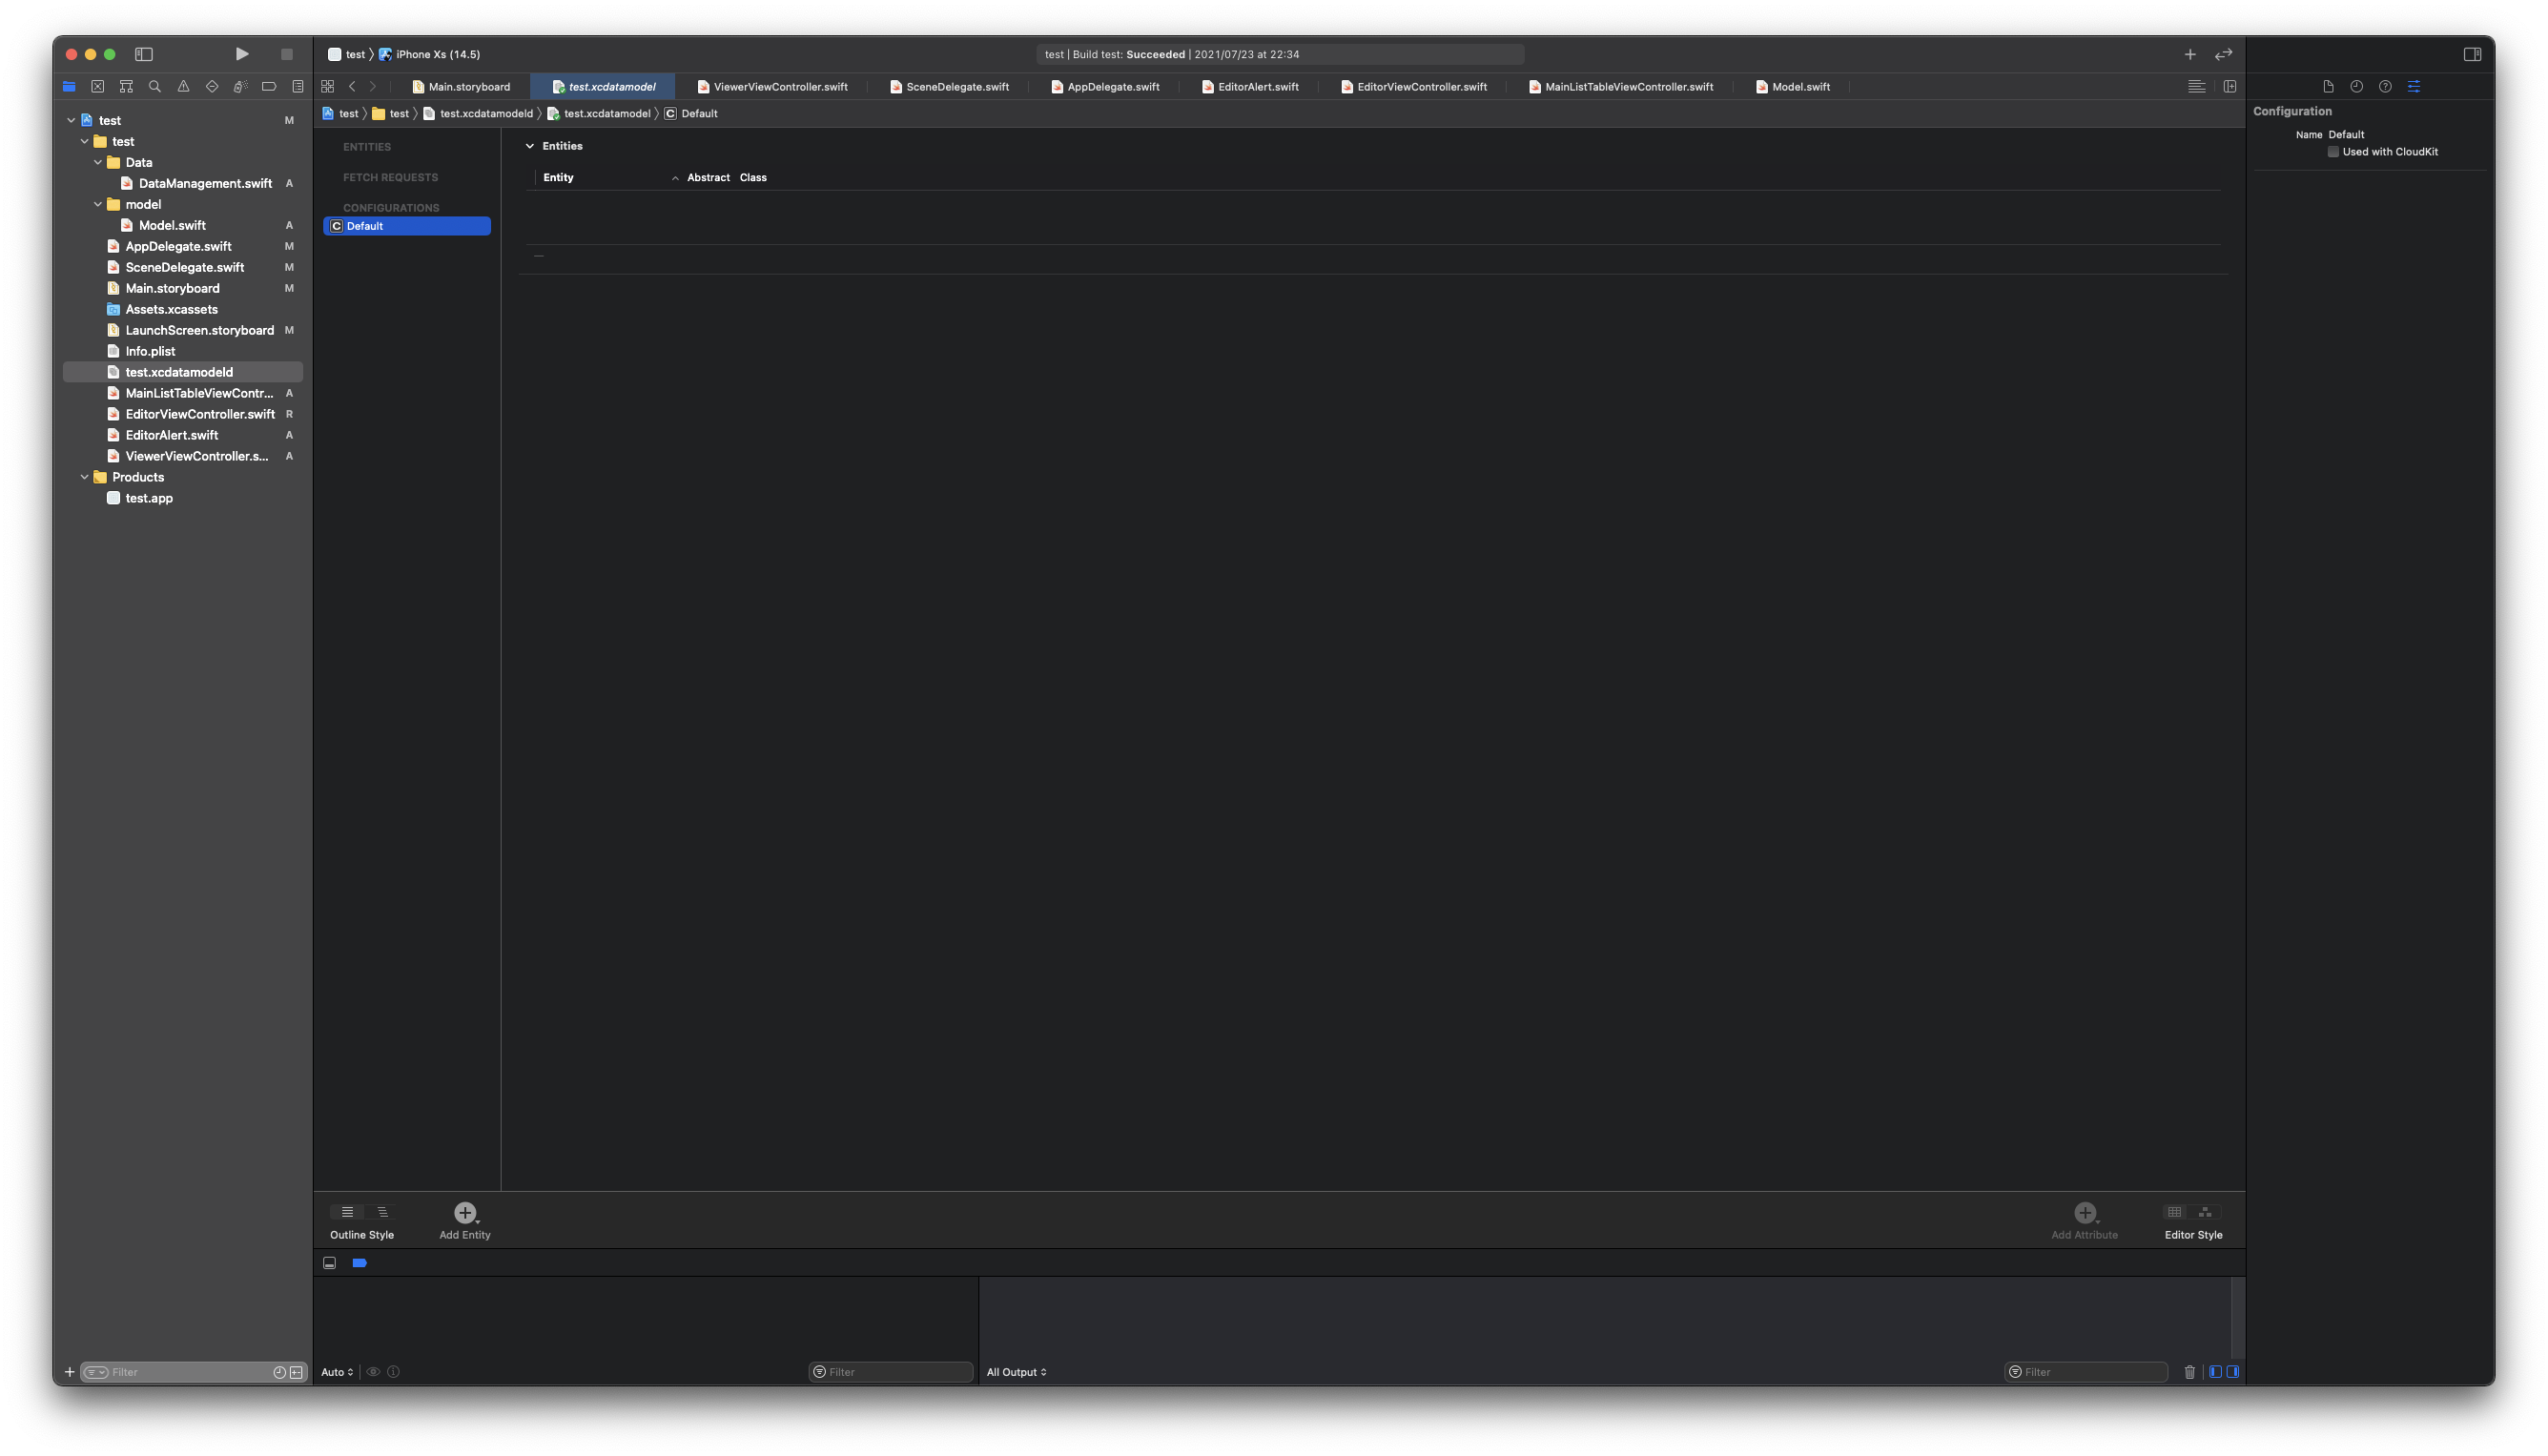
바로 앱 이름의 '.xdatamodeld' 파일이 DB이자 CoreData 파일이다.
해당 파일은 데이터 저장 방식의 설계도 역할을 한다.
좌측 하단의 'Add Entity' 버튼을 툴러 Entity를 생성하고,
컨텐츠와 날짜를 저장 할 Attribute를 각각 생성한다.
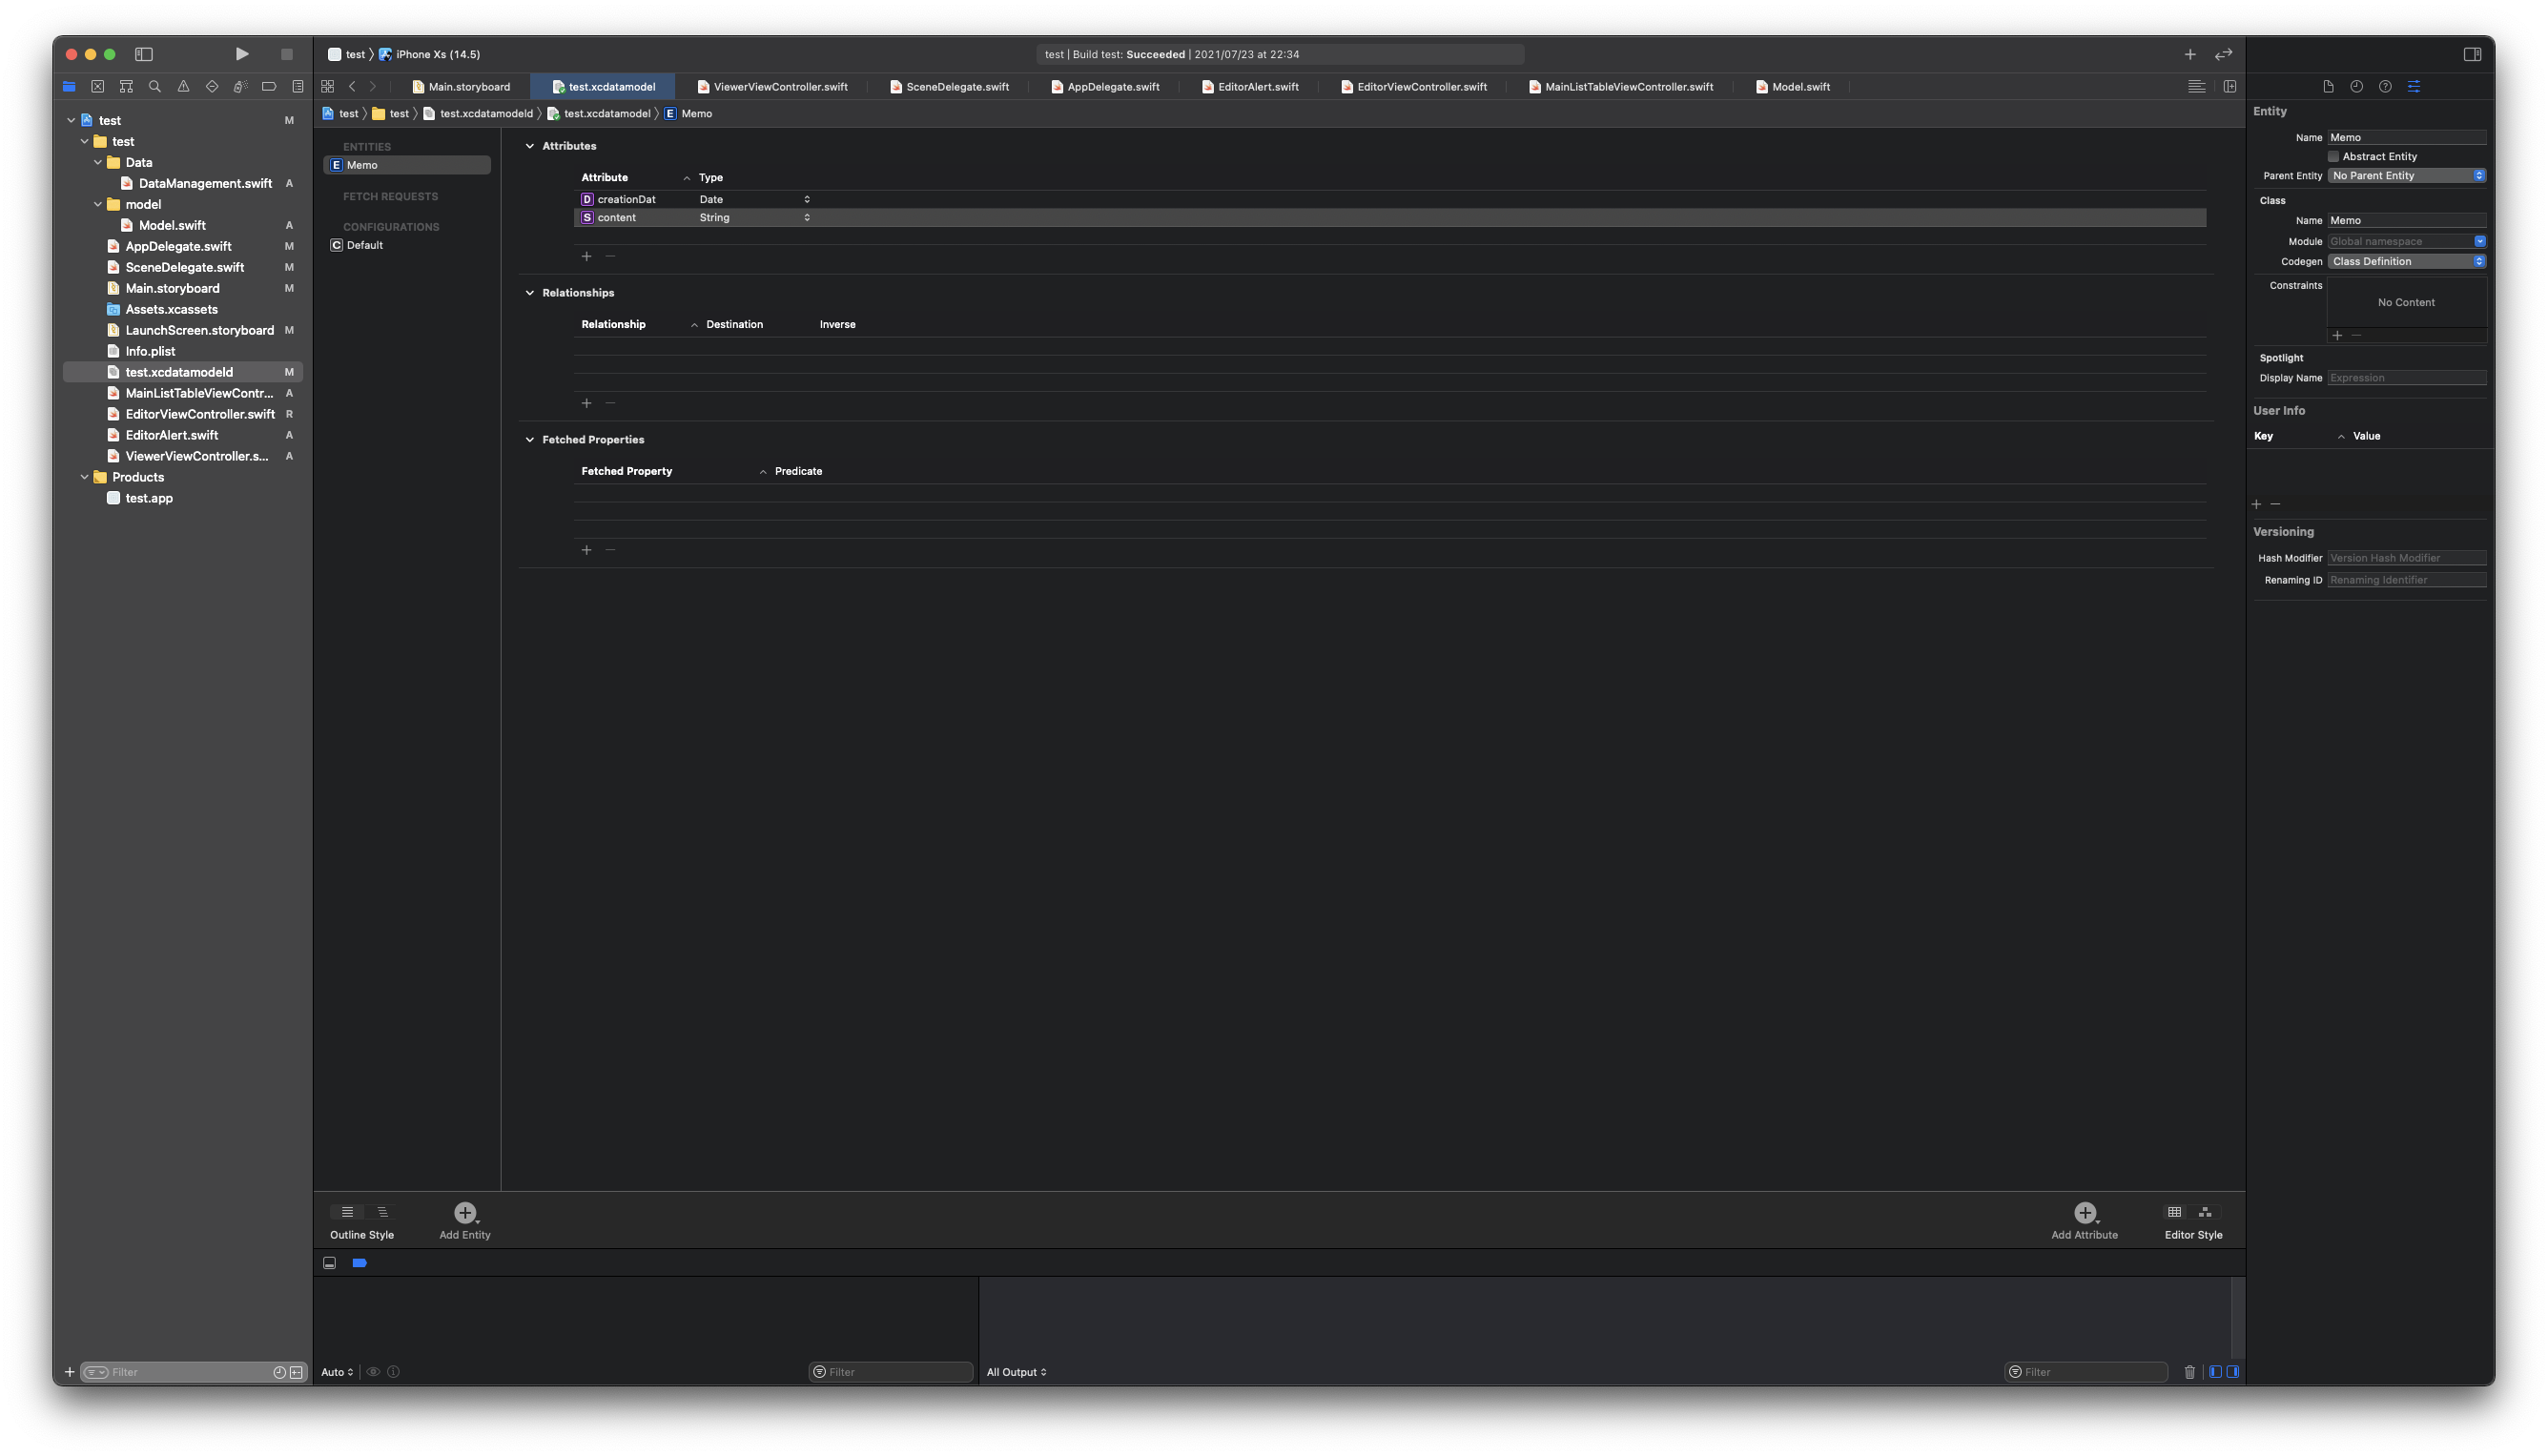
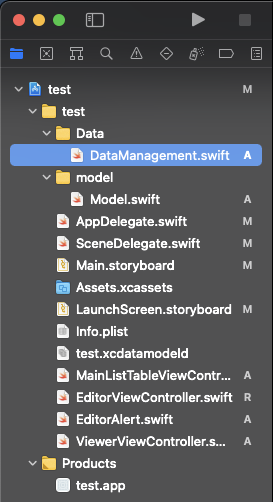
최종적으로는 위와 같은 모습이 되어야 하며,
Entity의 Attribute Inspector의 'Codegen'이 Class Definition으로 되어 있어야 한다.
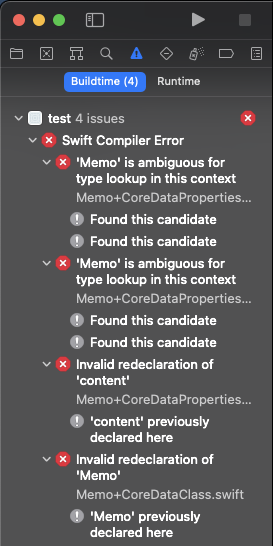
이 상태로 빌드를 시도하면 에러가 발생하는데,
임시로 생성해 뒀던 Memo 클래스와 CoreData가 생성한 Memo 클래스가 중복되기 때문이다.
//
//  Model.swift
//  test
//
//  Created by Martin.Q on 2021/07/21.
//

import Foundation

//class Memo {
//    var content: String
//    var date: Date
//
//    init(contentData: String){
//        content = contentData
//        date = Date()
//    }
//
//    static var dummayData = [
//        Memo(contentData: "What I said to you remains like a will.")
//    ]
//}
따라서 DB역할을 대신했던 Model.swift를 전부 주석처리해 중복을 피하고,
DB를 연결해 주면 에러는 해결 된다.
DB 연결
//
//  AppDelegate.swift
//  test
//
//  Created by Martin.Q on 2021/07/20.
//

import UIKit
import CoreData

@main
class AppDelegate: UIResponder, UIApplicationDelegate {

    var window: UIWindow?

    func application(_ application: UIApplication, didFinishLaunchingWithOptions launchOptions: [UIApplication.LaunchOptionsKey: Any]?) -> Bool {
        // Override point for customization after application launch.
        return true
    }

    // MARK: UISceneSession Lifecycle

    @available(iOS 13.0, *)
    func application(_ application: UIApplication, configurationForConnecting connectingSceneSession: UISceneSession, options: UIScene.ConnectionOptions) -> UISceneConfiguration {
        // Called when a new scene session is being created.
        // Use this method to select a configuration to create the new scene with.
        return UISceneConfiguration(name: "Default Configuration", sessionRole: connectingSceneSession.role)
    }

    @available(iOS 13.0, *)
    func application(_ application: UIApplication, didDiscardSceneSessions sceneSessions: Set<UISceneSession>) {
        // Called when the user discards a scene session.
        // If any sessions were discarded while the application was not running, this will be called shortly after application:didFinishLaunchingWithOptions.
        // Use this method to release any resources that were specific to the discarded scenes, as they will not return.
    }

    // MARK: - Core Data stack

    lazy var persistentContainer: NSPersistentContainer = {
        /*
         The persistent container for the application. This implementation
         creates and returns a container, having loaded the store for the
         application to it. This property is optional since there are legitimate
         error conditions that could cause the creation of the store to fail.
        */
        let container = NSPersistentContainer(name: "test")
        container.loadPersistentStores(completionHandler: { (storeDescription, error) in
            if let error = error as NSError? {
                // Replace this implementation with code to handle the error appropriately.
                // fatalError() causes the application to generate a crash log and terminate. You should not use this function in a shipping application, although it may be useful during development.

                /*
                 Typical reasons for an error here include:
                 * The parent directory does not exist, cannot be created, or disallows writing.
                 * The persistent store is not accessible, due to permissions or data protection when the device is locked.
                 * The device is out of space.
                 * The store could not be migrated to the current model version.
                 Check the error message to determine what the actual problem was.
                 */
                fatalError("Unresolved error \(error), \(error.userInfo)")
            }
        })
        return container
    }()

    // MARK: - Core Data Saving support

    func saveContext () {
        let context = persistentContainer.viewContext
        if context.hasChanges {
            do {
                try context.save()
            } catch {
                // Replace this implementation with code to handle the error appropriately.
                // fatalError() causes the application to generate a crash log and terminate. You should not use this function in a shipping application, although it may be useful during development.
                let nserror = error as NSError
                fatalError("Unresolved error \(nserror), \(nserror.userInfo)")
            }
        }
    }

}
우선 AppDelegate.swift 파일에 선언 된 'Core Data Stack' 이하의 부분을 새로운 파일에 옮긴다.
새롭게 Data 그룹과 swift 파일을 생성한 후 해당 파일에 새로운 클래스를 생성한다.
//
//  DataManagement.swift
//  test
//
//  Created by Martin.Q on 2021/07/26.
//

import Foundation
import CoreData

// MARK: - Core Data stack
class DataManagement {
    static let shared = dataManagement()
    private init() {

    }
}
새 클래스의 이름은 데이터를 관리한다는 의미의 dataManagement이다.
이후 작성한 코드는 해당 클래스를 Singletone(싱글톤) 패턴으로 선언하는 코드로,
싱글톤 패턴은 앱이 실행될 때에 최초 한 번만 메모리를 항당하는 방식이다.
일반적인 클래스라면 사용할 때 마다 각각의 인스턴스가 생성 되고,
값의 공유가 필요하다면 참조형식으로 전달할 수도 있지만,
싱글톤으로 구현하는 클래스의 경우 위와 같이 앱이 실행되는 시점에 생성되는 인스턴스를
여러 객체에서 사용할 수 있다.
다른 언어의 싱글톤 패턴은 객체간의 결합도를 높혀 원칙에 어긋하거나,
멀티 쓰레드 환경에서 중복 생성되는 문제가 있어 수정과 테스트가 어려워 지는 문제가 있으나
swift에선 구현 문법 상 지연 속성인 형식 속성으로 선언하게 되므로 생성 시점이 아닌 접근 시점에 초기화 된다.
덕분에 다른 언어들에 비해 구현 문법이 단순하고, 안전하다고 한다.
//
//  DataManagement.swift
//  test
//
//  Created by Martin.Q on 2021/07/26.
//

import Foundation
import CoreData

// MARK: - Core Data stack
class DataManagement {
    static let shared = DataManagement()
    private init() {

    }

    // MARK: - Core Data stack

    lazy var persistentContainer: NSPersistentContainer = {

        let container = NSPersistentContainer(name: "FirstMemo")
        container.loadPersistentStores(completionHandler: { (storeDescription, error) in
            if let error = error as NSError? {

                fatalError("Unresolved error \(error), \(error.userInfo)")
            }
        })
        return container
    }()

    // MARK: - Core Data Saving support

    func saveContext () {
        let context = persistentContainer.viewContext
        if context.hasChanges {
            do {
                try context.save()
            } catch {
                // Replace this implementation with code to handle the error appropriately.
                // fatalError() causes the application to generate a crash log and terminate. You should not use this function in a shipping application, although it may be useful during development.
                let nserror = error as NSError
                fatalError("Unresolved error \(nserror), \(nserror.userInfo)")
            }
        }
    }
}
이후엔 위에서 복사 한 Core Data stack 부분을 붙여 넣는다.
코드에 작성된 것과 같이 Core Data의 대부분의 작업은 Context 객체가 담당한다.
이를 직접 만들 수도 있지만 강의대로 기본적으로 생성되는 Context를 사용하도록 한다.
//
//  DataManagement.swift
//  test
//
//  Created by Martin.Q on 2021/07/26.
//

import Foundation
import CoreData

// MARK: - Core Data stack
class DataManagement {
    static let shared = DataManagement()
    private init() {}

    var context: NSManagedObjectContext {
        return persistentContainer.viewContext
    }

    // MARK: - Core Data stack

    lazy var persistentContainer: NSPersistentContainer = {

        let container = NSPersistentContainer(name: "FirstMemo")
        container.loadPersistentStores(completionHandler: { (storeDescription, error) in
            if let error = error as NSError? {

                fatalError("Unresolved error \(error), \(error.userInfo)")
            }
        })
        return container
    }()

    // MARK: - Core Data Saving support

    func saveContext () {
        let context = persistentContainer.viewContext
        if context.hasChanges {
            do {
                try context.save()
            } catch {
                // Replace this implementation with code to handle the error appropriately.
                // fatalError() causes the application to generate a crash log and terminate. You should not use this function in a shipping application, although it may be useful during development.
                let nserror = error as NSError
                fatalError("Unresolved error \(nserror), \(nserror.userInfo)")
            }
        }
    }
}
이렇게 수정하면 SceneDelegate.swift 파일에서 에러가 발생한다.
func sceneDidEnterBackground(_ scene: UIScene) {
  // Called as the scene transitions from the foreground to the background.
  // Use this method to save data, release shared resources, and store enough scene-specific state information
  // to restore the scene back to its current state.

  // Save changes in the application's managed object context when the application transitions to the background.
  (UIApplication.shared.delegate as? AppDelegate)?.saveContext()
}
해당 블록에 대한 오류인데,
우리가 코드를 수정하는 사이 saveContext 메소드의 위치가 AppDelegate 파일에서 Datamanagement 파일로 바뀌었다.
이 때 싱글톤을 사용했기 때문에 기존의 코드에서 처럼 타입 캐스팅이나 Optional 체이닝이 필요 없다.
func sceneDidEnterBackground(_ scene: UIScene) {
  // Called as the scene transitions from the foreground to the background.
  // Use this method to save data, release shared resources, and store enough scene-specific state information
  // to restore the scene back to its current state.

  // Save changes in the application's managed object context when the application transitions to the background.
  DataManagement.shared.saveContext()
}
이렇게 굉장히 단순한 방식으로 접근할 수 있다.
DB Fetch
//
//  DataManagement.swift
//  test
//
//  Created by Martin.Q on 2021/07/27.
//

import Foundation
import CoreData

class DataManagement {
    static let shared = DataManagement()
    private init() {}

    var context: NSManagedObjectContext {
        return persistentContainer.viewContext
    }

    var memoList = [Memo]()
    // MARK: - Core Data stack

    lazy var persistentContainer: NSPersistentContainer = {
        /*
         The persistent container for the application. This implementation
         creates and returns a container, having loaded the store for the
         application to it. This property is optional since there are legitimate
         error conditions that could cause the creation of the store to fail.
        */
        let container = NSPersistentContainer(name: "test")
        container.loadPersistentStores(completionHandler: { (storeDescription, error) in
            if let error = error as NSError? {
                // Replace this implementation with code to handle the error appropriately.
                // fatalError() causes the application to generate a crash log and terminate. You should not use this function in a shipping application, although it may be useful during development.

                /*
                 Typical reasons for an error here include:
                 * The parent directory does not exist, cannot be created, or disallows writing.
                 * The persistent store is not accessible, due to permissions or data protection when the device is locked.
                 * The device is out of space.
                 * The store could not be migrated to the current model version.
                 Check the error message to determine what the actual problem was.
                 */
                fatalError("Unresolved error \(error), \(error.userInfo)")
            }
        })
        return container
    }()

    // MARK: - Core Data Saving support

    func saveContext () {
        let context = persistentContainer.viewContext
        if context.hasChanges {
            do {
                try context.save()
            } catch {
                // Replace this implementation with code to handle the error appropriately.
                // fatalError() causes the application to generate a crash log and terminate. You should not use this function in a shipping application, although it may be useful during development.
                let nserror = error as NSError
                fatalError("Unresolved error \(nserror), \(nserror.userInfo)")
            }
        }
    }

}
다시 DataManagement로 돌아와 데이터를 저장 할 변수를 선언한다.
실습에는 memoList로 선언했다.
DB에서 데이터를 읽어오는 것을 iOS에서는 fetch라고 부른다.
데이터를 불러 오는 메소드를 작성한다.
//
//  DataManagement.swift
//  test
//
//  Created by Martin.Q on 2021/07/27.
//
class DataManagement {
	//...
    func fetchMemo() {
    	let request: NSFetchRequest<Memo> = Memo.fetchRequest()

        let sortDateDesc = NSSortDescriptor(key: "genDate", ascending: false)
        request.sortDescriptors = [sortDateDesc]
    }
    //...
}
DB에서 데이터를 읽으려 할 때는 fetchRequest를 생성해야 한다.
Request를 받기 위해선 형식 지정 방식으로 NSFetchRequest를 지정해야 하며,
이 때 개발 문서에 따라

Entity의 이름이나 EntityDescription이 함께 전달 되어야 한다.
따라서 실습시엔 Entity의 이름을 함께 전달했다.₁
또한 CoreData의 반환 값은 정렬되지 않은 상태이기 때문에 날짜에 해당하는 'genDat'에 의해 내림차순으로 정렬되게 했다.
이 때는 반환되는 request에 대해 'sortDescriptors' 속성을 사용한다.
func fetchMemo() {
	let request: NSFetchRequest = Memo.fetchRequest()

    let sortDateDesc = NSSortDescriptor(key: "genDate", ascending: false)
    request.sortDescriptors = [sortDateDesc]

    do {
    	memoList = try context.fetch(request)
    } catch  {
    	print(error)
    }
}
이후엔 fetch를 통해 데이터를 불러와 미리 생성 해 둔 memoList에 저장한다.

단, fetch가 throws를 통해 에러를 반환 할 수 있으므로 do-catch 문을 통해 예외처리가 반드시 필요함을 알아두자.
//
//  EditorViewController.swift
//  test
//
//  Created by Martin.Q on 2021/07/21.
//

let newMemo = Memo(contentData: generateDat)
Memo.dummayData.append(newMemo)
이후 에디터의 ViewController 파일에서 위의 두 코드를 주석처리 한다.
해당 코드는 새로 작성한 메모를 기존의 DummyData로 병합하는 코드로 아직 DB에 저장하는 기능을 구현하지 않았기 때문에 에러가 발생한다.
이후엔 메모 리스트의 ViewContoroller로 이동해 사라진 DummyData의 기준이 아닌 새로 연겨 한 DB의 기준으로 변경해 준다.
//
//  MainListTableViewController.swift
//  test
//
//  Created by Martin.Q on 2021/07/21.
//

override func tableView(_ tableView: UITableView, numberOfRowsInSection section: Int) -> Int {
    // #warning Incomplete implementation, return the number of rows
    return DataManagement.shared.memoList.count
}
기존의 셀의 갯수를 계산하던 코드는 'return Memo.dummyData.count' 였으나 DB인 DataManagement로 연결했다.
//
//  ViewerViewController.swift
//  test
//
//  Created by Martin.Q on 2021/07/23.
//

extension ViewerViewController: UITableViewDataSource {
    func tableView(_ tableView: UITableView, numberOfRowsInSection section: Int) -> Int {
        return 2
    }

    func tableView(_ tableView: UITableView, cellForRowAt indexPath: IndexPath) -> UITableViewCell {
        switch indexPath.row {
        case 0:
            let cell = tableView.dequeueReusableCell(withIdentifier: "memoCell", for: indexPath)

            cell.textLabel?.text = data?.content

            return cell
        case 1:
            let cell = tableView.dequeueReusableCell(withIdentifier: "dateCell", for: indexPath)

            cell.textLabel?.text = reform.string(for: data?.genDate)

            return cell
        default:
            fatalError()
        }
    }


}
//
// MainListTableViewController.swift
// test
//
// Created by Martin.Q on 2021/07/21.
//
override func prepare(for segue: UIStoryboardSegue, sender: Any?) {
if let cell = sender as? UITableViewCell, let indexPath = tableView.indexPath(for: cell){
if let destination = segue.destination as? ViewerViewController {
destination.data = DataManagement.shared.memoList[indexPath.row]
}
}
}
override func tableView(_ tableView: UITableView, cellForRowAt indexPath: IndexPath) -> UITableViewCell {
let cell = tableView.dequeueReusableCell(withIdentifier: "ListCell", for: indexPath)
let data = DataManagement.shared.memoList[indexPath.row]
cell.textLabel?.text = data.content
cell.detailTextLabel?.text = reform.string(for: data.genDate)
return cell
}나머지 코드도 DB 기준으로 수정해 준다.

이 때, 기존의 코드였던 'cell.detailTextLabel?.text = reform.string(from:)'의 string(from:) 메소드는
DB의 genDate의 타입인 Optional Date값을 받을 수 없기 때문에 string(for:)로 변경한다.
이후 메모 리스트의 viewWillAppear 메소드를 다음과 같이 수정한다.
//
//  MainListTableViewController.swift
//  test
//
//  Created by Martin.Q on 2021/07/21.
//

override func viewWillAppear(_ animated: Bool) {
        super.viewWillAppear(animated)

        DataManagement.shared.fetchMemo()
        tableView.reloadData()

//        tableView.reloadData()
//        print(#function)
    }
주석처리한 코드는 단순히 TableView의 데이터를 새로고침하는 역할을 했지만,
새로 작성한 코드는 DB에서 데이터를 받아 온 뒤, 테이블을 새로고침한다.
DB 저장
//
//  DataManagement.swift
//  test
//
//  Created by Martin.Q on 2021/07/27.
//

class DataManagement {
	//...
    func addMemo(_ memo: String) {
    	let newMemo = Memo(context: context)
    }
}
DataManagement에 새로운 메소드를 작성한다.
ArgumentLabel 없이 메모 내용을 전달 받은 메소드로 이름은 addMemo이다.
DB에 저장 할 Memo 인스턴스를 생성하는데, 이 클래스는 DB에서 제공하는 클래스로 별도의 생성자를 사용해 context를 저장해야 한다.
새로 만들어진 인스턴스는 빈 상태이므로 데이터를 저장해 줘야 한다.
//
//  DataManagement.swift
//  test
//
//  Created by Martin.Q on 2021/07/27.
//

class DataManagement {
	//...
    func addMemo(_ memo: String) {
    	let newMemo = Memo(context: context)

        newMemo.content = memo
        newMemo.genDate = Date()
    }
}
이렇게 작성 된 인스턴스를 DB에 저장해 주면 된다.
저장하는 메소드는 초반에 붙여넣은 코드에 saveContext 라는 이름으로 미리 만들어져 있다.
//
//  DataManagement.swift
//  test
//
//  Created by Martin.Q on 2021/07/27.
//

class DataManagement {
	//...
    func addMemo(_ memo: String) {
    	let newMemo = Memo(context: context)

        newMemo.content = memo
        newMemo.genDate = Date()

        saveContext()
    }
}
이후 실질적인 저장이 실행되는 곳인 에디터의 ViewController에서
기존에 더미데이터에 저장하던 부분에서 해당 메소드를 호출하도록 수정한다.
//
// EditorViewController.swift
// test
//
// Created by Martin.Q on 2021/07/21.
//
import UIKit
class EditorViewController: UIViewController {
@IBOutlet weak var textField: UITextView!
@IBAction func cancel(_ sender: Any) {
dismiss(animated: true, completion: nil)
}
@IBAction func save(_ sender: Any) {
guard let data = textField.text, data.count > 0 else {
alert(message: "Memo is empty")
return
}
// let newMemo = Memo(contentData: generateDat)
// Memo.dummayData.append(newMemo)
DataManagement.shared.addMemo(data)
NotificationCenter.default.post(name: EditorViewController.newMemoInserted, object: nil)
dismiss(animated: true, completion: nil)
}
override func viewDidLoad() {
super.viewDidLoad()
// Do any additional setup after loading the view.
}
/*
// MARK: - Navigation
// In a storyboard-based application, you will often want to do a little preparation before navigation
override func prepare(for segue: UIStoryboardSegue, sender: Any?) {
// Get the new view controller using segue.destination.
// Pass the selected object to the new view controller.
}
*/
}
extension EditorViewController {
static let newMemoInserted = Notification.Name(rawValue: "newMemoInserted")
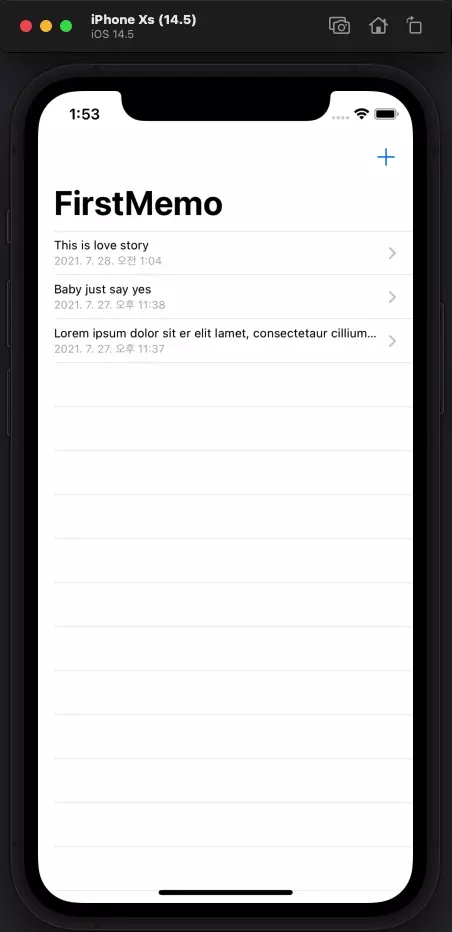
}이후 시뮬레이터를 실행하면 이전과는 조금 다른 모습으로 동작하는 것을 확인할 수 있다.

새 메모를 저장해도 리스트가 변하지 않는다.
앱을 새로 실행하면 불러 오는 것을 보아 하니 저장은 된 것 같다.
리스트를 새로고침 하는 데에 문제가 있는 것이다.
앱을 처음 실행한 시점에는 viewWillAppear가 실행되기 때문에 제대로 목록을 불러 오지만,
저장한 이후 목록으로 돌아갔을 때는 실행되지 않는다.
따라서 이전에는 저장 버튼을 누르면 Notification을 전송하고, Observer에서 이를 감지해 목록을 새로고침 했다.
//
//  MainListTableViewController.swift
//  test
//
//  Created by Martin.Q on 2021/07/21.
//

override func viewDidLoad() {
    super.viewDidLoad()

    NotificationCenter.default.addObserver(forName: EditorViewController.newMemoInserted, object: nil, queue: OperationQueue.main) { [weak self] (noti) in
       self?.tableView.reloadData()
    }
    // Uncomment the following line to preserve selection between presentations
    // self.clearsSelectionOnViewWillAppear = false

    // Uncomment the following line to display an Edit button in the navigation bar for this view controller.
    // self.navigationItem.rightBarButtonItem = self.editButtonItem
}
해당 코드도 물론 잘 작동하지만 정작 리스트를 저장하고 있는 배열인 Datamanagement의 memoList는 초기화 되지 않았다.
따라서 해당 코드 내에서 fetch를 한 번 더 실행하면 문제가 해결 되지만 이는 데이터의 크기가 커질 수록 효율이 나빠진다.
//
//  DataManagement.swift
//  test
//
//  Created by Martin.Q on 2021/07/27.
//

func addMemo(_ memo: String) {
    let newMemo = Memo(context: context)

    newMemo.content = memo
    newMemo.genDate = Date()

    memoList.insert(newMemo, at: 0)

    saveContext()
}
따라서 메모를 저장 할 때 '리스트 만' 업데이트 하도록 하면 테이터 전체를 다시 받아 올 필요가 없으니 조금 더 효율적이다.
append 메소드를 사용하면 배열의 마지막에 저장 되지만, insert 메소드를 사용하면 배열의 맨 앞에 저장할 수 있다.
다시 빌드하면 이전과 같이 리스트가 갱신 되는 것을 확인할 수 있다.
메모 수정
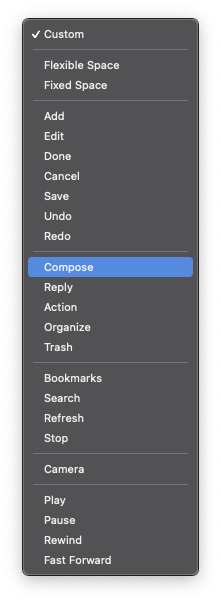
뷰어의 하단에 있는 툴바의 item 버튼을 선택한 뒤 Attribute Inspector에서 SystemItem을 'Compose'로 변경한다.

이후 해당 버튼을 에디터의 NavigationController에 연결한다.
이 때 Action은 'Present Modally'를 선택한다.
//
//  EditorViewController.swift
//  test
//
//  Created by Martin.Q on 2021/07/21.
//

import UIKit

class EditorViewController: UIViewController {

    var editTarget: Memo?

    @IBOutlet weak var textField: UITextView!

    @IBAction func cancel(_ sender: Any) {
        dismiss(animated: true, completion: nil)
    }

    @IBAction func save(_ sender: Any) {
        guard let data = textField.text, data.count > 0  else {
            alert(message: "Memo is empty")
            return
        }
//        let newMemo = Memo(contentData: generateDat)
//        Memo.dummayData.append(newMemo)

        DataManagement.shared.addMemo(data)

        NotificationCenter.default.post(name: EditorViewController.newMemoInserted, object: nil)

        dismiss(animated: true, completion: nil)
    }


    override func viewDidLoad() {
        super.viewDidLoad()

        // Do any additional setup after loading the view.
    }


    /*
    // MARK: - Navigation

    // In a storyboard-based application, you will often want to do a little preparation before navigation
    override func prepare(for segue: UIStoryboardSegue, sender: Any?) {
        // Get the new view controller using segue.destination.
        // Pass the selected object to the new view controller.
    }
    */

}

extension EditorViewController {
    static let newMemoInserted = Notification.Name(rawValue: "newMemoInserted")
}
이후 위와 같이 수정할 메모를 전달 받을 변수를 하나 생성한다.
실습에선 editTarget을 사용했다.
//
//  ViewerViewController.swift
//  test
//
//  Created by Martin.Q on 2021/07/23.
//

override func prepare(for segue: UIStoryboardSegue, sender: Any?) {
    if let sender = segue.destination.children.first as? EditorViewController {
        sender.editTarget = data
    }
}
이후 뷰어에서 prepare 메소드를 사용해 현재 보고 있는 메모를 전달한다.
이전의 리스트에서 사용했던 것과 비슷하지만 중간에 NavigationController를 저치기 때문에 destination 부분은 다소 달라진다.
destination 이후 부분인 '.children.first' 부분이 최종적으로 데이터가 도달하는 목적지를 '첫번째' 화면으로 정의한다.
해당 화면이 EditorViewController로 타입캐스팅이 가능하다면 데이터를 전달한다.
이렇게 에디터로 전달 된 데이터가 존재한다면 편집 버튼을 통해 접근한 것이므로 편집기가 열려야 한다.
하지만 이외의 경우로 접근했다면 nil을 저장하고 있으므로 새 에디터가 열려야 한다.
//
// EditorViewController.swift
// test
//
// Created by Martin.Q on 2021/07/21.
//
override func viewDidLoad() {
super.viewDidLoad()
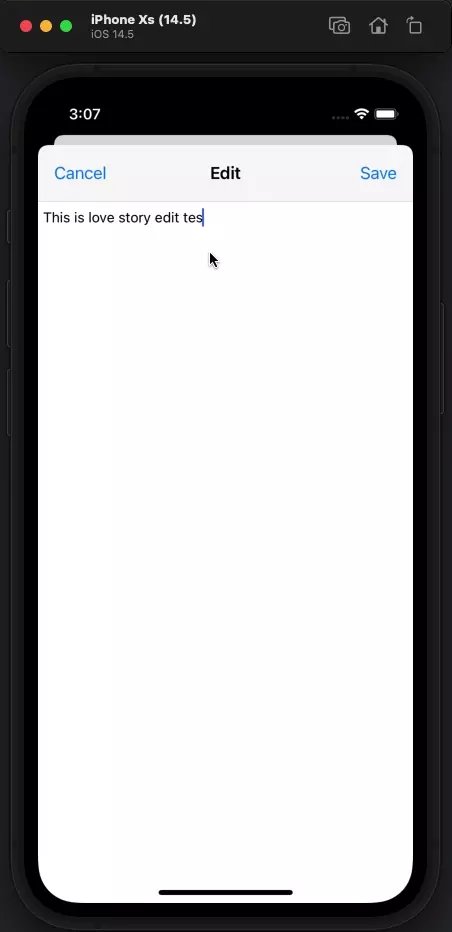
if let memo = editTarget {
navigationItem.title = "Edit"
textField.text = memo.content
} else {
navigationItem.title = "New Memo"
textField.text = ""
}
// Do any additional setup after loading the view.
}viewDidLoad는 해당 화면이 열렸을 때 최초에 1회 실행되면 되는 코드들이 주로 모인다.
에디터 화면이 열릴 때 조건에 따라 화면의 타이틀을 바꾸고,
TextView의 내용을 초기화한다.
이전에 TextView에 해당하는 인스턴스를 textField로 선언했기 때문에 textField로 접근했다.

이렇게 되면 에디터에 접근하는 방식에 따라 에디터의 제목과 내용이 동적으로 바뀌게 된다.
이후 편집기라면 데이터를 현재 편집된 내용으로 대체하고, saveContext 메소드를 호출해 저장한다.
이외의 경우라면 새 메모이므로 기존의 저장 방식을 그대로 사용한다.
//
//  EditorViewController.swift
//  test
//
//  Created by Martin.Q on 2021/07/21.
//

@IBAction func save(_ sender: Any) {
        guard let data = textField.text, data.count > 0  else {
            alert(message: "Memo is empty")
            return
        }
//        let newMemo = Memo(contentData: generateDat)
//        Memo.dummayData.append(newMemo)
        if let saveTarget = editTarget {
            saveTarget.content = data
            DataManagement.shared.saveContext()
        } else {
            DataManagement.shared.addMemo(data)
        }

        NotificationCenter.default.post(name: EditorViewController.newMemoInserted, object: nil)

        dismiss(animated: true, completion: nil)
    }
단, 이렇게 되면 다시 뷰어로 돌아왔을 때 편집이 완료 된 메모가 아닌 기존의 메모를 보여주는 문제가 생긴다.
이 문제 또한 token으로 해결한다.
//
//  EditorViewController.swift
//  test
//
//  Created by Martin.Q on 2021/07/21.
//

extension EditorViewController {
    static let newMemoInserted = Notification.Name(rawValue: "newMemoInserted")
    static let memoEdited = Notification.Name(rawValue: "memoEdited")
}
기존에 존재하던 토큰 외에 새로운 토큰을 생성한 뒤,
//
//  EditorViewController.swift
//  test
//
//  Created by Martin.Q on 2021/07/21.
//

@IBAction func save(_ sender: Any) {
    guard let data = textField.text, data.count > 0  else {
        alert(message: "Memo is empty")
        return
    }
//        let newMemo = Memo(contentData: generateDat)
//        Memo.dummayData.append(newMemo)
    if let saveTarget = editTarget {
        saveTarget.content = data
        DataManagement.shared.saveContext()
        NotificationCenter.default.post(name: EditorViewController.memoEdited, object: nil)
    } else {
        DataManagement.shared.addMemo(data)
        NotificationCenter.default.post(name: EditorViewController.newMemoInserted, object: nil)
    }

    dismiss(animated: true, completion: nil)
}
분기한 에디터에서 각각 토큰을 전달하도록 수정한다.
//
//  ViewerViewController.swift
//  test
//
//  Created by Martin.Q on 2021/07/23.
//

import UIKit

class ViewerViewController: UIViewController {
    @IBOutlet weak var memoTableView: UITableView!

    var data: Memo?

    var token: NSObjectProtocol?
    deinit {
        if let token = token {
            NotificationCenter.default.removeObserver(token)
        }
    }

    let reform: DateFormatter = {
        let formatted = DateFormatter()
        formatted.dateStyle = .medium
        formatted.timeStyle = .short
        formatted.locale = Locale(identifier: "Ko-kr")

        return formatted
    }()

    override func prepare(for segue: UIStoryboardSegue, sender: Any?) {
        if let sender = segue.destination.children.first as? EditorViewController {
            sender.editTarget = data
        }
    }

    override func viewDidLoad() {
        super.viewDidLoad()

        token = NotificationCenter.default.addObserver(forName: EditorViewController.memoEdited, object: nil, queue: OperationQueue.main, using: { [weak self] (noti) in
            self?.memoTableView.reloadData()
        })

        // Do any additional setup after loading the view.
    }


    /*
    // MARK: - Navigation

    // In a storyboard-based application, you will often want to do a little preparation before navigation
    override func prepare(for segue: UIStoryboardSegue, sender: Any?) {
        // Get the new view controller using segue.destination.
        // Pass the selected object to the new view controller.
    }
    */

}

extension ViewerViewController: UITableViewDataSource {
    func tableView(_ tableView: UITableView, numberOfRowsInSection section: Int) -> Int {
        return 2
    }

    func tableView(_ tableView: UITableView, cellForRowAt indexPath: IndexPath) -> UITableViewCell {
        switch indexPath.row {
        case 0:
            let cell = tableView.dequeueReusableCell(withIdentifier: "memoCell", for: indexPath)

            cell.textLabel?.text = data?.content

            return cell
        case 1:
            let cell = tableView.dequeueReusableCell(withIdentifier: "dateCell", for: indexPath)

            cell.textLabel?.text = reform.string(for: data?.genDate)

            return cell
        default:
            fatalError()
        }
    }


}
이후 뷰어의 controller 파일과 TableView를 Outlet으로 연결 한 뒤, memoEdited 토큰을 받으면 뷰어를 새로고침 하도록 수정한다.
token을 받을 인스턴스를 생성하고,
Observer를 닫을 소멸자를 추가해야 하는 것을 명심하자.

이렇게 되면 수정후 저장한 메모가 뷰어에 즉각적으로 반영 되는 것을 확인할 수 있다.
편집 확인 기능
에디터는 Modal 방식으로 열리며 iOS 13 이상의 기기에서는 sheet 방식을 가지고 있다.
취소 버튼을 누른다면 명백한 사용자의 의도겠지만 sheet를 쓸어 내리는 경우는 오작동일 가능성이 다분하다.
따라서 sheet를 내려서 닫는 경우 사용자의 의도를 확인하는 팝업창을 추가한다.
이렇게 기능을 구현하려면 편집 이전의 내용과 편집 이후의 내용을 별도로 저장할 필요가 있다.
//
//  EditorViewController.swift
//  test
//
//  Created by Martin.Q on 2021/07/21.
//

var originalContent: String?

override func viewDidLoad() {
    super.viewDidLoad()
    if let memo = editTarget {
        navigationItem.title = "Edit"
        textField.text = memo.content
        originalContent = memo.content
    } else {
    	navigationItem.title = "New Memo"
        textField.text = ""
        }
    textField.delegate = self
}
따라서 원본을 저장할 인스턴스를 하나 생성하고,
에디터가 편집기로 열렸을 결우에 원본 데이터를 저장하도록 한다.
이후 if문 밖에서 textField를 delegate로 지정한다.
//
//  EditorViewController.swift
//  test
//
//  Created by Martin.Q on 2021/07/21.
//

override func viewDidLoad() {
    super.viewDidLoad()
    if let memo = editTarget {
        navigationItem.title = "Edit"
        textField.text = memo.content
        originalContent = memo.content
    } else {
        navigationItem.title = "New Memo"
        textField.text = ""
    }

}

override func viewWillAppear(_ animated: Bool) {
    super.viewWillAppear(animated)

    navigationController?.presentationController?.delegate = self
}

override func viewWillDisappear(_ animated: Bool) {
    super.viewWillDisappear(animated)

    navigationController?.presentationController?.delegate = nil
}
이후 viewWillAppear 메소드와 viewWillDisappear 메소드를 추가하고,
각각의 presentationController의 delegate를 'self'와 'nil'로 지정한다.
이렇게 되면 편집기가 표시되기 직전 delegate로 설정되고, 사라지기 직전에 delegate가 해제된다.
//
//  EditorViewController.swift
//  test
//
//  Created by Martin.Q on 2021/07/21.
//

extension EditorViewController: UITextViewDelegate {
    func textViewDidChange(_ textView: UITextView) {
    }
}
이번엔 익스텐션을 하나 추가한다.
해당 익스텐션을 추가함으로 인해 textField를 delegate로 지정했을 때 발생했던 에러가 사라진다.
//
//  EditorViewController.swift
//  test
//
//  Created by Martin.Q on 2021/07/21.
//

extension EditorViewController: UITextViewDelegate {
    func textViewDidChange(_ textView: UITextView) {
        if let original = originalContent, let edited = textView.text {
            if #available(iOS 13.0, *) {
                isModalInPresentation = original != edited
            } else {
                // Fallback on earlier versions
            }
        }
    }
}
해당 익스텐션의 textViewDidChange 메소드는 textView가 수정 될 때 마다 호출 되므로 수정여부를 판단하는데 사용하기 탁월하다.
isModalInPresentation 속성은 modal 방식으로 동작해야 하는지에 대한 flag로 사용된다.
해당 속성이 true이면 모달 방식으로 작동하고, 끌어 내려 닫히기 전에 delegate 메소드를 호출해 준다.
단, 해당 속성은 modal 방식에 관련된 만큼 iOS13 이상에서만 사용할 수 있고, 예외처리가 필요함에 주의하자.
본래의 컨텐츠와 수정된 컨텐츠를 비교하고, 이 둘이 다를 때 true를 리턴하게 된다.
//
//  EditorViewController.swift
//  test
//
//  Created by Martin.Q on 2021/07/21.
//

extension EditorViewController: UIAdaptivePresentationControllerDelegate {

}
새로운 익스텐션을 하나 더 추가한다.
해당 익스텐션을 추가 함으로서 presentatinController를 delegate로 지정했을 때 발생했던 오류가 사라진다.
//
//  EditorViewController.swift
//  test
//
//  Created by Martin.Q on 2021/07/21.
//

extension EditorViewController: UIAdaptivePresentationControllerDelegate {
    func presentationControllerDidAttemptToDismiss(_ presentationController: UIPresentationController) {

    }
}
이후 메소드를 하나 추가한다.
편집기가 컨텐츠를 수정 할 때 마다 원본 컨텐츠와 수정된 컨텐츠를 비교하고,
이 둘이 다르다면 flag가 true로 변하게 된다.
이 상태에서 sheet를 내려 닫게 되면 sheet가 사라지는 대신 지금 추가한 메소드가 호출된다.
따라서 해당 메소드 안에 경고창을 표시하면 된다.
//
//  EditorViewController.swift
//  test
//
//  Created by Martin.Q on 2021/07/21.
//

extension EditorViewController: UIAdaptivePresentationControllerDelegate {
    func presentationControllerDidAttemptToDismiss(_ presentationController: UIPresentationController) {
        let alert = UIAlertController(title: "Worning", message: "Save edited memo?", preferredStyle: .alert)
        let saveBtn = UIAlertAction(title: "Save", style: .default) { [weak self] (action) in
            self?.save(action)
        }
        let dismiss = UIAlertAction(title: "Dismiss", style: .default) { [weak self] (action) in
            self?.cancel(action)
        }

        alert.addAction(saveBtn)
        alert.addAction(dismiss)

        present(alert, animated: true, completion: nil)
    }
}
경고창을 만드는 것은 이전과 동일하다.
이후 실행하면 sheet를 끌어 내렸을 경우 경고창이 나오는 것을 확인 할 수 있다.


