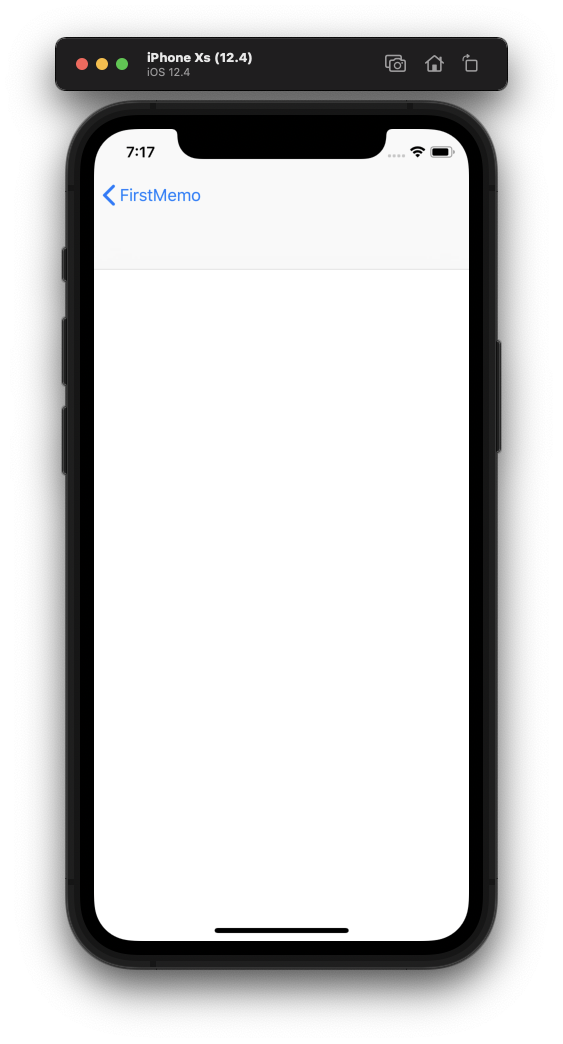
메모 뷰어

위와 같이 새로운 화면이 우측에서 좌측으로 표시되는 걸 Push라고 한다.
또한, 뒤로 가기를 선택했을 때 기존의 화면이 좌측에서 우측으로 사라지고 이전의 화면을 보여주는 것을 Pop이라고 한다.
메모를 선택하면 메모 뷰어를 push 하고,
하단에 toolbar를 추가해 편집과 공유가 가능하도록 한다.

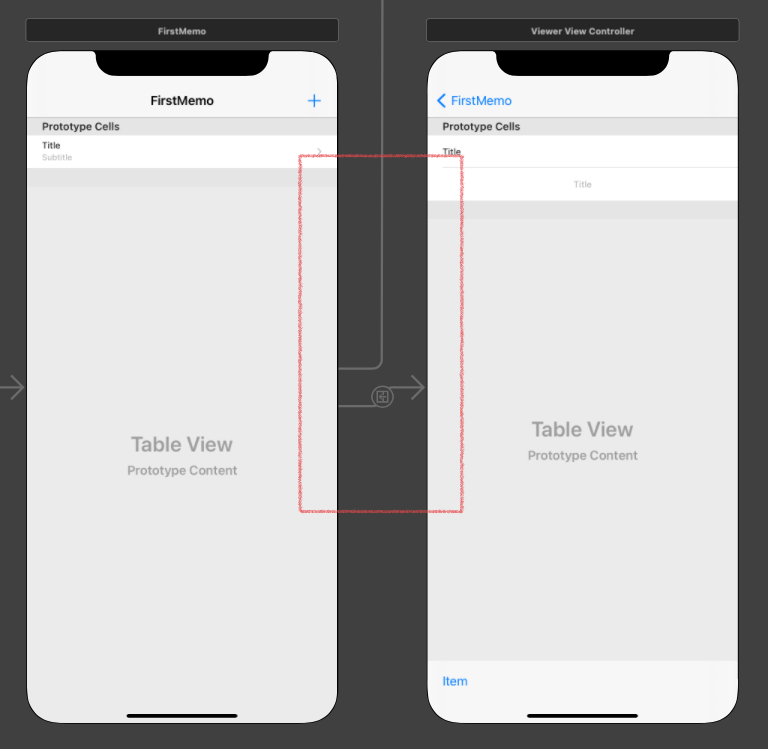
메인 스토리보드에서 라이브러리로 진입해 View Controller를 추가해 새 Scene(씬)을 생성한다.
해당 씬은 메모 뷰어로, 특정 메모를 선택하면 해당 씬으로 전환이 되어야 한다.
따라서 메인 화면의 Cell(셀)과 새 씬은 연결한다.
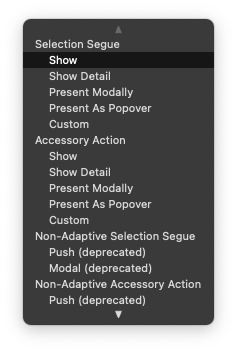
이후 표시되는 팝업에서 Show를 선택하면 자동으로 Navigation Bar와 뒤로 가기 버튼이 추가된 것을 확인할 수 있다.
이제는 해당 셀에 추가적인 기능이 생겼다.
그대로 놔두면 사용자가 해당 셀에 기능이 있는지 알 수 있는 방법이 없기 때문에,
셀의 attribute indicator의 Accessory를 'Disclosure Indicator'로 바꾼다.

이젠 셀의 우측에 작은 화살표가 생겨 추가적인 기능이 있음을 명확히 하고 있다.
새 씬이 생겼으므로 해당 씬을 조작할 코드가 필요하다.
ViewController 클래스를 생성 후 씬과 연결하자.
클래스 연결은 해당 씬의 View Controller를 선택한 뒤 Identity Indicator에서 진행한다.

이후엔 Viewer 화면을 작성한다.
Navigation Bar를 선택하고 attribute indicator의 Large Title을 'Never'로 변경한다.
이후 라이브러리에서 Tool Bar를 하단에 배치한다.
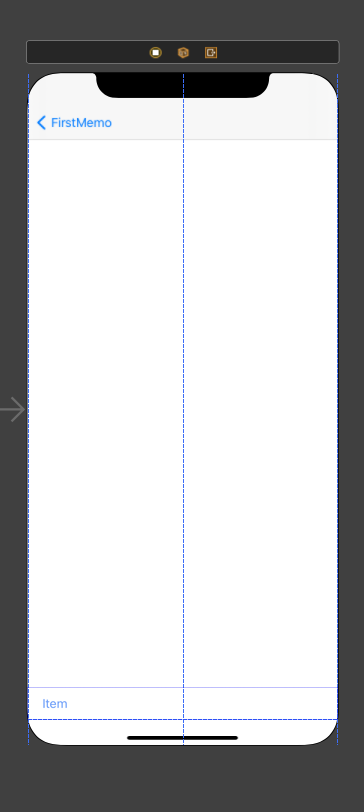
하단에 배치할 때에는 Home Bar(홈바)의 영역까지 고려해야 하는데.
위의 그림처럼 푸른 선이 생길 때까지 조절하면 된다.
컨텐츠를 표시하는 방법은 TextView의 수정 기능을 잠그는 방법과, TableView를 수정하는 방법 두 가지가 있다.
강의에선 TableView에 익숙해 지기 위해 TableView를 수정해 사용한다.
라이브러리에서 TableView를 선택한다.
하단은 Tool Bar에 맞추고, 상단은 화면 상단 전체를 채우도록 조절한다.
이는 iOS의 Navigation Bar가 위처럼 유동적으로 변하기 때문으로,
상단 전체가 아닌 Navigation Bar 아래로 설정하면 애니메이션이 반영되지 않아 부자연스럽기 때문이다.
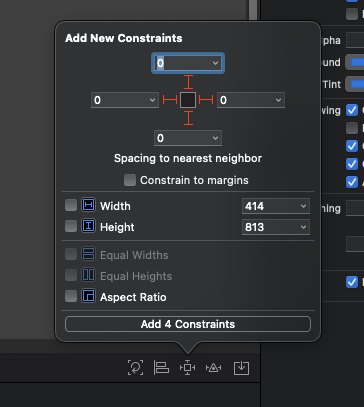
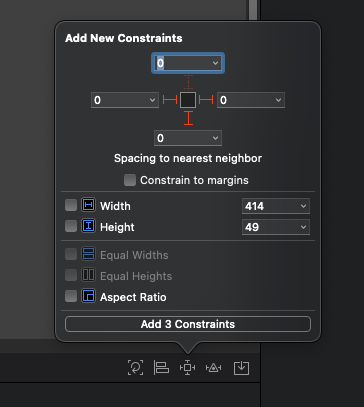
이후, Tool Bar는 상단을 제외한 3면에, Table View는 4면에 제약을 추가한다.


라이브러리에서 Table View Cell을 찾아 추가한다.
Table View Controller를 Scene으로 추가한다면 TableView와 Table View Cell까지 자동으로 작성되지만,
그럴 경우 하단의 Tool Bar를 추가할 수 없거나 제약이 생긴다.
우리가 사용할 셀은 컨텐츠, 날짜 두 개이다.
Attribute Indicator의 Prototype Cells를 2로 변경하자.
셀들을 선택하고 Attrubute Insicator에서 Style을 'Basic'으로 변경한다.
이후 셀들을 디자인하고, Identifier를 작성하는 것을 잊지 말자.
첫 번째 셀은 memoCell로, 두 번째 셀은 dateCell로 작성했다.
데이터 연결
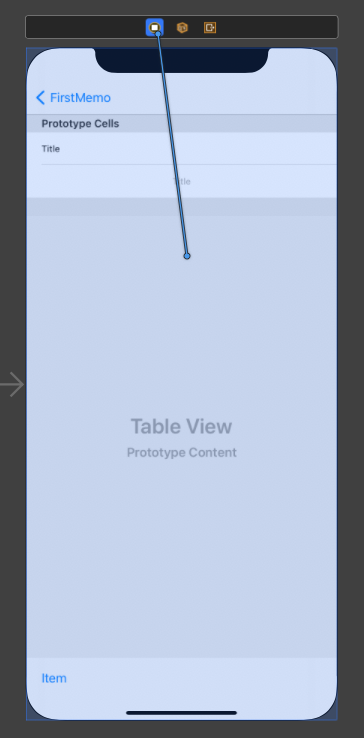
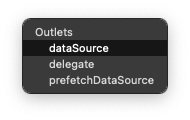

Table View를 선택하고 Outlet에 연결한다. 이때 효시되는 팝업창에서는 dataSource를 선택한다.
이후 TableView를 우클릭하면 세 번째 사진과 같은 창이 열린다.
이는 Connection Pannel로 해당 요소에 연결될 수 있는 옵션들을 표시해 준다.
우측의 점들을 Connection Well이라고 하며, 연결되면 흰 점으로, 연결되지 않는 경우 빈 점으로 표시한다.
Data Source 연결은 두 단계로 구현한다.
첫 번째로 다음과 같이 해당 ViewController가 UITableViewDataSource를 채용해야 한다.
클래스 밖에 익스텐션을 구현한다.
extension ViewerViewController: UITableViewDataSource {
    func tableView(_ tableView: UITableView, numberOfRowsInSection section: Int) -> Int {
        <code>
    }

    func tableView(_ tableView: UITableView, cellForRowAt indexPath: IndexPath) -> UITableViewCell {
        <code>
    }


}
UITableViewDataSource 프로토콜의 채용 조건은
TableView가 표시할 셀의 수와 어떤 셀을 표시할지에 필요한 두 메소드이다.
우리가 표시할 셀의 수는 두 개이므로 2를 전달한다.
extension ViewerViewController: UITableViewDataSource {
    func tableView(_ tableView: UITableView, numberOfRowsInSection section: Int) -> Int {
        return 2
    }

    func tableView(_ tableView: UITableView, cellForRowAt indexPath: IndexPath) -> UITableViewCell {
        <#code#>
    }


}
두 번째 메서드는 indexPath를 받아 출력할 셀을 반환한다.
따라서 indexPath에 따라 분기하도록 switch문을 통해 구현한다.
extension ViewerViewController: UITableViewDataSource {
    func tableView(_ tableView: UITableView, numberOfRowsInSection section: Int) -> Int {
        return 2
    }

    func tableView(_ tableView: UITableView, cellForRowAt indexPath: IndexPath) -> UITableViewCell {
        switch indexPath.row {
        case 0:
            let cell = tableView.dequeueReusableCell(withIdentifier: "memoCell", for: indexPath)
            return cell
        case 1:
            let cell = tableView.dequeueReusableCell(withIdentifier: "dateCell", for: indexPath)
            return cell
        default:
            fatalError()
        }
    }


}
indexPath를 row로 접근하면 순차적으로 접근할 수 있다.
첫 번째 index를 통해 컨텐츠를 출력하고, 두 번째 index를 통해 날짜를 출력한다.
추후 데이터의 구조가 바뀌어 2보다 큰 indexPath가 생기는 경우 충돌을 유도했다.
데이터 전달
ViewViewerController가 해당하는 셀에 해당 데이터를 전달할수 있도록 연결했지만,
아직 실질적인 데이터를 전달하진 않는다.
var data: Memo?데이터를 전달받기 위해서 Viewer의 클래스에 변수를 하나 생성한다.
자료형은 Memo이고, 빈 상태로 존재할 수 있도록 Optional의 형태를 가지고 있다.
데이터를 전달하기 위해선 실질적으로 Viewer의 표시할 데이터를 결정하는 메인 TableViewController에서 작업이 선행되어야 한다.
override func prepare(for segue: UIStoryboardSegue, sender: Any?) {
        <code>
    }
메인 TableViewController의 클래스 파일에서 prepare 메소드를 선언한다.
해당 메소드는 segue(세그)에서 화면이 전환되기 직전 실행되는 메소드이다.
Viewer의 씬은 메인 화면의 셀과 세그로 연결되어 있다.
따라서 셀이 sender이고, 해당 sender는 prepare의 파라미터인 sender로 전달된다.
따라서 해당 sender를 통해 몇 번째 셀이 선택됐는지 계산해야 한다.
override func prepare(for segue: UIStoryboardSegue, sender: Any?) {
        if let cell = sender as? UITableViewCell, let indexPath = tableView.indexPath(for: cell){

        }
    }
이때 sender의 형식이 optional Any이기 때문에 사용하기 위해선 타입캐스팅이 필요하다.
UITableViewCell로 타입캐스팅을 하고 나서야 indexPath에 접근할 수 있다.
override func prepare(for segue: UIStoryboardSegue, sender: Any?) {
        if let cell = sender as? UITableViewCell, let indexPath = tableView.indexPath(for: cell){
            if let destination = segue.destination as? ViewerViewController {

            }
        }
    }
그리고 첫 번째 파라미터인 segue를 통해 현재 실행 중인 씬과 실행될 씬에 접근할 수 있다.
현재 실행중인 씬은 Source, 실행 될 씬을 Destination이라고 부른다.
override func prepare(for segue: UIStoryboardSegue, sender: Any?) {
        if let cell = sender as? UITableViewCell, let indexPath = tableView.indexPath(for: cell){
            if let destination = segue.destination as? ViewerViewController {
                destination.data = Memo.dummayData[indexPath.row]
            }
        }
    }
destination을 통해 Viewer에 접근해 이미 생성해 놓은 저장용 data 변수에 dummyData를 전달한다.
extension ViewerViewController: UITableViewDataSource {
    func tableView(_ tableView: UITableView, numberOfRowsInSection section: Int) -> Int {
        return 2
    }

    func tableView(_ tableView: UITableView, cellForRowAt indexPath: IndexPath) -> UITableViewCell {
        switch indexPath.row {
        case 0:
            let cell = tableView.dequeueReusableCell(withIdentifier: "memoCell", for: indexPath)

            cell.textLabel?.text = data?.content

            return cell
        case 1:
            let cell = tableView.dequeueReusableCell(withIdentifier: "dateCell", for: indexPath)
            return cell
        default:
            fatalError()
        }
    }


}
첫 번째 셀에는 전달받은 더미 데이터의 content를 전달한다.
두 번째 셀에 날짜를 전달하기 전에 기존의 메인 화면에서 적용했듯 표시 형태를 바꿔 줄 필요가 있다.
해당 부분은 메인 클래스에서 재사용하기로 한다.
extension ViewerViewController: UITableViewDataSource {
    func tableView(_ tableView: UITableView, numberOfRowsInSection section: Int) -> Int {
        return 2
    }

    func tableView(_ tableView: UITableView, cellForRowAt indexPath: IndexPath) -> UITableViewCell {
        switch indexPath.row {
        case 0:
            let cell = tableView.dequeueReusableCell(withIdentifier: "memoCell", for: indexPath)

            cell.textLabel?.text = data?.content

            return cell
        case 1:
            let cell = tableView.dequeueReusableCell(withIdentifier: "dateCell", for: indexPath)

            cell.textLabel?.text = reform.string(for: data?.date)

            return cell
        default:
            fatalError()
        }
    }


}
변환된 값을 받을 속성인 text가 Optional String 형식이기 때문에 reform도 string 속성을 적용해 형태를 바꿔 준다.
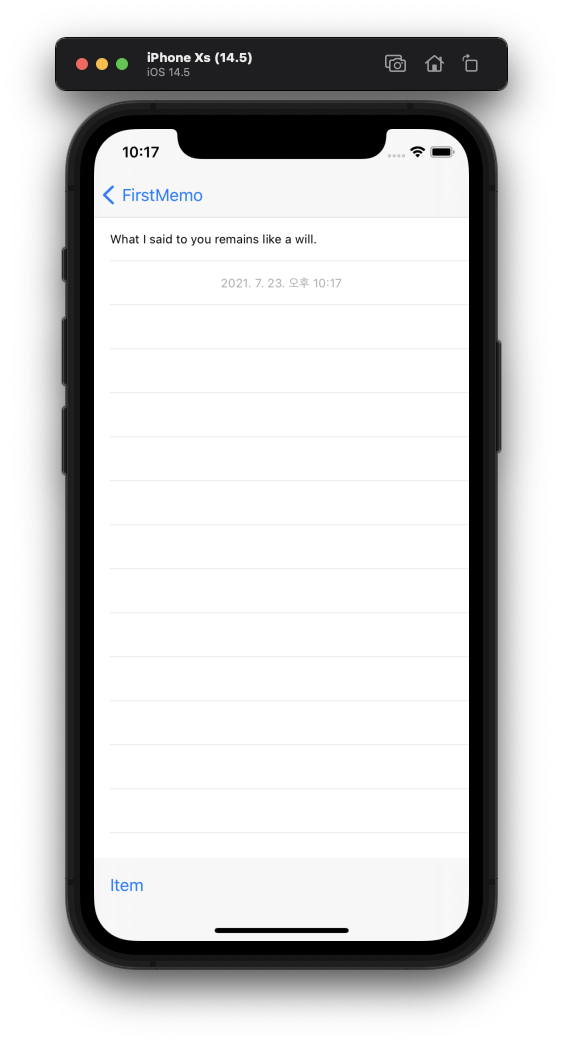
연결된 데이터가 Viewer에 잘 표시되는 것을 확인할 수 있다.
셀 강조, 줄 바꿈
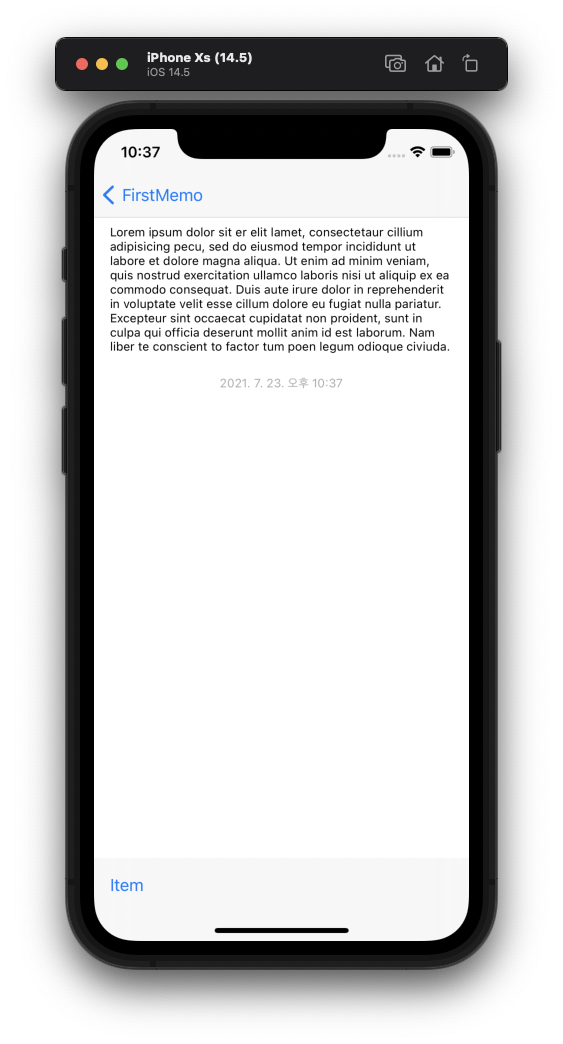
지금까지 완성된 Viewer의 모습이다.
컨텐츠가 표시되는 부분이 선으로 구분되어 있는 Separator를 없애고,
셀을 선택하는 경우의 반응을 없애보도록 한다.
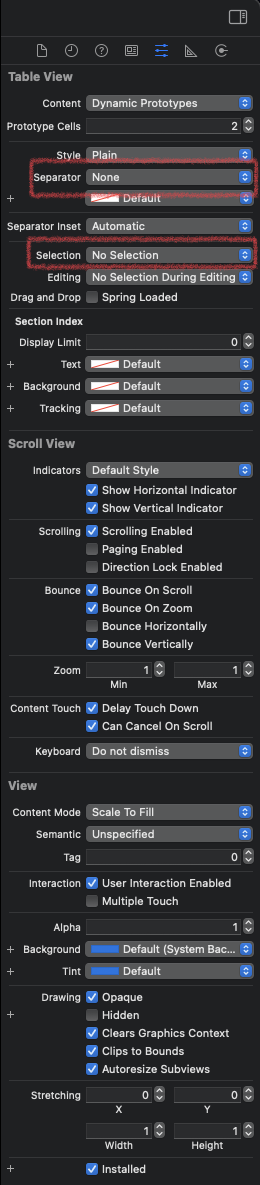
storyboard의 TableView를 선택하고 Attribute Inspector에서 Separator를 'None'으로,
Selection를 'No Selection'으로 변경한다.
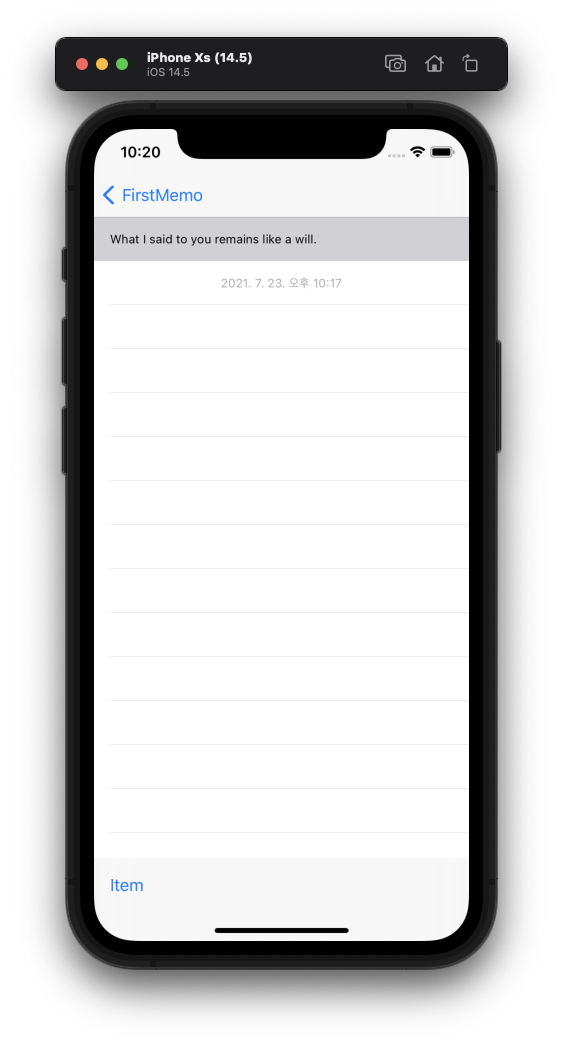
또한, TableView는 셀이 Highlight 되어있는 경우에도 셀을 강조한다.
이 부분은 셀의 Attribute Inspector에서 Selection을 'None'으로 바꾸는 것으로 해결한다.
셀이 두 개이므로 둘 다 빼놓지 않고 작업해야 함에 주의하자.
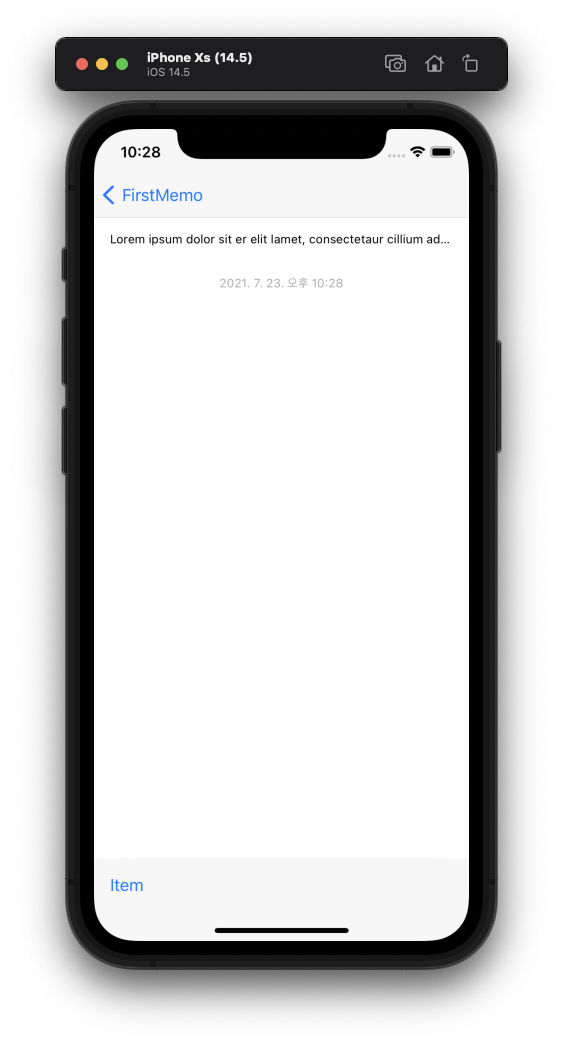
또한 메모의 길이가 길 경우 뷰어에서 한 줄로만 표현하고, 축약해 출력하는 것을 확인할 수 있다.
셀은 표시되는 내용에 맞게 사이즈를 자동으로 조절할 수 있도록 할 수 있고, 이를 Self Sizing Cell이라고 부른다.
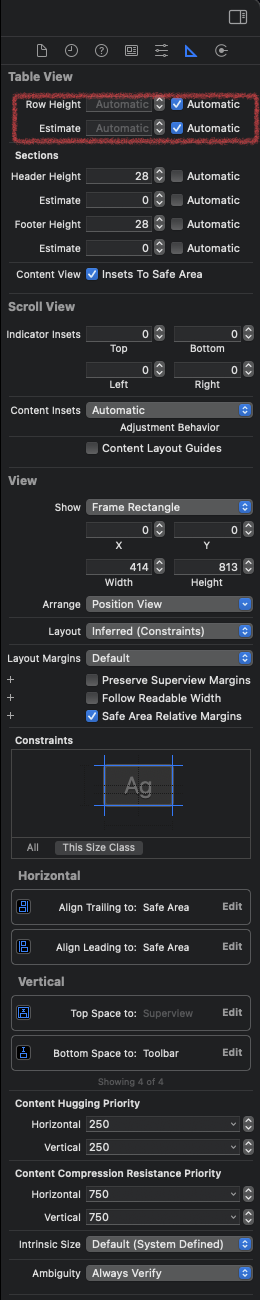
TableView를 선택하고 Size Inspector를 확인하면
Row Height와 Estimate가 'Automatic'으로 설정되어 있는 것을 확인 할 수 있다.
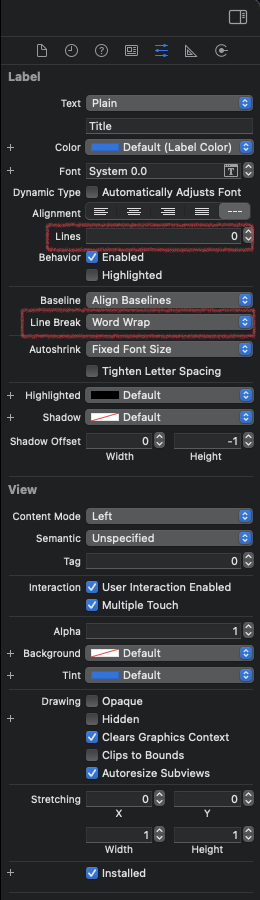
이후엔 컨텐츠를 표시할 셀의 Label을 선택하고, Attribute Inspector의 Lines를 '0'으로, Line Break을 'Word Wrap'으로 수정한다.
Word Wrap은 줄 바꿈을 단어 단위로 하게 하는 옵션이지만 영어에 한해서 작동을 보장한다.
이후 시뮬레이터를 확인하면 제법 메모 앱 다운 모습으로 컨텐츠를 표시하고 있는 것을 확인할 수 있다.


