Adaptive Segue

Segue는 Storyboard에서 두 Scene을 연결하고, 생성과 전환을 처리한다.
Segue로 연결된 두 Scene은 각각 Source와 Destination의 관계가 형성된다.
둘을 실전으로 연결되고, 화살표는 흐름을 표현한다.
그리고 Segue의 중앙에는 종류를 나타내는 아이콘이 표시된다.
Segue를 연결할 때는 Button이나 Cell처럼 Tab으로 선택할 수 있는 Control과 연결한다.
이러한 Control을 Segue Trigger라고 부른다.
Trigger에서 이벤트가 발생하면 Transition Seguence가 시작된다.

첫 번째로 shouldPerformSegue 메서드가 호출된다.
해당 메소드에서 true를 반환하면 Segue 객체가 생성되고, Destination View Controller가 생성된다.
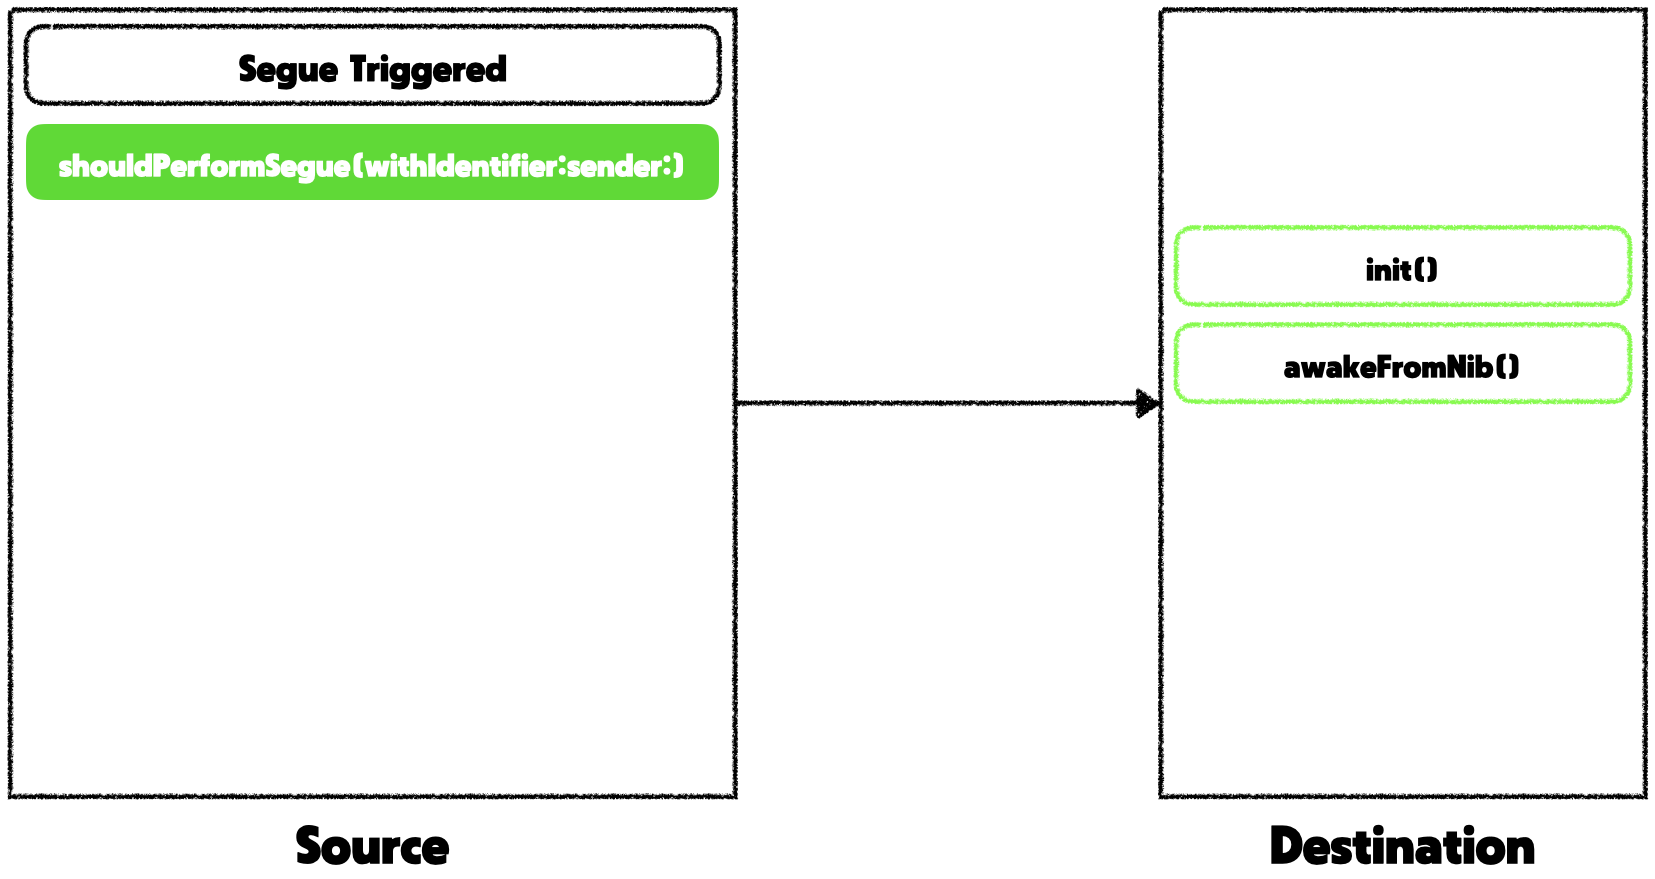
Destination View Controller에서는 생성자와 awakeFromNib 메서드를 호출한다.

이어서 Source에서 prepare 메소드를 호출한다.
해당 메소드는 실제 화면 전환을 진행하기 전에 필요한 준비작업을 구현하거나 데이터를 전달할 때 사용한다.

prepare 메소드가 값을 반환하면 전환이 시작되고, Sestination View Controller가 화면에 표시된다.
Cocoa Touch Framework는 4가지의 Adaptive Segue를 제공한다.
'Adaptive'인 이유는 Context에 가장 적합한 Transition을 실행하기 때문이다.
모든 Segue는 Modal 방식이 기본이지만 어떤 Container에 Embed 되었는지에 따라 표시방식이 달라진다.
기본 Segue가 원하는 Transition을 제공하지 않는 경우 Custom Segue를 직접 구현한다.
이 때는 UIStoryboardSegue를 SubClassing 해서 구현한다.
앞서 소개한 모든 Segue는 Destination으로 이동하는 Transition을 처리할 수 있지만, 돌아가진 못한다.
Destination View Controller에서 Source로 Segue를 연결하면 이전으로 돌아가는 것이 아닌 새로운 화면이 생성된다.
돌아가는 것은 Unwind Segue로 구현한다.
Unwind Segue는 다른 Segue와 구현 방식이 다르다.

Unwind Segue는 Control을 Exit에 연결하고,
대상 View Controller에서 특별한 메서드를 구현해야 한다.
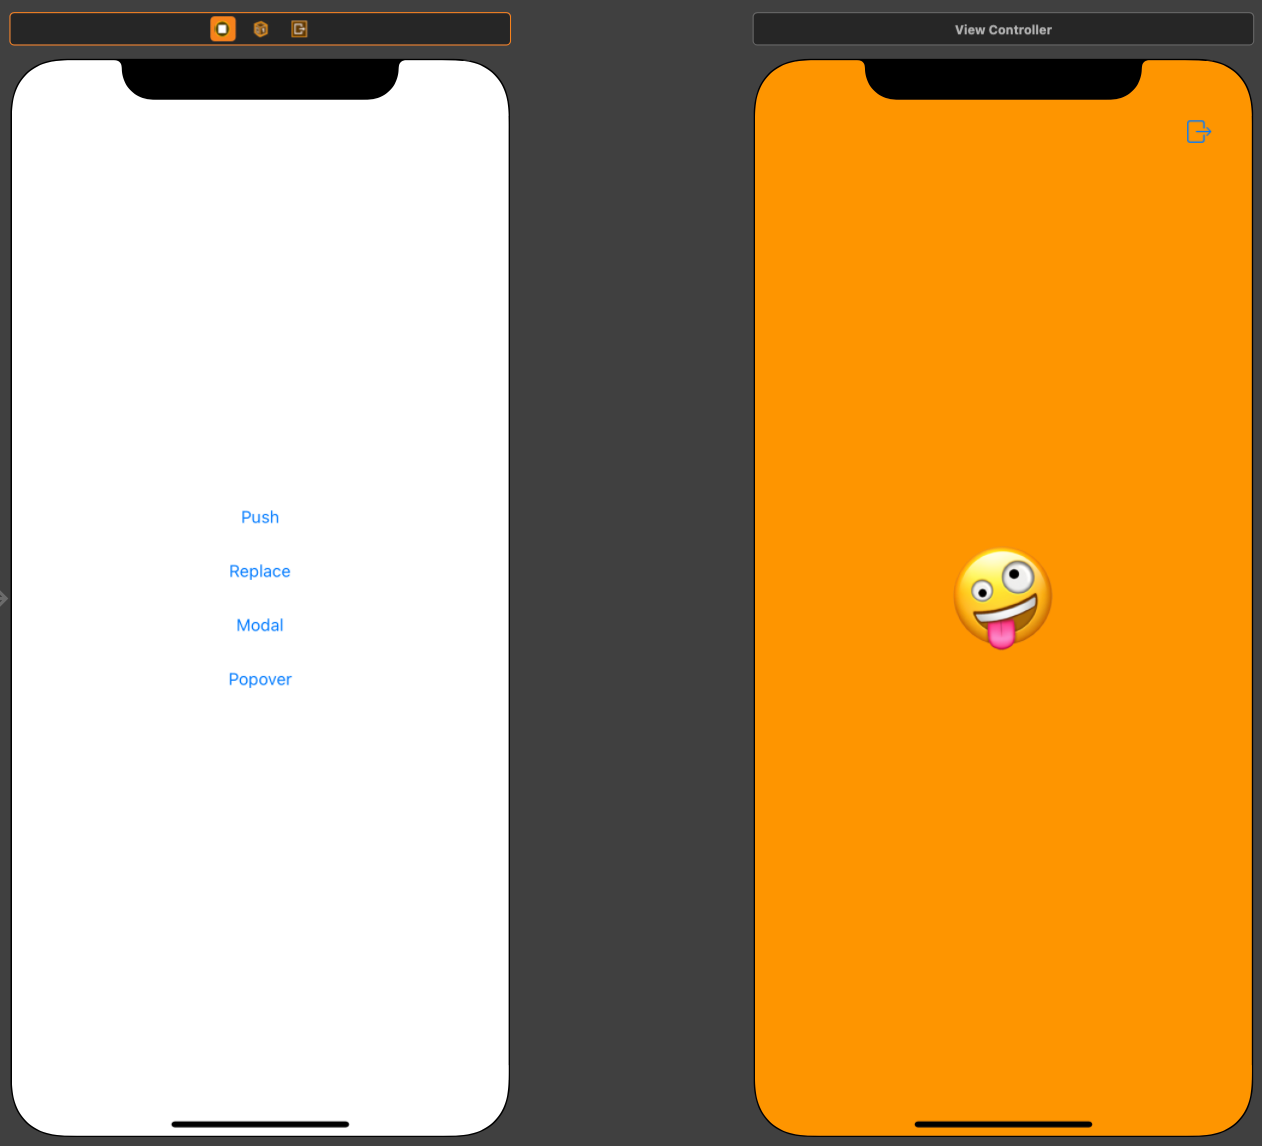
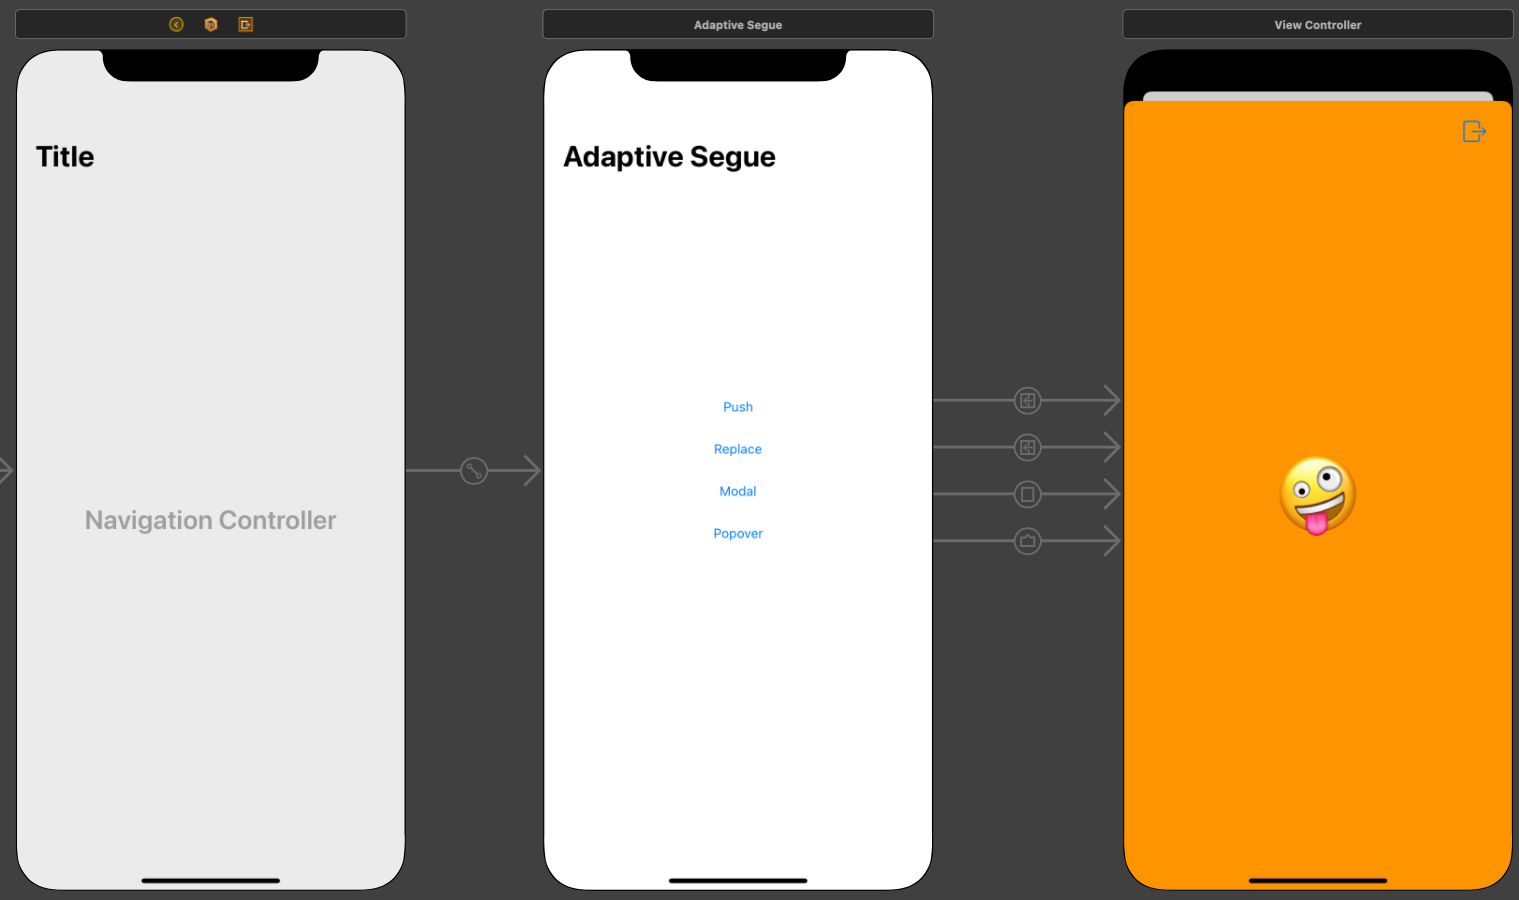
실습에 사용할 Scene은 위와 같다.
4개의 Button에 Adaptive Segue를 종류별로 하나씩 연결하고,
표현 방식을 비교해 본다.
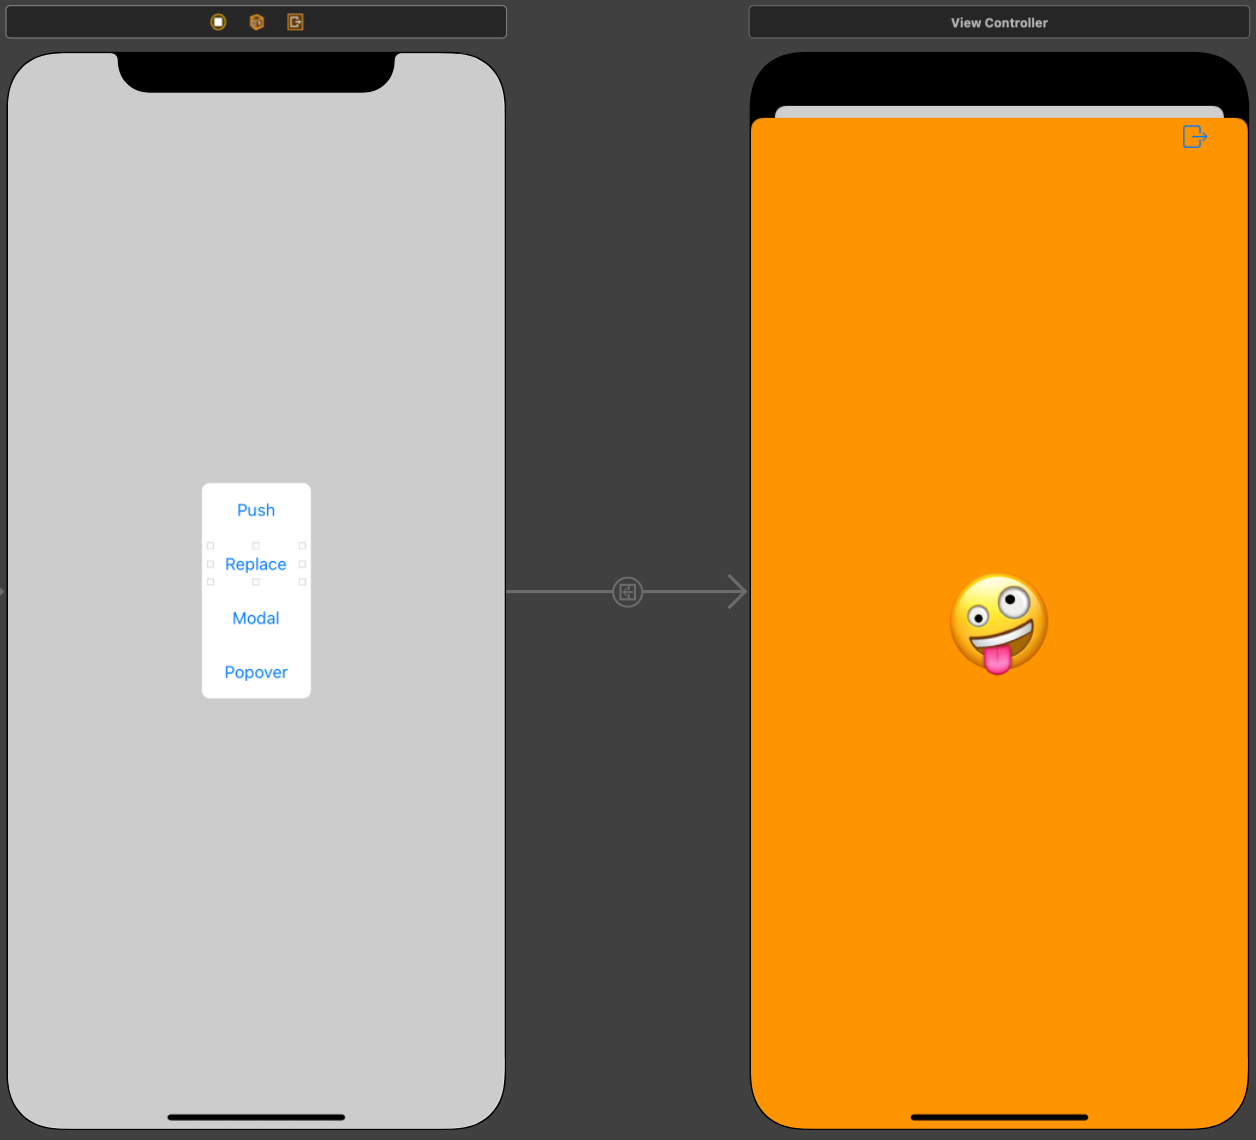
첫 번째 버튼을 Show 방식으로 연결하면 위와 같이 Segue가 생긴다.
둘은 Push 방식으로 연결되었다.
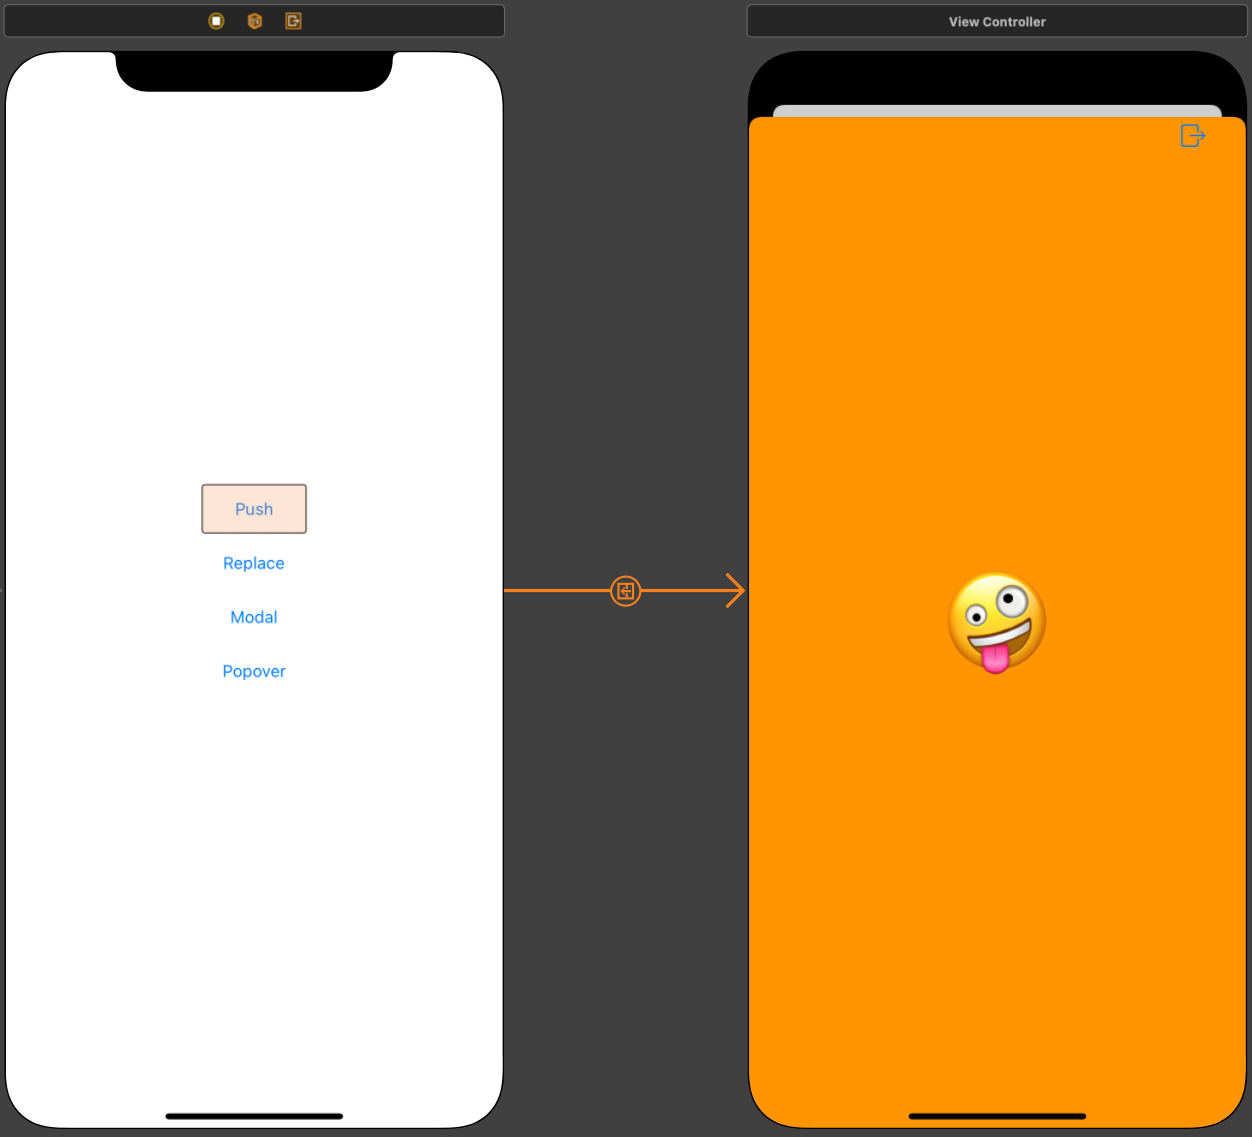
Segue의 아이콘을 선택하면 Segue를 선택할 수 있고, Trigger가 강조된다.
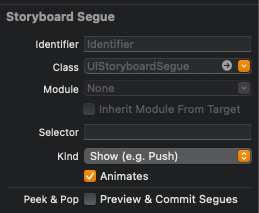
Segue의 Attribute에는 다양한 옵션이 제공된다.
그중 Kind는 Segue의 종류를 변경할 수 있어, Segue를 삭제하지 않고 바로 변경할 수 있다.
Animates 속성을 통해 전환 시 애니메이션 효과 여부를 결정할 수 있다.

두 번째 버튼은 Shoe Detail Segue로 연결했다.
아이폰에서는 Push와 동일하지만 이 둘은 Replace 방식으로 연결되었다.
Replace View Controller는 주로 Split View Controller에서 사용한다.
제공되는 Attribute도 동일하다.
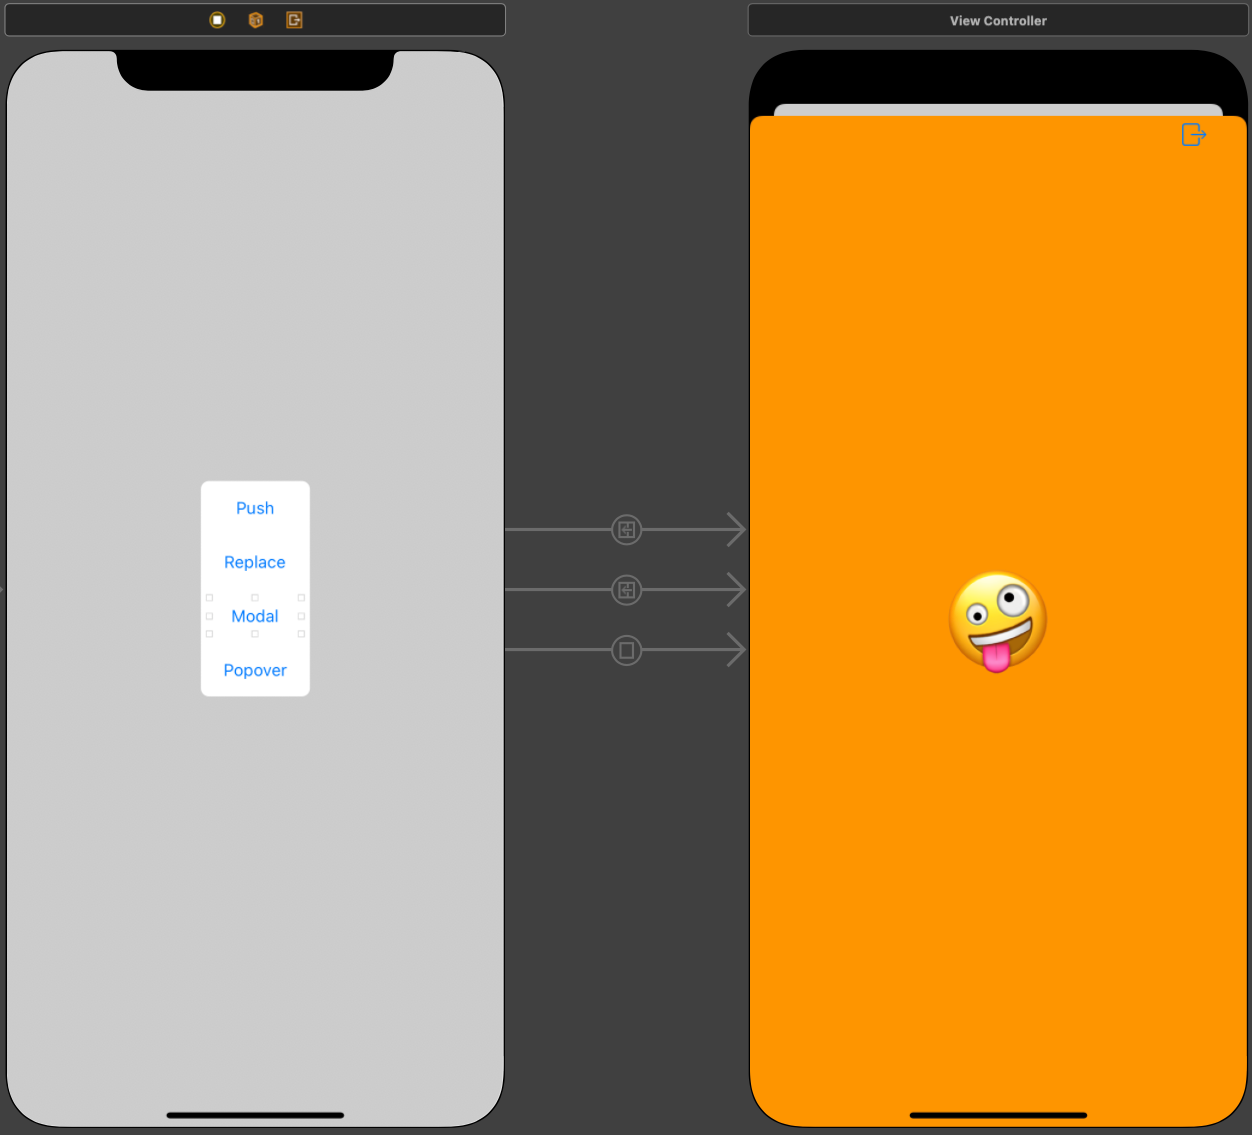
세 번째 버튼은 Present Modally Segue로 연결했다.
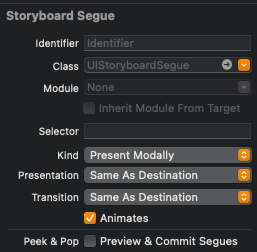
Modal 방식 Segue의 Attribute에는 Presentation과 Transition 속성이 추가되어있다.
두 가지 속성을 통해 새로운 화면을 표시할 방식과 전환 효과 종류를 선택한다.

이번엔 네 번째 버튼을 Present As Popover Segue로 연결한다.
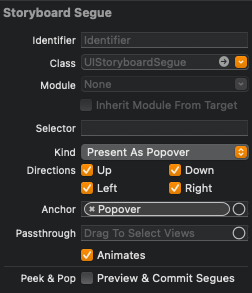
Attribute에는 화살표의 방향을 정하는 속성과 Anchor를 설정하는 속성이 존재한다.
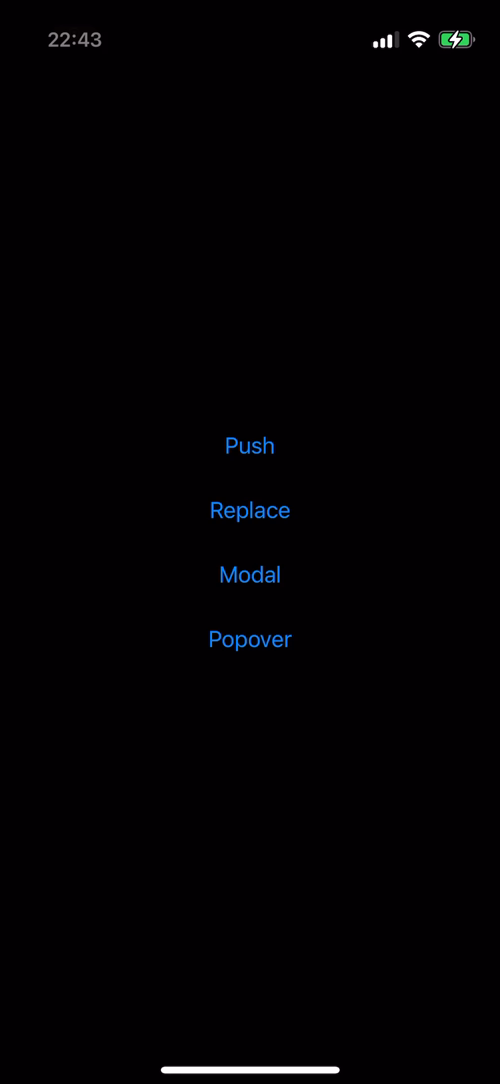
지금은 Navigation Controller나 Split View Controller에 Embed 되지 않은 상태이다.
따라서 Push는 아래에서 위로 새로운 하면을 표시하고, 이는 기본적인 Modal 방식 전환 효과이다.
Push Segue는 Navigation Contoller에 Embed 되어있지 않으면 Modal 방식으로 화면을 표시한다.

Replace 버튼을 선택하면 이전과 같이 Modal 방식으로 표시된다.
Replace Segue는 Splitview Controller에 연결되어있지 않으면 Modal 방식으로 표시한다.
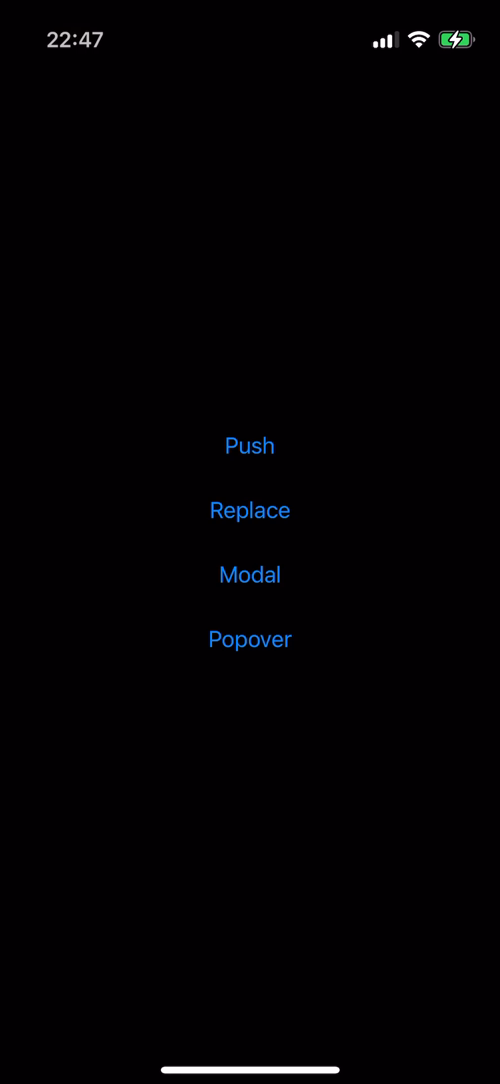
Modal 버튼을 선택하면 이름 그대로 Modal 방식으로 표시한다.
현재는 Push와 Replace Segue가 Modal Segue와 같은 방식으로 동작한다.
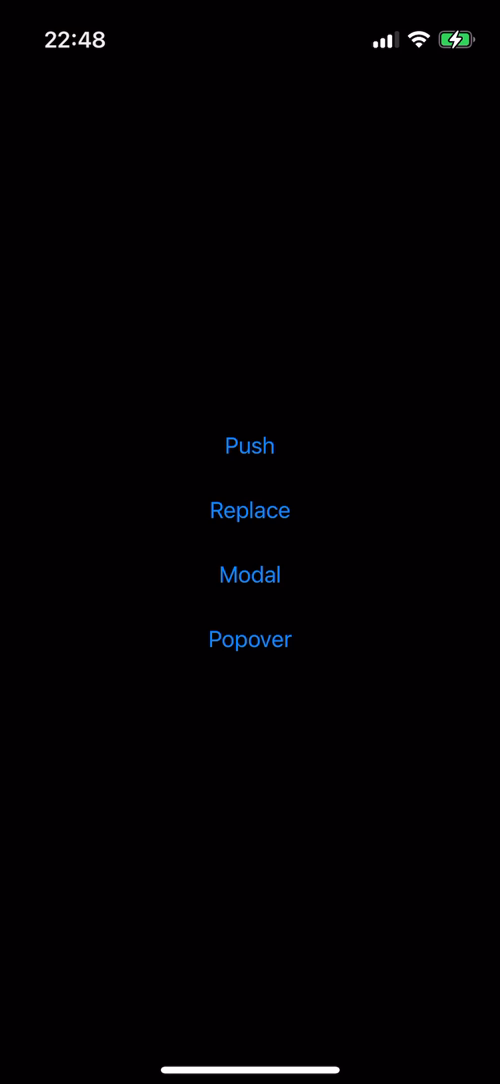
Popover도 마찬가지로 Modal 방식으로 화면을 표시한다.
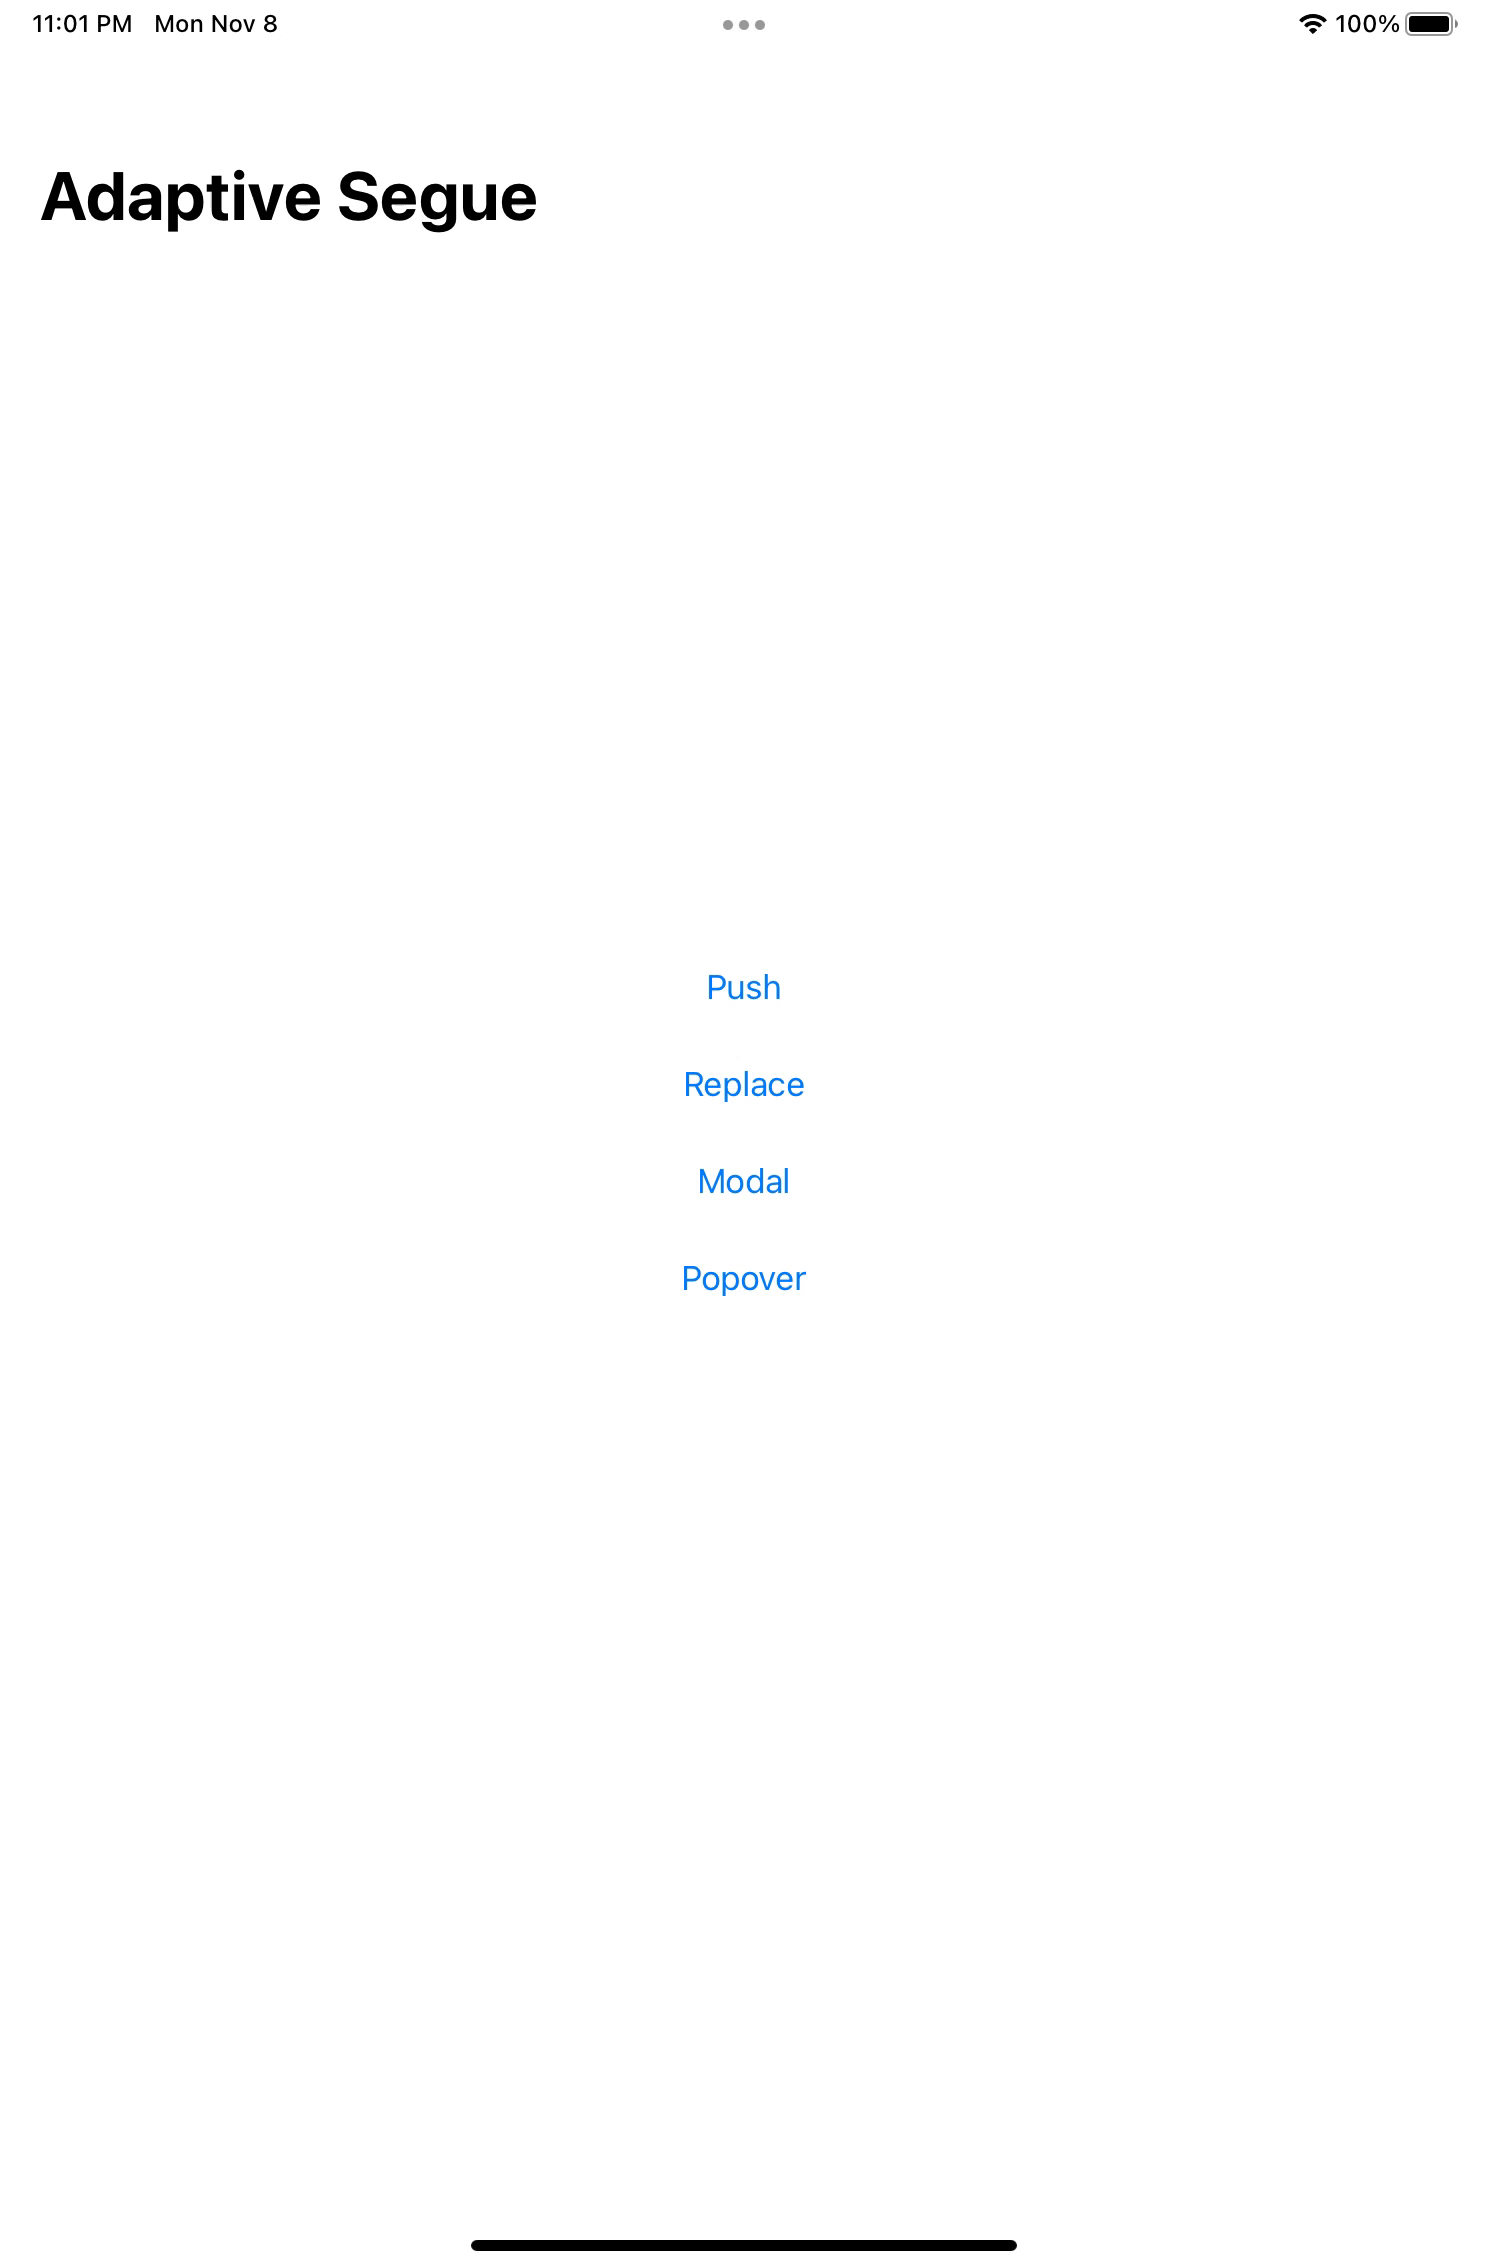
Popover Segue는 iPad에서만 의미가 있는 Segue이다.
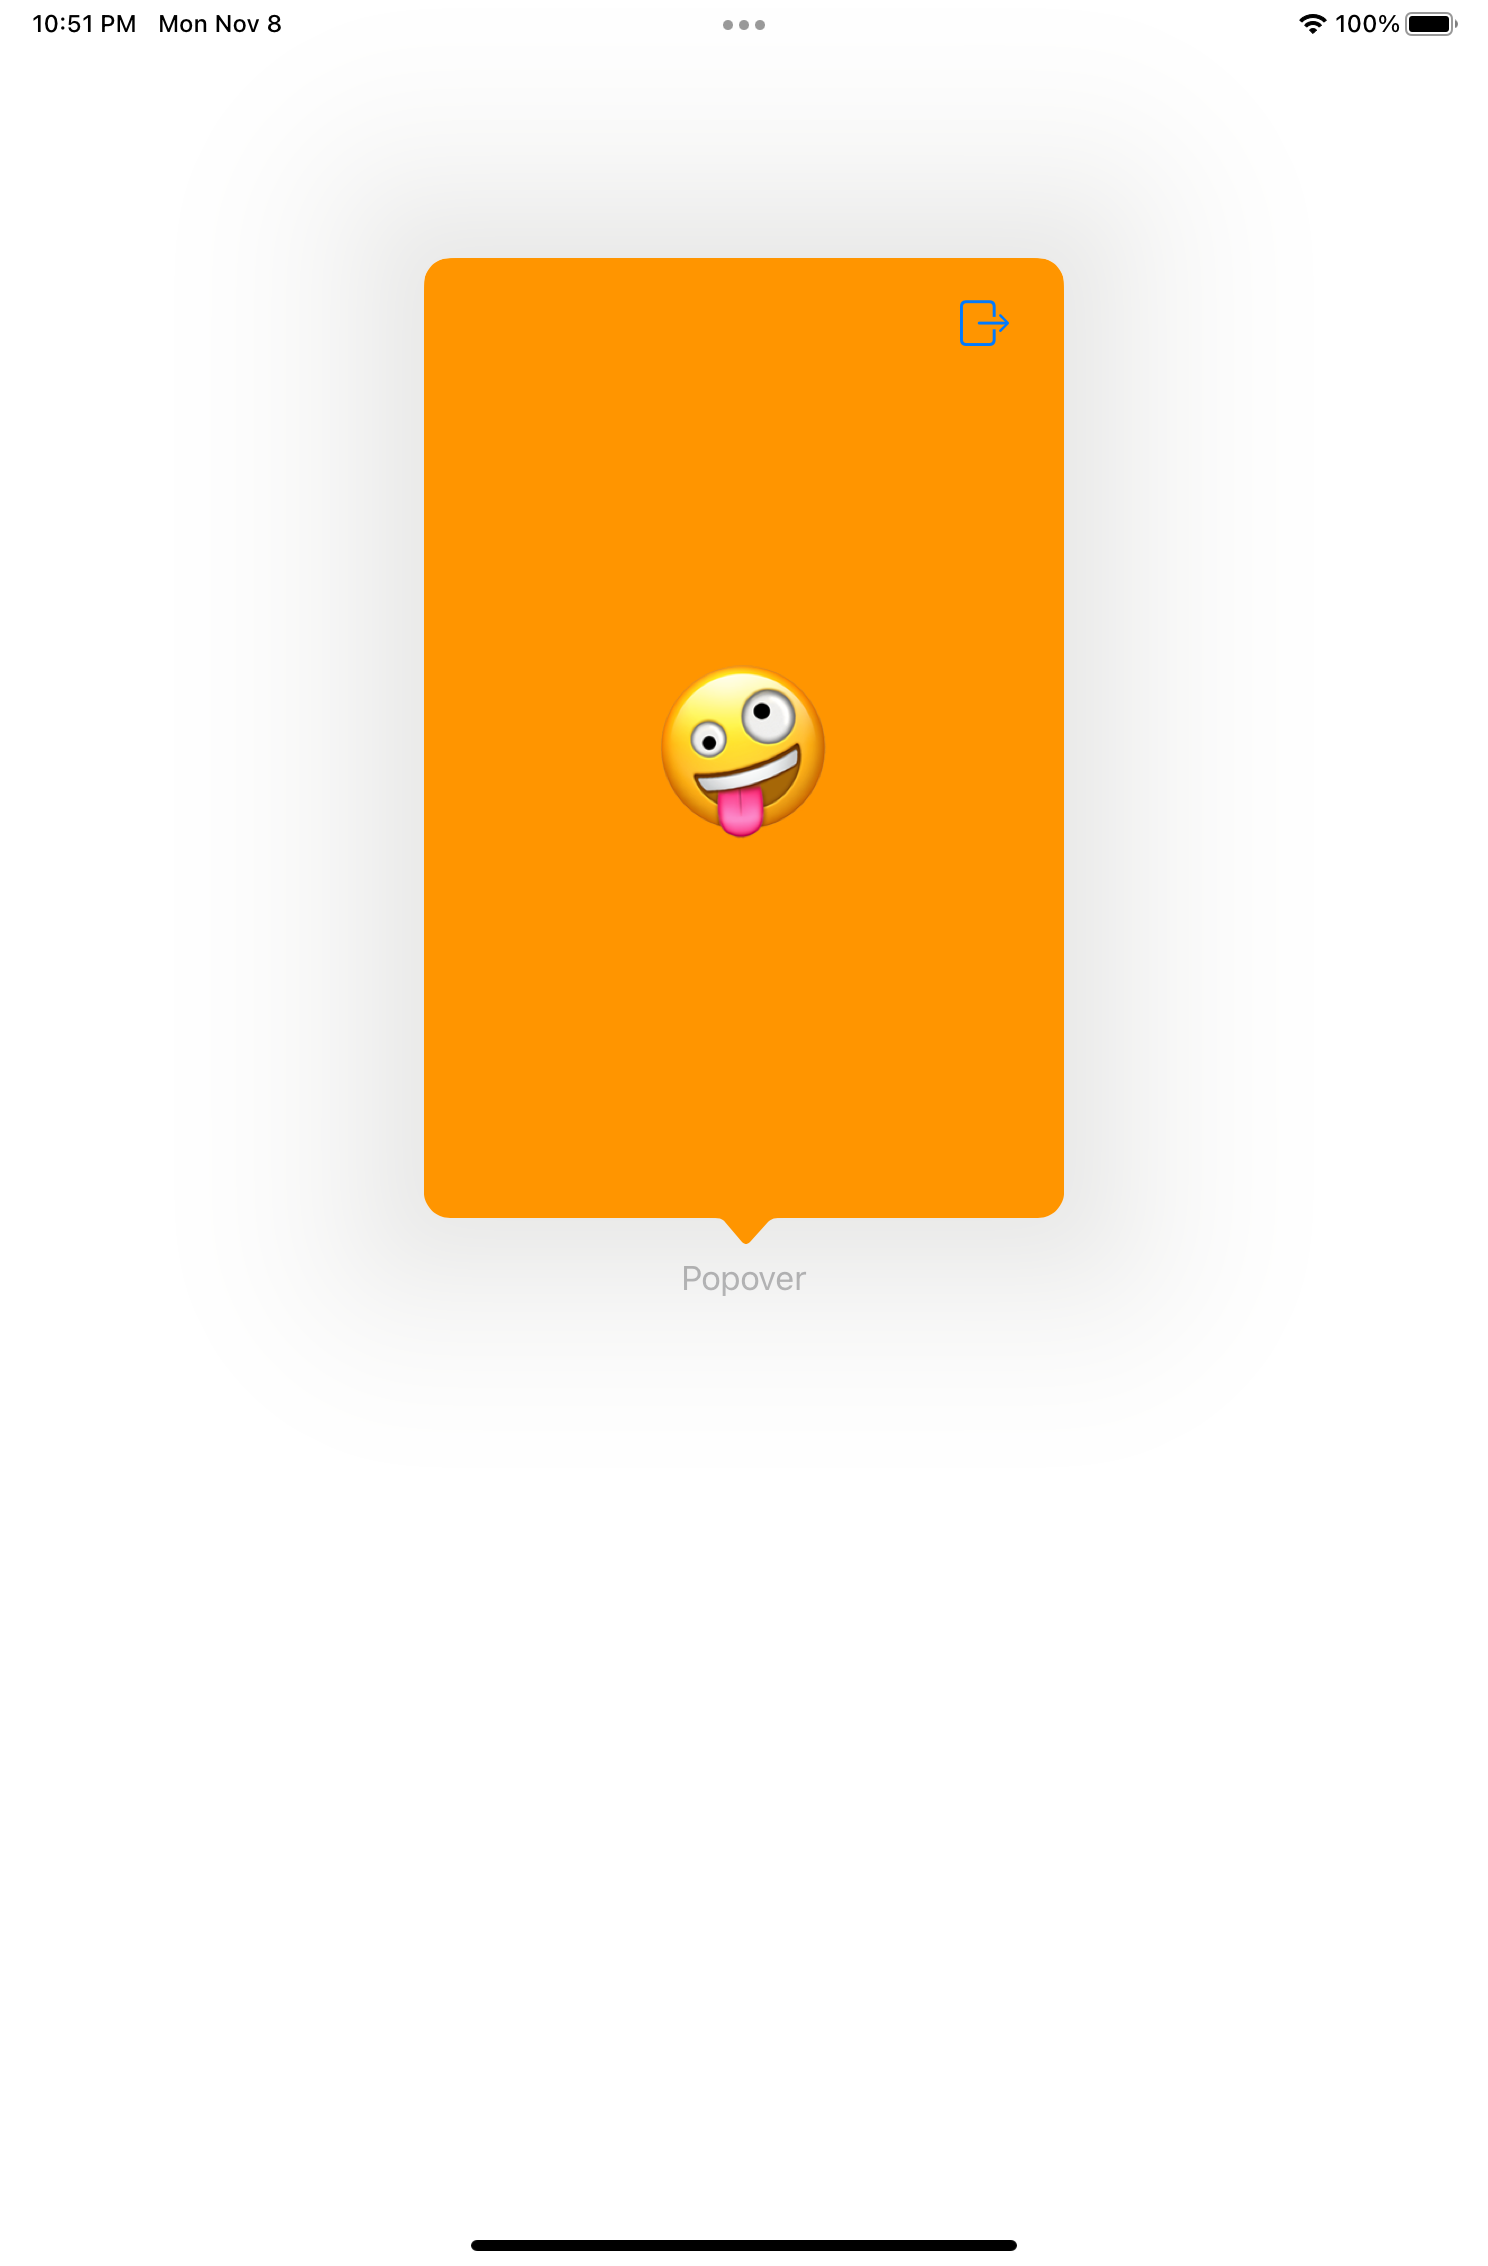
iPad에서는 이렇게 Trigger를 기준으로 말풍선과 같은 모양으로 표시된다.
이번엔 Navigation Controller를 하나 연결했다.
이외엔 전부 동일하다.

하지만 지금 상태에서 Push 버튼을 선택하면 이전과 다른 방식으로 화면을 표시한다.
오른쪽에서 왼쪽으로 새 창이 들어오는 지금의 방식을 Push라고 하고,
Navigation Stack에 실제로 Push 하기도 한다.
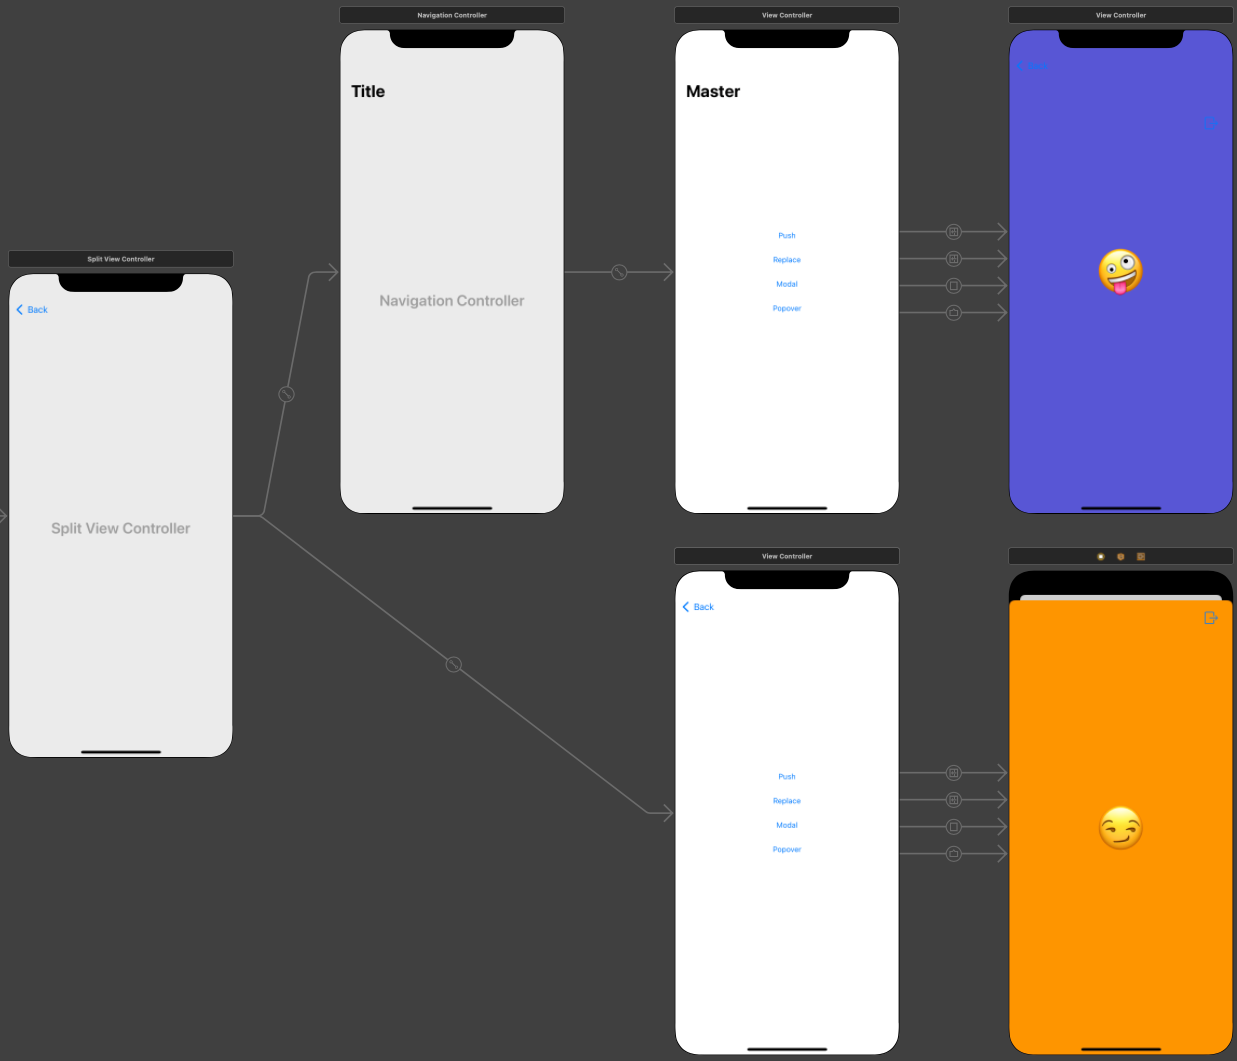
이번엔 Split View Controller를 연결했다.
Primary View Controller는 직전에 Navigation Controller에 연결되어있고,
Secondary View Controller는 Split View Controller에 직접 연결되어있다.

iPhone의 Horizontal Size는 Compact이기 때문에 Secondary View가 먼저 표시된다.
Push과 Replace는 새롭게 Push 방식으로 표시되고, 나머지는 모두 Modal로 표시된다.
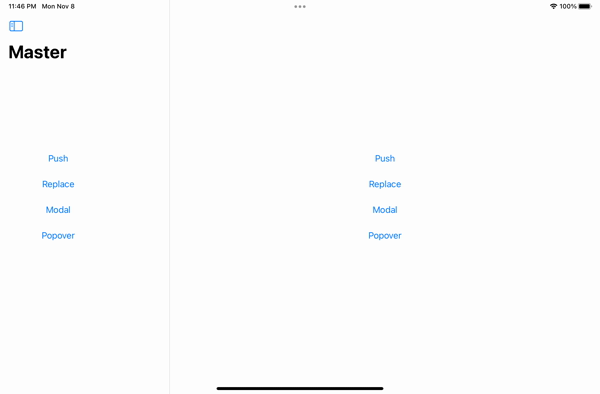
iPad에서는 변화가 더 크다.
Primary View Controller에서는
Push를 자신의 영역에 Push 하고,
Replace는 Secondary View Controller 영역에 Replace 방식으로 표시한다.
Modal은 Modal로, Popover는 popover로 표시한다.
Secondary View Controller에서는
Push를 자신의 영역에 Push 하고,
replace를 사진의 영역에 Replace 방식으로 표시하며,
나머지는 위와 같다.
Primary View Controller의 Replace 버튼에 주목해야 한다.
기존의 Secondary View를 대체해서 표시되기 때문이다.
Split View Controller는 기기의 Horizontal Size에 따라,
Child가 Embed 되어있는 Controller에 따라 결과가 달라지기 때문에 주의해야 한다.
Horizontal Size가 Compact일 때 Navigation Controller에 Embed 되어 있다면 Navigation Stack에 Push 한다.
이외의 경우엔 Modal 방식으로 표시한다.
Horizontal Size가 Regular일 때는 Detail View Controller를 대체한다.
Interacting with Segue

Storyboard에서 Trigger 버튼과 Scene을 연결한다.
이 방법이 Segue를 실행하는 가장 단순하고 쉬운 방법이다.
대부분의 경우 Button이나 Table View Cell처럼 Trigger로 사용할 수 있는 Control과 Destination View Controller를 연결한다.
하지만 Source View Controller와 Destination View Controller를 직접 연결하는 것도 가능하다.
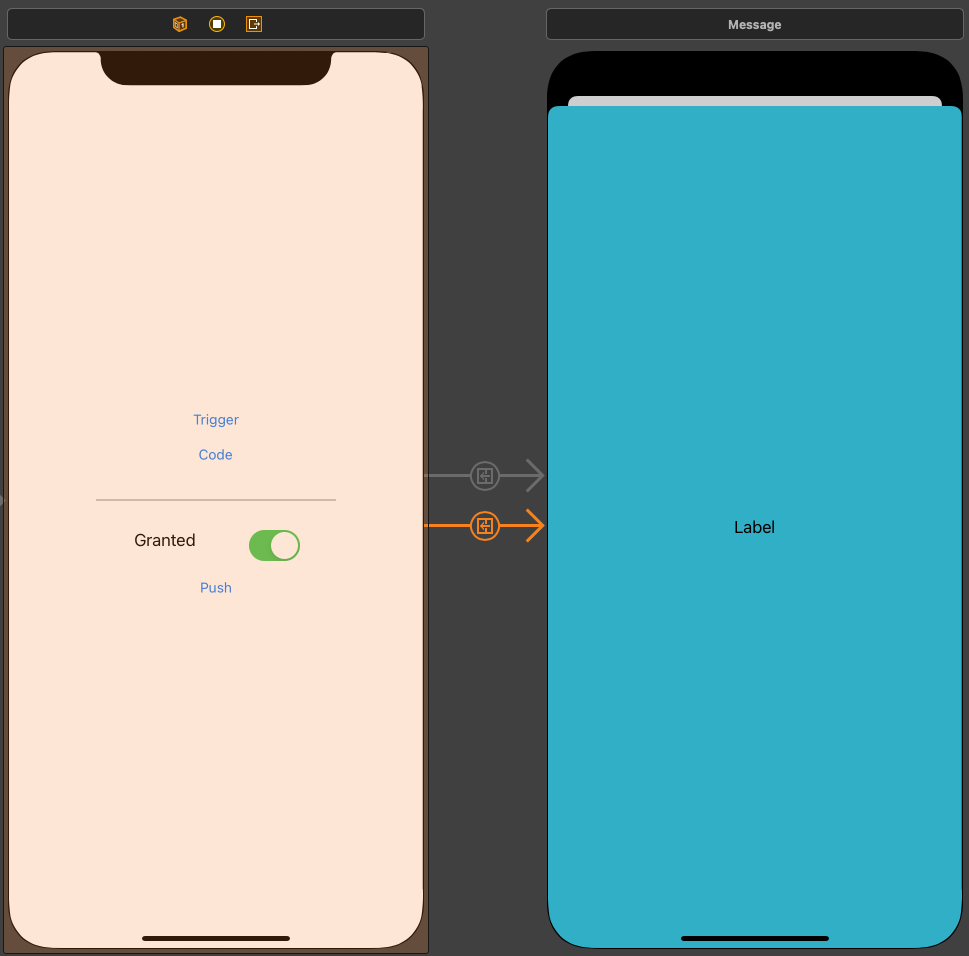
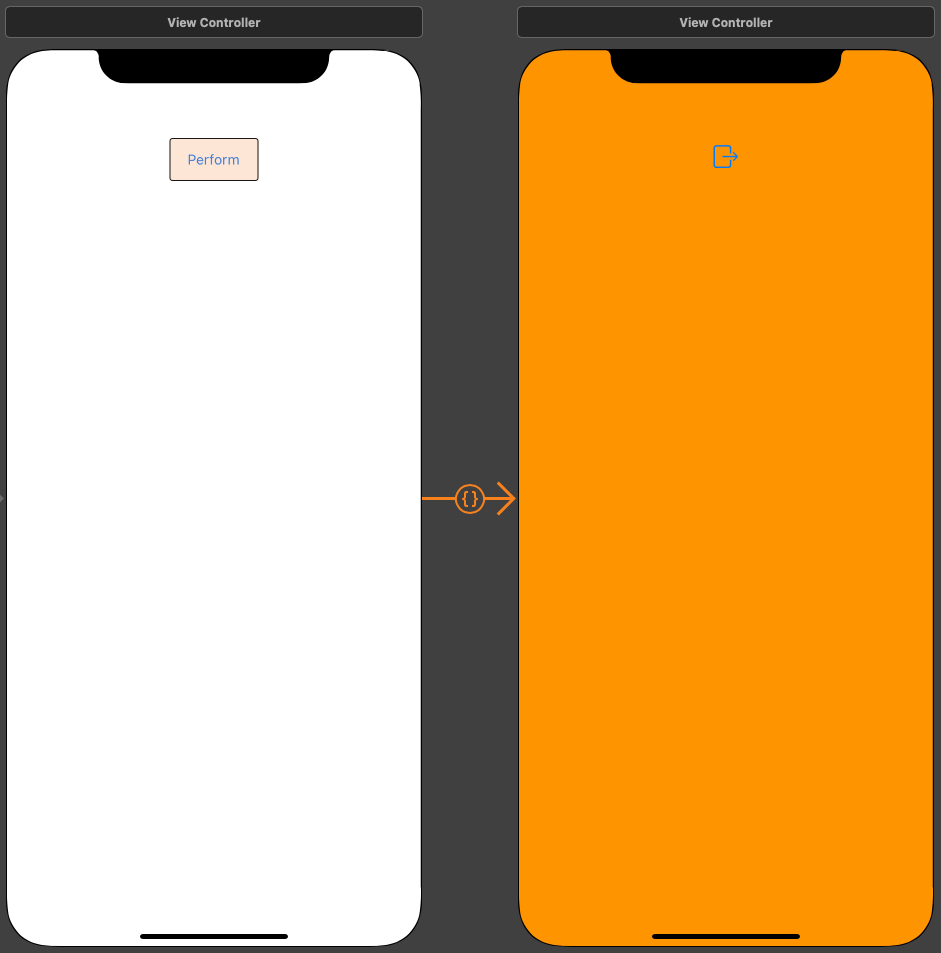
이렇게 Scene Dock의 Files Owner 아이콘을 직접 연결할 수 있다.
하지만 이렇게 된 경우 Segue를 자동으로 실행시키지 못한다.
따라서 Code로 직접 실행해야 한다.
Code로 Segue를 실행할 때는 Segue를 식별할 수 있어야 한다.

단 Segue는 Outlet 등으로 연결할 수 없기 때문에 별도로 식별할 수 있는 이름을 지어줘야 한다.
Segue의 Attrubute에서 Identifier를 설정한다.
Code는 이 이름으로 Seuge를 식별한다.
//
//  PerformSegueViewController.swift
//  Segue Practice
//
//  Created by Martin.Q on 2021/11/09.
//

import UIKit

class PerformSegueViewController: UIViewController {

	@IBAction func CodeAction(_ sender: Any) {
	}


	override func viewDidLoad() {
		super.viewDidLoad()
	}

}
코드에는 Code Button이 Action으로 연결되어있고,
해당 버튼을 선택하면 Segue가 실행되도록 구현한다.
//
//  PerformSegueViewController.swift
//  Segue Practice
//
//  Created by Martin.Q on 2021/11/09.
//

import UIKit

class PerformSegueViewController: UIViewController {

	@IBAction func CodeAction(_ sender: Any) {
		performSegue(withIdentifier: "manual", sender: self)
	}


	override func viewDidLoad() {
		super.viewDidLoad()
	}

}
performSegue 메서드를 사용해 Segue를 실행한다.
첫 번째 파라미터로 Segue의 Identifier를 전달한다.
두 번째 파라미터로 Segue를 실행시킨 Trigger를 전달한다.
주로 Trigger에 따라 Segue의 실행을 제어해야 하는 경우 사용하고, 그렇지 않을 경우 nil을 전달한다.
지금은 self를 전달한다.
해당 메서드는 첫 번째 파라미터로 전달된 문자열로 Segue를 검색한다.
존재한다면 Segue를 실행하고, 존재하지 않는다면 충돌이 발생한다.
따라서 오타에 유의해야 한다.
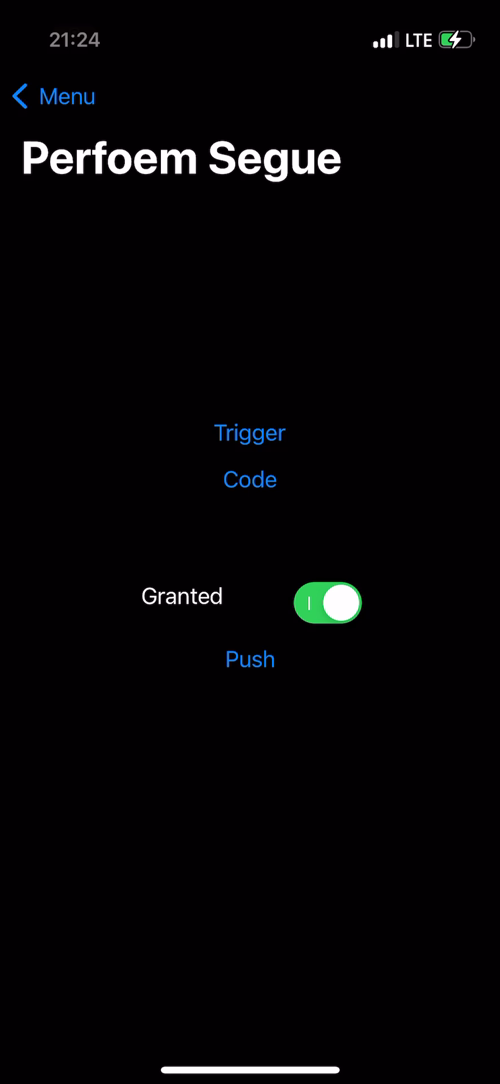
결과는 동일하지만 각각 다른 Segue가 실행된 것이다.
새로 표시되는 Scene에는 Label이 하나 추가되어있다.
해당 Label에 Segue의 Identifier가 표시되도록 구현해 본다.
//
//  PerformSegueViewController.swift
//  Segue Practice
//
//  Created by Martin.Q on 2021/11/09.
//

import UIKit

class PerformSegueViewController: UIViewController {

	@IBAction func CodeAction(_ sender: Any) {
		performSegue(withIdentifier: "manual", sender: self)
	}

	override func prepare(for segue: UIStoryboardSegue, sender: Any?) {

	}


	override func viewDidLoad() {
		super.viewDidLoad()
	}

}
새로 추가한 prepare 메서드는 Segue와 Destination View가 생성되고,
전환이 시작되기 직전에 호출된다.
첫 번째 파라미터엔 Segue 객체가 전달된다.
해당 객체를 통해 Identifier를 확인할 수 있다.
//
//  MessageViewController.swift
//  Segue Practice
//
//  Created by Martin.Q on 2021/11/09.
//

import UIKit

class MessageViewController: UIViewController {

	@IBOutlet weak var label: UILabel!

	var segueID: String?


	override func viewDidLoad() {
		super.viewDidLoad()

		label.text = segueID

	}

}
연결되는 Scene인 Message의 클래스는 위와 같다.
label에 segueID 속성을 저장하는 방식으로 구현되어있다.
//
//  PerformSegueViewController.swift
//  Segue Practice
//
//  Created by Martin.Q on 2021/11/09.
//

import UIKit

class PerformSegueViewController: UIViewController {

	@IBAction func CodeAction(_ sender: Any) {
		performSegue(withIdentifier: "manual", sender: self)
	}

	override func prepare(for segue: UIStoryboardSegue, sender: Any?) {
		if let vc = segue.destination as? MessageViewController {

		}
	}


	override func viewDidLoad() {
		super.viewDidLoad()
	}

}
Destination View에 접근하기 위해 destination 속성을 사용한다.
해당 속성을 통해 접근할 수 있지만 업 캐스팅된 상태이기 때문에
다시 사용할 수 있는 MessageViewController로 다운 캐스팅해 줘야 속성들에 접근할 수 있다.
override func prepare(for segue: UIStoryboardSegue, sender: Any?) {
	if let vc = segue.destination as? MessageViewController {
		vc.segueID = segue.identifier
	}
}
이제 Destination View의 SegueID 속성에 segue의 실제 Identifier를 전달하면 된다.
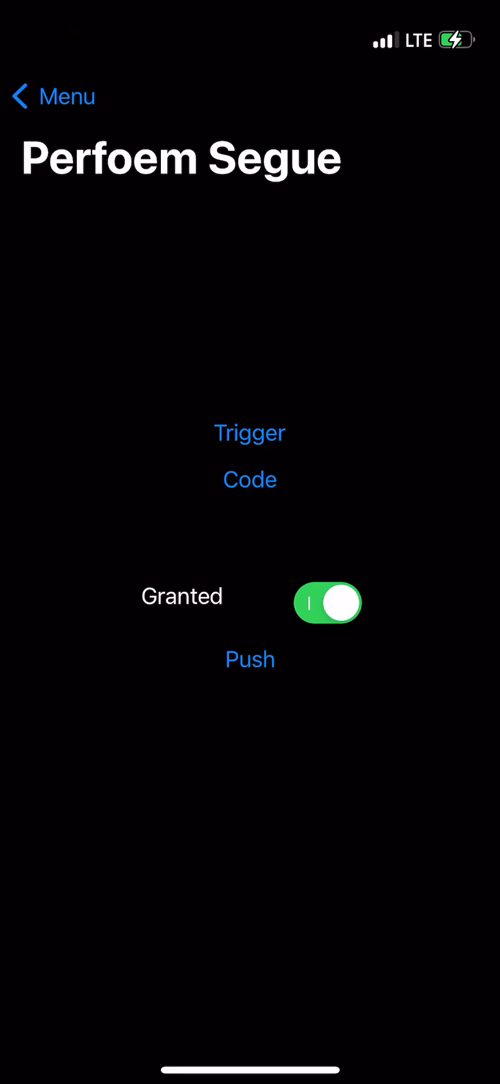
실행한 Segue의 Identifier에 맞게 Label이 업데이트된다.

마지막 Segue도 동일하게 Message Scene과 연결되어있다.
이번엔 Switch의 상태에 따라 Segue의 동작 여부를 조절하도록 구현한다.
//
//  PerformSegueViewController.swift
//  Segue Practice
//
//  Created by Martin.Q on 2021/11/09.
//

import UIKit

class PerformSegueViewController: UIViewController {

	@IBOutlet weak var grantedSwitch: UISwitch!


	@IBAction func CodeAction(_ sender: Any) {
		performSegue(withIdentifier: "manual", sender: self)
	}

	override func prepare(for segue: UIStoryboardSegue, sender: Any?) {
		if let vc = segue.destination as? MessageViewController {
			vc.segueID = segue.identifier
		}
	}

	override func shouldPerformSegue(withIdentifier identifier: String, sender: Any?) -> Bool {

	}


	override func viewDidLoad() {
		super.viewDidLoad()
	}

}
Switch를 코드에 연결하고, shouldPerformSegue 메서드를 추가한다.
해당 메서드는 Trigger가 Segue 실행을 요청하고 실제로 생성되기 전에 호출된다.
해당 메서드에서 true를 반환하면 생성되고, false를 반환하면 생성되지 않기 때문에, Segue의 동작 여부를 결정할 수 있다.
override func shouldPerformSegue(withIdentifier identifier: String, sender: Any?) -> Bool {
	if identifier == "Switchable" {
		return grantedSwitch.isOn
	}
	return true
}
첫 번째 파라미터인 identifier를 통해 Segue를 판단하고,
Switchable인 경우에만 Switch의 상태에 맞게 Segue를 실행하도록 구현했다.

의도한 대로 동작한다.
Unwind Segue
앞서 배웠던 Segue는 Destination으로 이동할 수는 있지만 되돌아올 수는 없다.
되돌아오기 위해선 Unwind Segue가 필요하다.

Unwind Segue는 View Controller와 연결하지 않고, Scene Dock의 Exit과 연결한다.
또한 돌아가려는 대상의 클래스에서 메서드를 구현해 줘야 한다.

Unwind Seuge는 원하는 Scene으로 돌아가는 기능을 구현할 수 있다.
//
//  FirstViewController.swift
//  Segue Practice
//
//  Created by Martin.Q on 2021/11/09.
//

import UIKit

class FirstViewController: UIViewController {
	@IBAction func unwindToFirst(_ unwindSegue: UIStoryboardSegue) {
		print(#function, type(of: unwindSegue.source), "=>", type(of: unwindSegue.destination))
	}

	override func viewDidLoad() {
		super.viewDidLoad()

	}

}
Unwind Segue를 구현하기 위해서는 돌아가려는 대상에 Unwind 메서드를 작성해야 한다.
First Scene의 클래스 파일에서 unwind의 기본형을 찾아 이름을 수정하고,
내부에는 log를 출력하도록 수정했다.

Trigger가 될 Button을 Exit에 연결하고, 방금 생성한 메서드를 선택한다.

그럼 표면상으론 Segue가 보이지 않지만, Document outline의 가장 아래에서 Segue를 확인할 수 있다.
이어서 Forth Scene에서도 같은 방식으로 Unwind Seuge를 연결한다.


둘 다 정상적으로 돌아오는 것을 확인할 수 있다.
서로 다른 Context에 존재해도 Unwind Segue가 알아서 이를 처리한다.
또한 로그에서도 기존의 Controller에서 FisrtViewController로 이동했음을 확인할 수 있다.
Custom Segue
Adaptive Segue와 Unwind Segue는 일반적인 전환을 처리하기에 충분하다.
하지만 직접 원하는 전환을 구현하려면 Custom Segue가 필요하다.
Segue는 UIStroyboardSegue 클래스로 구현되어있다.
Custom Segue는 해당 클래스를 Subclassing 하고, perform 메서드를 overriding 하는 방식으로 구현한다.

일반 Push Segue로 연결되어있는 Segue를 Custom으로 바꾸기 위해 새로운 파일을 추가한다.
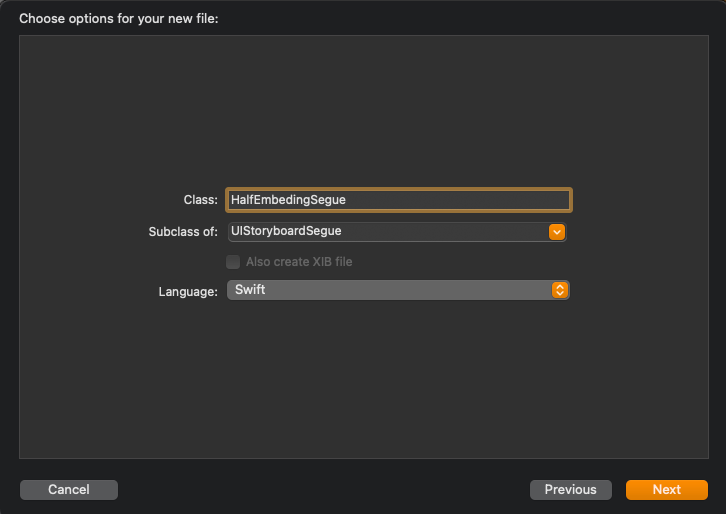
새 파일을 UIStoryboardSegue를 Subclass로 가진다.
//
//  HalfEmbedingSegue.swift
//  Segue Practice
//
//  Created by Martin.Q on 2021/11/09.
//

import UIKit

class HalfEmbedingSegue: UIStoryboardSegue {

	override init(identifier: String?, source: UIViewController, destination: UIViewController) {
		super.init(identifier: identifier, source: source, destination: destination)

	}

}
CustomSegue에서 생성자를 Overriding 할 때는 위의 생성자를 호출한다.
또한 반드시 상위 구현을 호출해야 한다.
//
//  HalfEmbedingSegue.swift
//  Segue Practice
//
//  Created by Martin.Q on 2021/11/09.
//

import UIKit

class HalfEmbedingSegue: UIStoryboardSegue {

	override init(identifier: String?, source: UIViewController, destination: UIViewController) {
		super.init(identifier: identifier, source: source, destination: destination)

	}

	override func perform() {

	}

}
두 번째는 perform 메서드이다.
해당 메서드에서 실제 전환을 구현한다.
Custom Segue를 구현하려면 전환에 관련된 모든 것을 직접 처리해야 한다.
해당 메서드가 호출되는 시점에는 Destination View가 정상적으로 생성되어있어야 한다.
새 화면이 기존의 화면의 절반만 채우도록 구현하고, 애니메이션을 추가한다.
override func perform() {
	var frame = source.view.bounds
	frame.origin.y = frame.height
	frame.size.height = frame.height / 2
}
먼저 Animation의 시작 Frame을 생성한다.
override func perform() {
	var frame = source.view.bounds
	frame.origin.y = frame.height
	frame.size.height = frame.height / 2

	source.view.addSubview(destination.view)
	destination.view.frame = frame
	destination.view.alpha = 0.0
}
새로운 화면을 기존의 View 계층에 추가하고, Alpha를 0.0으로 설정한다.
override func perform() {
	var frame = source.view.bounds
	frame.origin.y = frame.height
	frame.size.height = frame.height / 2

	source.view.addSubview(destination.view)
	destination.view.frame = frame
	destination.view.alpha = 0.0

	source.addChild(destination)
}
이후 Child로 설정한다.
override func perform() {
	var frame = source.view.bounds
	frame.origin.y = frame.height
	frame.size.height = frame.height / 2

	source.view.addSubview(destination.view)
	destination.view.frame = frame
	destination.view.alpha = 0.0

	source.addChild(destination)

	frame.origin.y = source.view.bounds.height / 2

	UIView.animate(withDuration: 0.3) {
		self.destination.view.frame = frame
		self.destination.view.alpha = 1.0
	}
}
frame의 y좌표를 최종 좌표로 설정하고, Animation을 실행한다.
이렇게 Custom Segue의 구현은 완료되었다.
연결된 Segue를 Custom Segue로 바꾸고,

클래스를 새롭게 생성한 클래스로 변경한다.

전환은 적용됐지만, 버튼을 눌러도 사라지지 않는다.

이미 Unwind Segue로 연결되어서 Adaptive Segue로 연결됐다면 어디로 돌아가야 하는지 파악할 수 있지만,
Custom Segue는 그러지 못한다.
Custom Segue로 효시한 화면에서 Unwind Segue를 구현하려면 Custom Unwind Segue를 구현하고,
전환을 직접 처리해야 한다.

이번에도 새 파일을 생성한다.
//
//  HalfEmbedingUnwindSegue.swift
//  Segue Practice
//
//  Created by Martin.Q on 2021/11/09.
//

import UIKit

class HalfEmbedingUnwindSegue: UIStoryboardSegue {
	override func perform() {
		var frame = source.view.frame
		frame = frame.offsetBy(dx: 0, dy: frame.height)
	}

}
먼저 최종 Animation Frame을 생성한다.
override func perform() {
	var frame = source.view.frame
	frame = frame.offsetBy(dx: 0, dy: frame.height)

	UIView.animate(withDuration: 0.3) {
		self.source.view.frame = frame
		self.source.view.alpha = 0.0
	} completion: { finished in
		self.source.view.removeFromSuperview()
		self.source.removeFromParent()
	}

}
completion이 존재하는 animate 메서드를 사용해서
지속 시간과 프레임을 설정하고,
view 계층에서 제거하고 Parent View Controller에서 제거하도록 구현한다.

View Controller의 Connection Pannel에서 Custom Segue를 찾아 버튼에 Action으로 연결하면 끝이다.

정상적으로 사라지는 것을 확인 할 수 있다.
Log
2021.11.10
Custom Unwind Segue 연결 수정
결과 화면 추가
'학습 노트 > iOS (2021)' 카테고리의 다른 글
| 124 ~ 127. UIVIew Animation, Spring Animation & Keyframe Animation, Property Animator and Motion Effect (0) | 2021.11.13 |
|---|---|
| 123. Status Bar and Home Indicator (0) | 2021.11.11 |
| 118. Storyboard & Storyboard Reference (0) | 2021.11.06 |
| 116 ~ 117. Split View Controller and Split View Controller Customizing. (0) | 2021.11.06 |
| 114 ~ 115. Tab Bar Controller and Tab Bar Controller Customizing (0) | 2021.10.30 |


