Target Action
007 ~ 013. View & Window (뷰와 윈도우))
007 ~ 008 강의는 Xcode9 -> Xcode11 마이그레이션 강의로 따로 정리하지 않는다. View & Window Window(윈도우)와 View는 디바이스의 화면과 UI를 출력하고, 이벤트를 처리한다. 모든 앱은 적어도 하나 이상의
chillog.page
이전에 언급했던 UI 중에 Control에 해당하는
Button, Switch, Slider, Page Control, Date Picker, Segmented Control, Stepper의
공통된 기능은 모두 UIControl에 구현되어있다.
Control은 각자 다양한 상태를 가지고 있고, 이를 시각적으로 표현하며, 다양한 이벤트를 전달하는데
이 이벤트를 Target Action이라고 부른다.

컨트롤들은 UIControl.state에 선언되어있는 상태를 사용한다.
상태는 터치 이벤트에 따라 자동으로 전환되며,
초기 상태는 AttributeInspector에서 설정하거나 isEnabled, isSelected, isHighlighted 멤버를 사용한다.
iOS는 컨트롤과 코드를 연결하고 이벤트를 처리하는데 이것이 Target-Actrion Pattern이다.
간단하게는 InterfaceBuilder를 통해 Action으로 연결하기도 하고,
코드에서는 addTarget 메서드를 사용하기도 한다.
func addTarget(_ target: Any?, action: Selector, for controlEvents: UIControl.Event)첫 번째로 메소드가 구현되어 있는 객체를,
두 번째는 실행할 코드가 구현되어 있는 메서드를 Selector로 전달한다.
마지막으로 처리할 이벤트를 전달한다.
static var touchDown: UIControl.Event
A touch-down event in the control.
static var touchDownRepeat: UIControl.Event
A repeated touch-down event in the control; for this event the value of the UITouch tapCount method is greater than one.
static var touchDragInside: UIControl.Event
An event where a finger is dragged inside the bounds of the control.
static var touchDragOutside: UIControl.Event
An event where a finger is dragged just outside the bounds of the control.
static var touchDragEnter: UIControl.Event
An event where a finger is dragged into the bounds of the control.
static var touchDragExit: UIControl.Event
An event where a finger is dragged from within a control to outside its bounds.
static var touchUpInside: UIControl.Event
A touch-up event in the control where the finger is inside the bounds of the control.
static var touchUpOutside: UIControl.Event
A touch-up event in the control where the finger is outside the bounds of the control.
static var touchCancel: UIControl.Event
A system event canceling the current touches for the control.
static var valueChanged: UIControl.Event
A touch dragging or otherwise manipulating a control, causing it to emit a series of different values.
static var menuActionTriggered: UIControl.Event
A menu action has triggered prior to the menu being presented.
static var primaryActionTriggered: UIControl.Event
A semantic action triggered by buttons.
static var editingDidBegin: UIControl.Event
A touch initiating an editing session in a UITextField object by entering its bounds.
static var editingChanged: UIControl.Event
A touch making an editing change in a UITextField object.
static var editingDidEnd: UIControl.Event
A touch ending an editing session in a UITextField object by leaving its bounds.
static var editingDidEndOnExit: UIControl.Event
A touch ending an editing session in a UITextField object.
static var allTouchEvents: UIControl.Event
All touch events.
static var allEditingEvents: UIControl.Event
All editing touches for UITextField objects.
static var applicationReserved: UIControl.Event
A range of control-event values available for application use.
static var systemReserved: UIControl.Event
A range of control-event values reserved for internal framework use.
static var allEvents: UIControl.Event
All events, including system events.
선택할 수 있는 event는 UIControl.Event에 선언되어있고, 종류는 위와 같다.
컨트롤 스스로가 어떤 이벤트인지 판단하고, target에 구현되어 있는 Action을 호출한다.
만약 target이 존재하지 않는다면 무시하거나 다른 뷰에 전달한다.
InterfaceBuilder를 통해 패턴을 구현한다면 적절한 이벤트를 골라 자동으로 적용하지만,
코드로 구현하는 경우 적절한 이벤트 까지도 사용자가 지정해야 한다.

이번 실습은 위와 같은 storyboard에서 진행한다.


Tab Bar Controller와 View Controller의 조합으로 서로 Relationship segue로 뷰들을 연결했다.

탭 바의 아이콘과 이름은 Attribute Inspector에서 변경했다.
Selected Image는 선택됐을 때의 아이콘,
Bar Item은 선택되지 않았을 때의 아이콘을 각각 설정한다.
Interface Builder로 연결하기
Button을 Action으로 연결


Event를 선택할 수 있는데, Button에 가장 알맞은 Event가 자동으로 추가된 것을 볼 수 있다.
Touch Up Inside가 아닌 다른 이벤트를 선택할 수도 있다

그 아래의 Arguments는 파라미터를 만들 것인지,
Sender로 설정할 것인지, Sender와 Event 모두 설정할 것인지를 선택한다.
//
//  BuilderViewController.swift
//  Control
//
//  Created by Martin.Q on 2021/08/06.
//

import UIKit

class BuilderViewController: UIViewController {
    @IBAction func Button(_ sender: Any) {
    }

    override func viewDidLoad() {
        super.viewDidLoad()
    }


}
연결을 마치면 위와 같이 코드에 추가되고 Target-Action Pattern으로 연결이 완료된다.
Target은 Builder 씬의 Button이고,
메서드의 이름은 Button이다.
Target인 Button에 Touch Up Inside 이벤트가 발생할 때마다 해당 메서드를 자동으로 호출한다.
코드 작성
//
//  BuilderViewController.swift
//  Control
//
//  Created by Martin.Q on 2021/08/06.
//

import UIKit

class BuilderViewController: UIViewController {
    @IBAction func Button(_ sender: Any) {
    }

    @IBAction func Button2() {
    }

    @IBAction func Button3(_ sender: Any, forEvent event: UIEvent) {
    }

    override func viewDidLoad() {
        super.viewDidLoad()
    }


}
선택에 따라 위와 같이 다양한 Action 코드가 작성될 수 있다.

Action으로 연결 된 메서드는 @IBAction 특성이 붙고, gutter 영역에 연결 여부를 표시하는 Connection Well이 표시된다.
Slider를 Action으로 연결

위와 같이 팝업을 확인해 보면 Button과는 달리 Value Changed Event를 자동으로 선택한 것을 확인할 수 있다.
//
//  BuilderViewController.swift
//  Control
//
//  Created by Martin.Q on 2021/08/06.
//

import UIKit

class BuilderViewController: UIViewController {
    @IBAction func button(_ sender: Any) {
    }

    @IBAction func slider(_ sender: Any) {
    }


    override func viewDidLoad() {
        super.viewDidLoad()
    }


}
이렇게 Slider와 코드도 연결됐다.
코드로 연결하기
Outlet 연결
//
//  CodeViewController.swift
//  Control
//
//  Created by Martin.Q on 2021/08/06.
//

import UIKit

class CodeViewController: UIViewController {
    @IBOutlet weak var button: UIButton!
    @IBOutlet weak var slider: UISlider!


    override func viewDidLoad() {
        super.viewDidLoad()
    }

}
Action 함수 정의
//
//  CodeViewController.swift
//  Control
//
//  Created by Martin.Q on 2021/08/06.
//

import UIKit

class CodeViewController: UIViewController {
    @IBOutlet weak var button: UIButton!
    @IBOutlet weak var slider: UISlider!

    func action() {

    }

    func action(_ sender: Any) {

    }

    func action(_ sender: Any, _ Event: UIEvent) {

    }

    override func viewDidLoad() {
        super.viewDidLoad()
    }

}
코드로 연결 할 때에는 형태는 비슷하지만 @IBAction 키워드가 빠진 모습으로 작성한다.
//
//  CodeViewController.swift
//  Control
//
//  Created by Martin.Q on 2021/08/06.
//

import UIKit

class CodeViewController: UIViewController {
    @IBOutlet weak var button: UIButton!
    @IBOutlet weak var slider: UISlider!

    func action() {

    }

    func action(_ sender: Any) {

    }

    func action(_ sender: Any, _ Event: UIEvent) {

    }

    override func viewDidLoad() {
        super.viewDidLoad()

        let select = #selector(action(_:))

        button.addTarget(self, action: selector, for: Control.Event)
    }

}
Target을 추가할 때는 addTarget 메서드를 사용한다.
첫 번째 파라미터에 해당하는 target은 Button이 존재하고 있는 CodeViewController 이므로 self를 전달한다.
두 번째 파라미터인 action에는 selector를 전달해야 한다.
따라서 앞에서 작성한 action 파라미터를 selector로 변환해야 할 필요가 있다.
select 변수에 변환한 action을 저장하면 에러가 발생하게 된다.

변환할 action이라는 파라미터가 Objective C에 포함되지 않았다는 의미로.
//
//  CodeViewController.swift
//  Control
//
//  Created by Martin.Q on 2021/08/06.
//

import UIKit

class CodeViewController: UIViewController {
    @IBOutlet weak var button: UIButton!
    @IBOutlet weak var slider: UISlider!

    func action() {

    }

    @objc func action(_ sender: Any) {

    }

    func action(_ sender: Any, _ Event: UIEvent) {

    }

    override func viewDidLoad() {
        super.viewDidLoad()

        let select = #selector(action(_:))

        button.addTarget(self, action: , for: <#T##UIControl.Event#>)
    }

}
Fixit을 선택해 자동수정을 진행하면 해당하는 action의 앞에 @objc 특성이 생긴다.
이는 InterfaceBuilder를 통해 연결했던 @IBAction 특성에 @objc 특성이 포함되었기 때문에 필요가 없었지만,
코드로 연결하는 경우 해당 특성을 사용하지 않으며, 따라서 @objc 특성을 반드시 추가해야 한다.
//
//  CodeViewController.swift
//  Control
//
//  Created by Martin.Q on 2021/08/06.
//

import UIKit

class CodeViewController: UIViewController {
    @IBOutlet weak var button: UIButton!
    @IBOutlet weak var slider: UISlider!

    func action() {

    }

    @objc func action(_ sender: Any) {
        print(#function)

    }

    func action(_ sender: Any, _ Event: UIEvent) {

    }

    override func viewDidLoad() {
        super.viewDidLoad()

        let select = #selector(action(_:))

        button.addTarget(self, action: select, for: .touchUpInside)
    }

}
Event를 전달한다.
동작을 확인하기 위해 action 메서드에는 로그를 출력할 수 있도록 코드를 추가했다.
결과
action(_ :)
시뮬레이터에서 Button을 터치하면 콘솔에 정상적으로 호출되는 것을 확인할 수 있다.
//
//  CodeViewController.swift
//  Control
//
//  Created by Martin.Q on 2021/08/06.
//

import UIKit

class CodeViewController: UIViewController {
    @IBOutlet weak var button: UIButton!
    @IBOutlet weak var slider: UISlider!

    @objc func button(_ sender: Any) {
        print(#function)

    }

    @objc func slider(_ sender: Any) {
        print(#function)
    }

    override func viewDidLoad() {
        super.viewDidLoad()

        let selectbtn = #selector(button(_:))
        let selectslider = #selector(slider(_:))

        button.addTarget(self, action: selectbtn, for: .touchUpInside)
        slider.addTarget(self, action: selectslider, for: .valueChanged)
    }

}
Slider도 동일한 방식으로 구현할 수 있고,
이때 Event는 valueChanged를 전달한다.
Button

iOS에서 제공하는 Button은 총 여섯 가지이다.
- System
가장 기본적인 타입으로 title text, title color, button image를 설정할 수 있다. - Detail Disclosure
부가정보를 modal이나 popover 방식으로 제공할 때 사용한다.
위치에 관계없이 사용 가능하지만 주로 테이블에서 사용한다. - Info
상세정보나 구성 정보를 표시할 때 사용한다. - Add Contact
주로 주소 데이터를 추가할 때 사용한다.
단, 해당 용도로 제약되진 않는다. - Close
화면을 닫거나 작업을 취소할 때 사용한다.
버튼은 default, highlighted, selected, disabled의 네 가지의 상태를 갖는다.

button의 attribute inspector에 존재하는 속성들 중 title ~ background 까지는
각각의 상태에 귀속되는 속성들이다.
또한 state config를 변경해 해당 상태의 속성을 변경할 수 있다.

button의 상태를 바꾸고자 한다면 더 아래에 존재하는 Control의 State를 변경해 주거나 코드로 수정해야 한다.
//
//  ButtonViewController.swift
//  controltest
//
//  Created by Martin.Q on 2021/08/09.
//

import UIKit

class ButtonViewController: UIViewController {

    @IBOutlet weak var systemBtn: UIButton!


    override func viewDidLoad() {
        systemBtn.isHighlighted = true
        super.viewDidLoad()
    }
}
Button을 코드에 연결하고 해당 버튼의 속성에 접근한다.
isHighlighted와 isSelected에 각각 true와 false를 전달해 적용하고,
Enabled와 Disabled는 isEnabled 속성에 true와 false를 전달해 적용한다.
결과
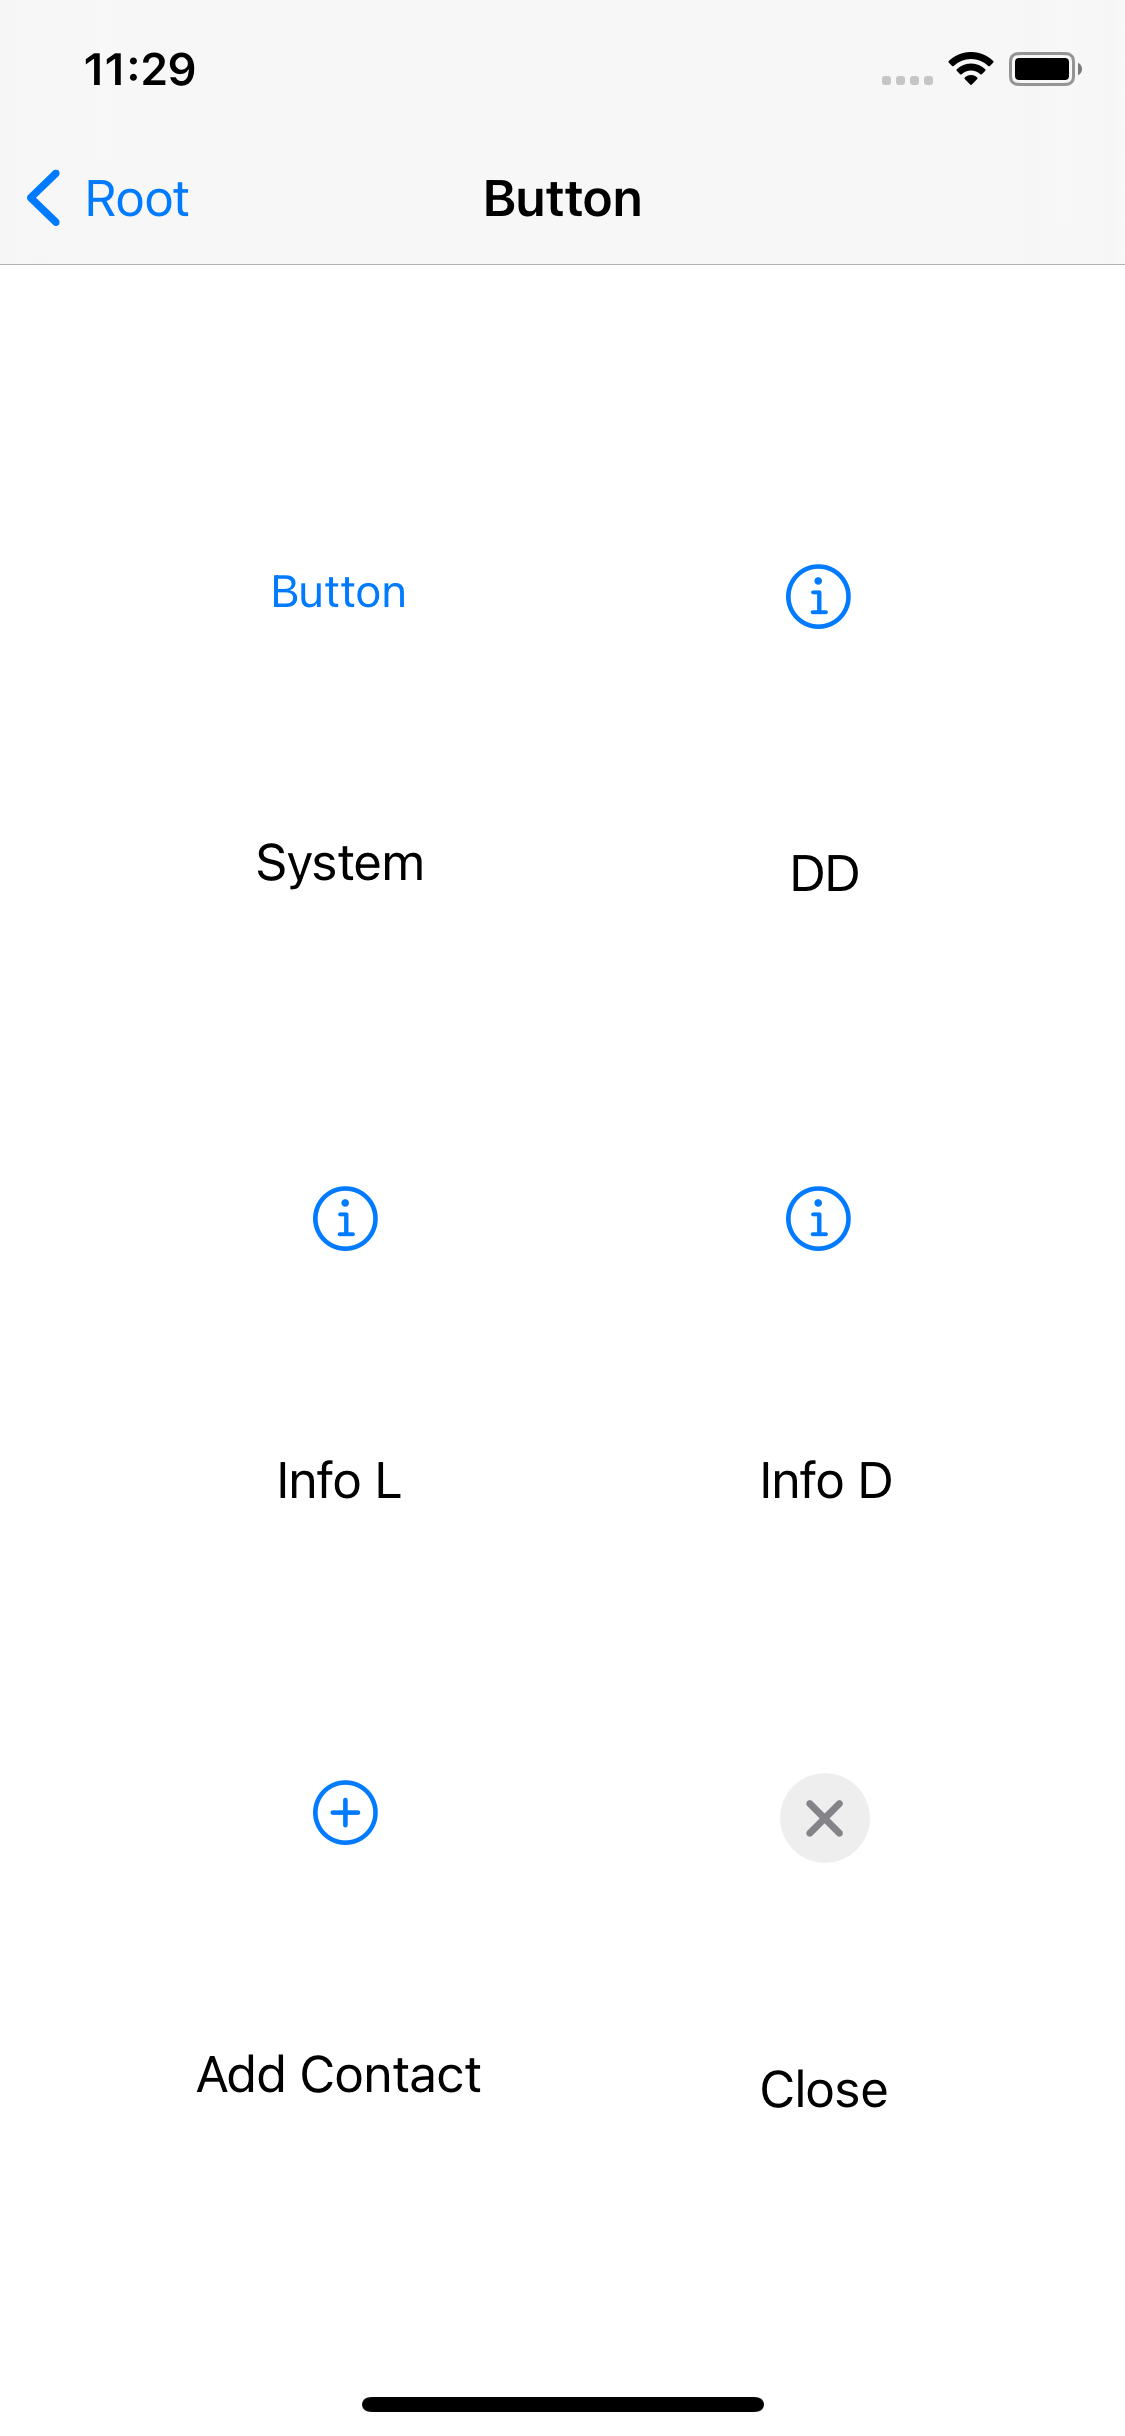


위는 기본 설정의 각각의 상태이다.
좌상 단부터 시계방향으로 Enabled, Disabled, Highlighted, Selected에 해당한다.
Button은 두 개 이상의 상태를 동시에 가질 수 있다.
//
//  ButtonViewController.swift
//  controltest
//
//  Created by Martin.Q on 2021/08/09.
//

import UIKit

class ButtonViewController: UIViewController {

    @IBOutlet weak var systemBtn: UIButton!


    override func viewDidLoad() {
        systemBtn.isEnabled = false
        systemBtn.isHighlighted.toggle()
        super.viewDidLoad()
    }
}
그래서 위와 같이 Diabled로 변경한 상태에서 isHighlighted 속성을 toggle로 설정하면
결과

이렇게 일반적인 Highlighted가 아닌 Disabled와 Highlighted가 종시에 적용된 Button을 확인할 수 있다.
Text Button
system button은 title text, color, background를 자유롭게 설정 가능하다.
따라서 각각의 상태마다 title을 전부 변경해 주면


버튼의 상태에 따라 title이 바뀌는 것을 확인할 수 있다.
만약 특정 상태의 title을 설정하지 않는다면 default 상태의 title을 사용한다.
//
//  ButtonViewController.swift
//  controltest
//
//  Created by Martin.Q on 2021/08/09.
//

import UIKit

class ButtonViewController: UIViewController {

    @IBOutlet weak var systemBtn: UIButton!


    override func viewDidLoad() {

        systemBtn.titleLabel?.text = "Damn"
        let label = systemBtn.titleLabel?.text
        systemBtn.titleLabel?.textColor = .systemRed
        systemBtn.titleLabel?.backgroundColor = .systemYellow

        print(label)
        super.viewDidLoad()
    }
}
결과
Optional("Damn")
Button의 title은 titleLabel 속성에 접근하게 된다.
결과

backgroundColor는 해당 속성에서 바로 변경이 가능하지만 title과 titleColor는 반영되지 않는 것을 확인할 수 있다.
title을 변경하기 위해서는 UIControl에 선언되어 있는 메서드를 활용해야 한다.
//
//  ButtonViewController.swift
//  controltest
//
//  Created by Martin.Q on 2021/08/09.
//

import UIKit

class ButtonViewController: UIViewController {

    @IBOutlet weak var systemBtn: UIButton!


    override func viewDidLoad() {

        systemBtn.setTitle("Damn", for: .normal)
        systemBtn.setTitleColor(.systemRed, for: .normal)
        systemBtn.titleLabel?.backgroundColor = .systemYellow

        print(label)
        super.viewDidLoad()
    }
}
title과 titleColor는 각각 setTitle, setTitleColor 메서드로,
각자 설정할 값과 '상태'를 전달받는다.
결과

이제는 의도와 같이 title과 titleColor 또한 바뀐 것을 확인할 수 있다.
Image Button

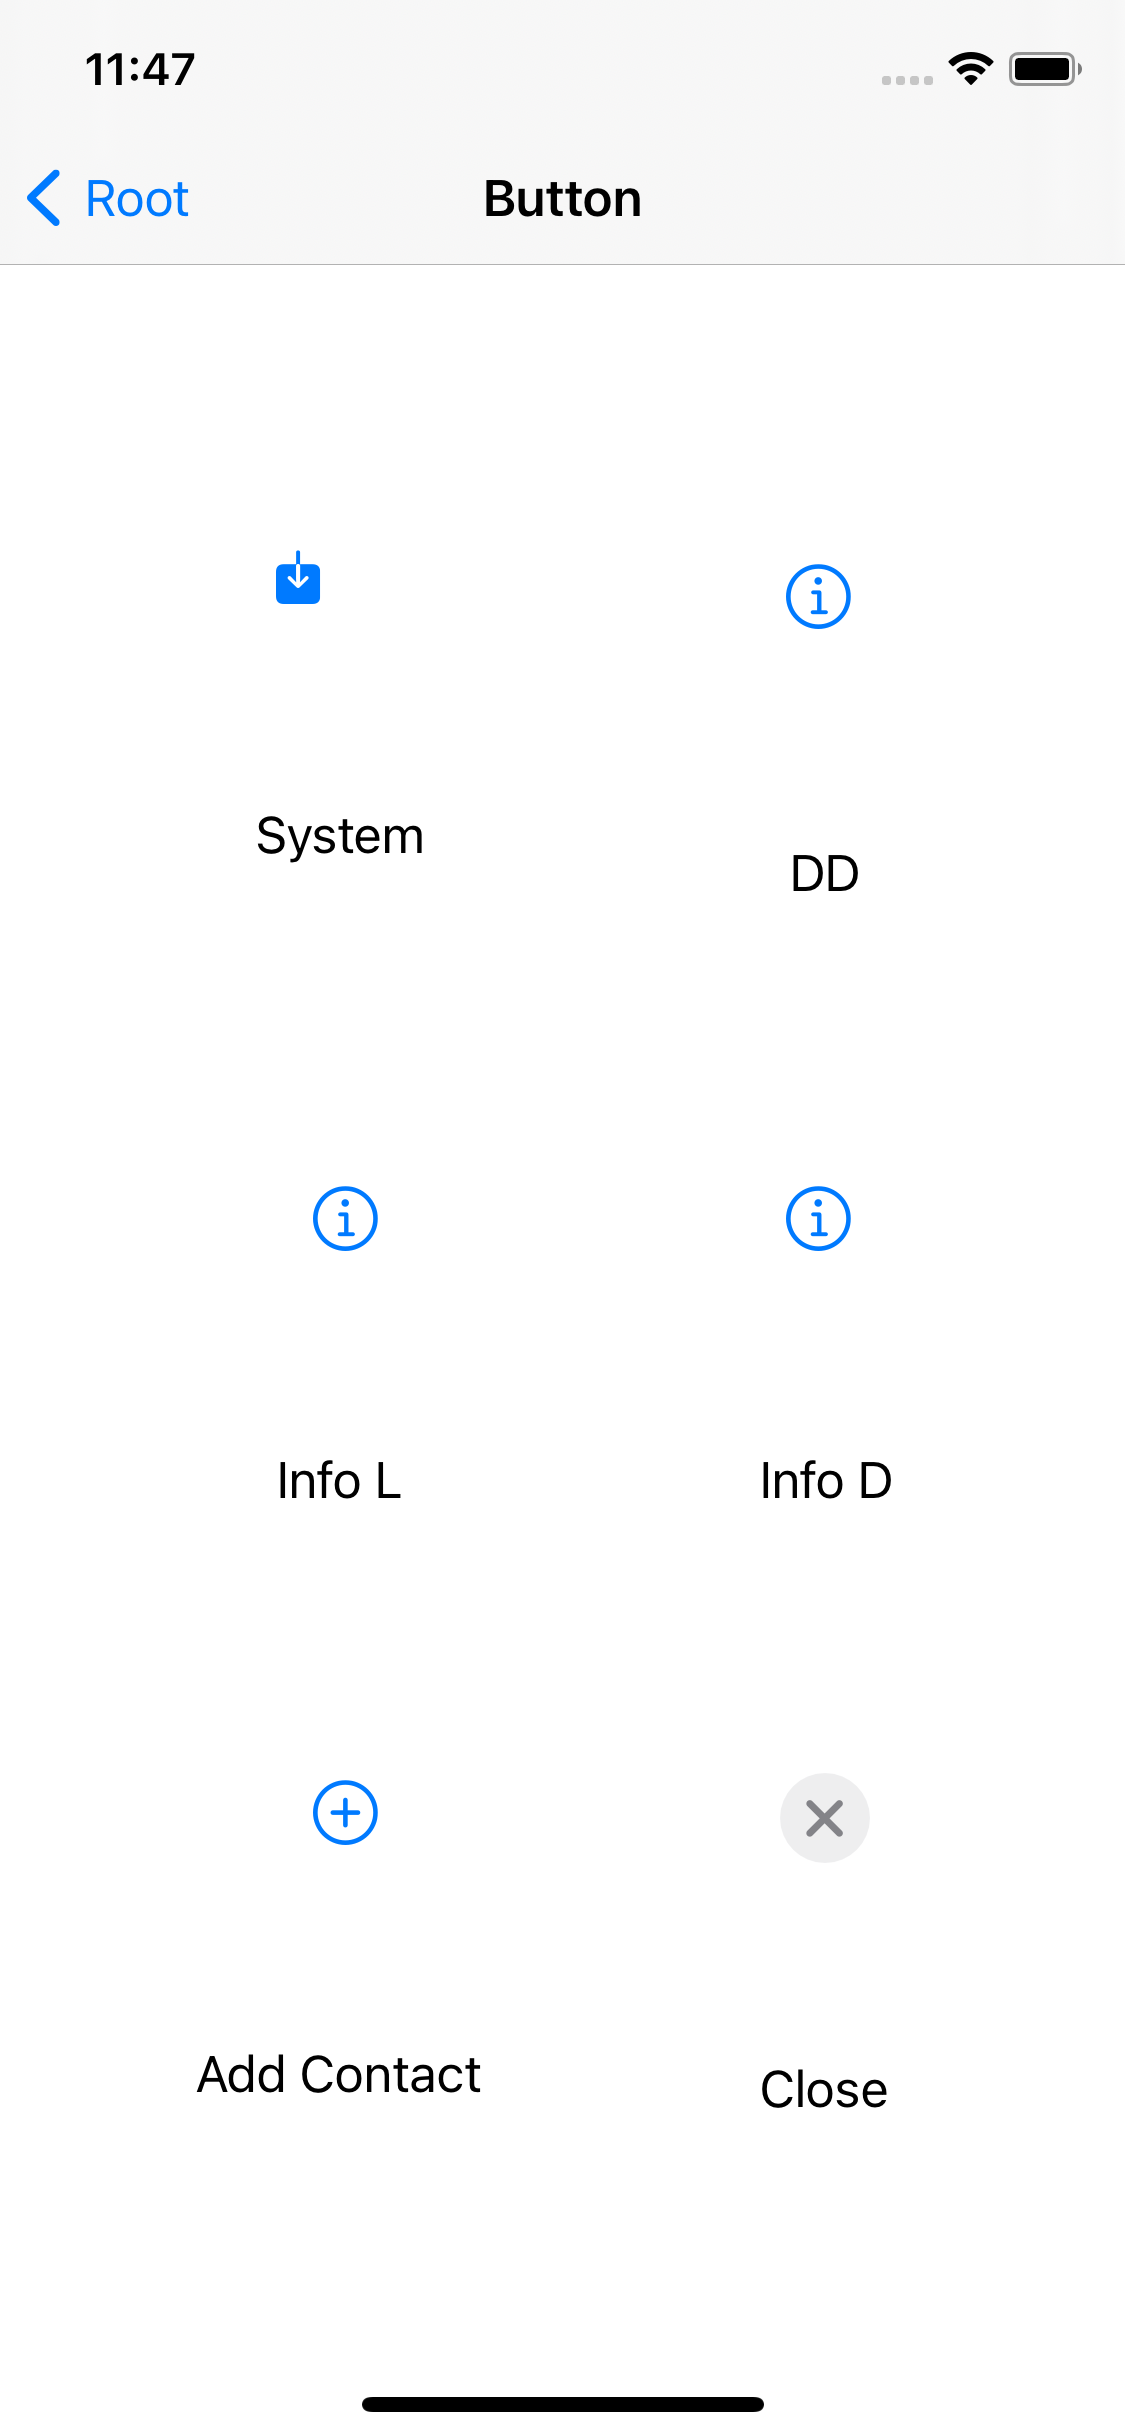
attribute inspector에서 image 속성을 설정하면 image button을 사용할 수 있다.
타입은 Custom으로 바뀌고 Text Color는 흰색의 기본값을 가진다.


Text Color를 바꾸면 Title의 색만 변하게 된다.
button image의 색은 title의 색상에 영향을 받지 않아
Tint의 기본 값이 파란색으로 표시되고 있는 걸 볼 수 있다.


대신 view 자체의 tint 속성에 영향을 받거나,


button 자체의 view 섹션의 tint 속성에 영향을 받게 된다.
button의 image는 항상 title의 앞에 오게 되고, 위치를 조정할 수 있는 방법을 제공하지 않는다.
따라서 semantic 속성을 별도로 다뤄야 한다.
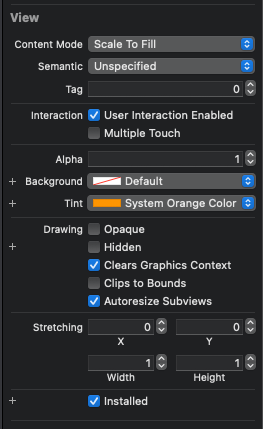

semantic 속성을 통해 간단한 위치 조정을 할 수 있지만,
Label, Button, ImageView를 사용해 직접 만드는 것이 호환성과 자유도 면에서 더 뛰어나다.
Custom Image Button

imageView를 사용해 image를 선택하고,
label을 사용해 버튼의 이름을 작성한다.

embed 메뉴를 통해 StackView를 적용한 뒤 다시 View를 적용해 상하좌우의 제약을 0으로 설정한다.

이제는 해당 레이아웃이 버튼의 역할을 수행할 수 있도록 button을 입혀 줘야 한다.
stackView와 동등한 위치에 button을 추가하고, title을 삭제한다.

이번엔 view를 선택하고 왼쪽과 아래쪽에 제약을 추가한다.
이렇게 되면 지금까지 작성한 모든 것들이 하나처럼 작동하게 돼 마치 하나의 버튼처럼 변하게 된다.
해당 방법은 조금 번거롭지만 원하는 레이아웃을 자유롭게 만들 수 있다는 큰 장점이 있다.


imageButton도 textButton과 마찬가지로 상태에 따라 대응하도록 설정할 수 있다.
//
//  ButtonViewController.swift
//  controltest
//
//  Created by Martin.Q on 2021/08/09.
//

import UIKit

class ButtonViewController: UIViewController {

    @IBOutlet weak var systemBtn: UIButton!


    override func viewDidLoad() {
        super.viewDidLoad()

        let sample = UIImage(named: "pencil")
        systemBtn.setImage(sample, for: .normal)
    }
}
코드로는 위와 같이 변경하며,
backgroundImage는 setBackgroundImage 메서드를 사용한다.
Picker View
Text Picker
pickerView는 형태에 따라 두 가지를 제공한다.

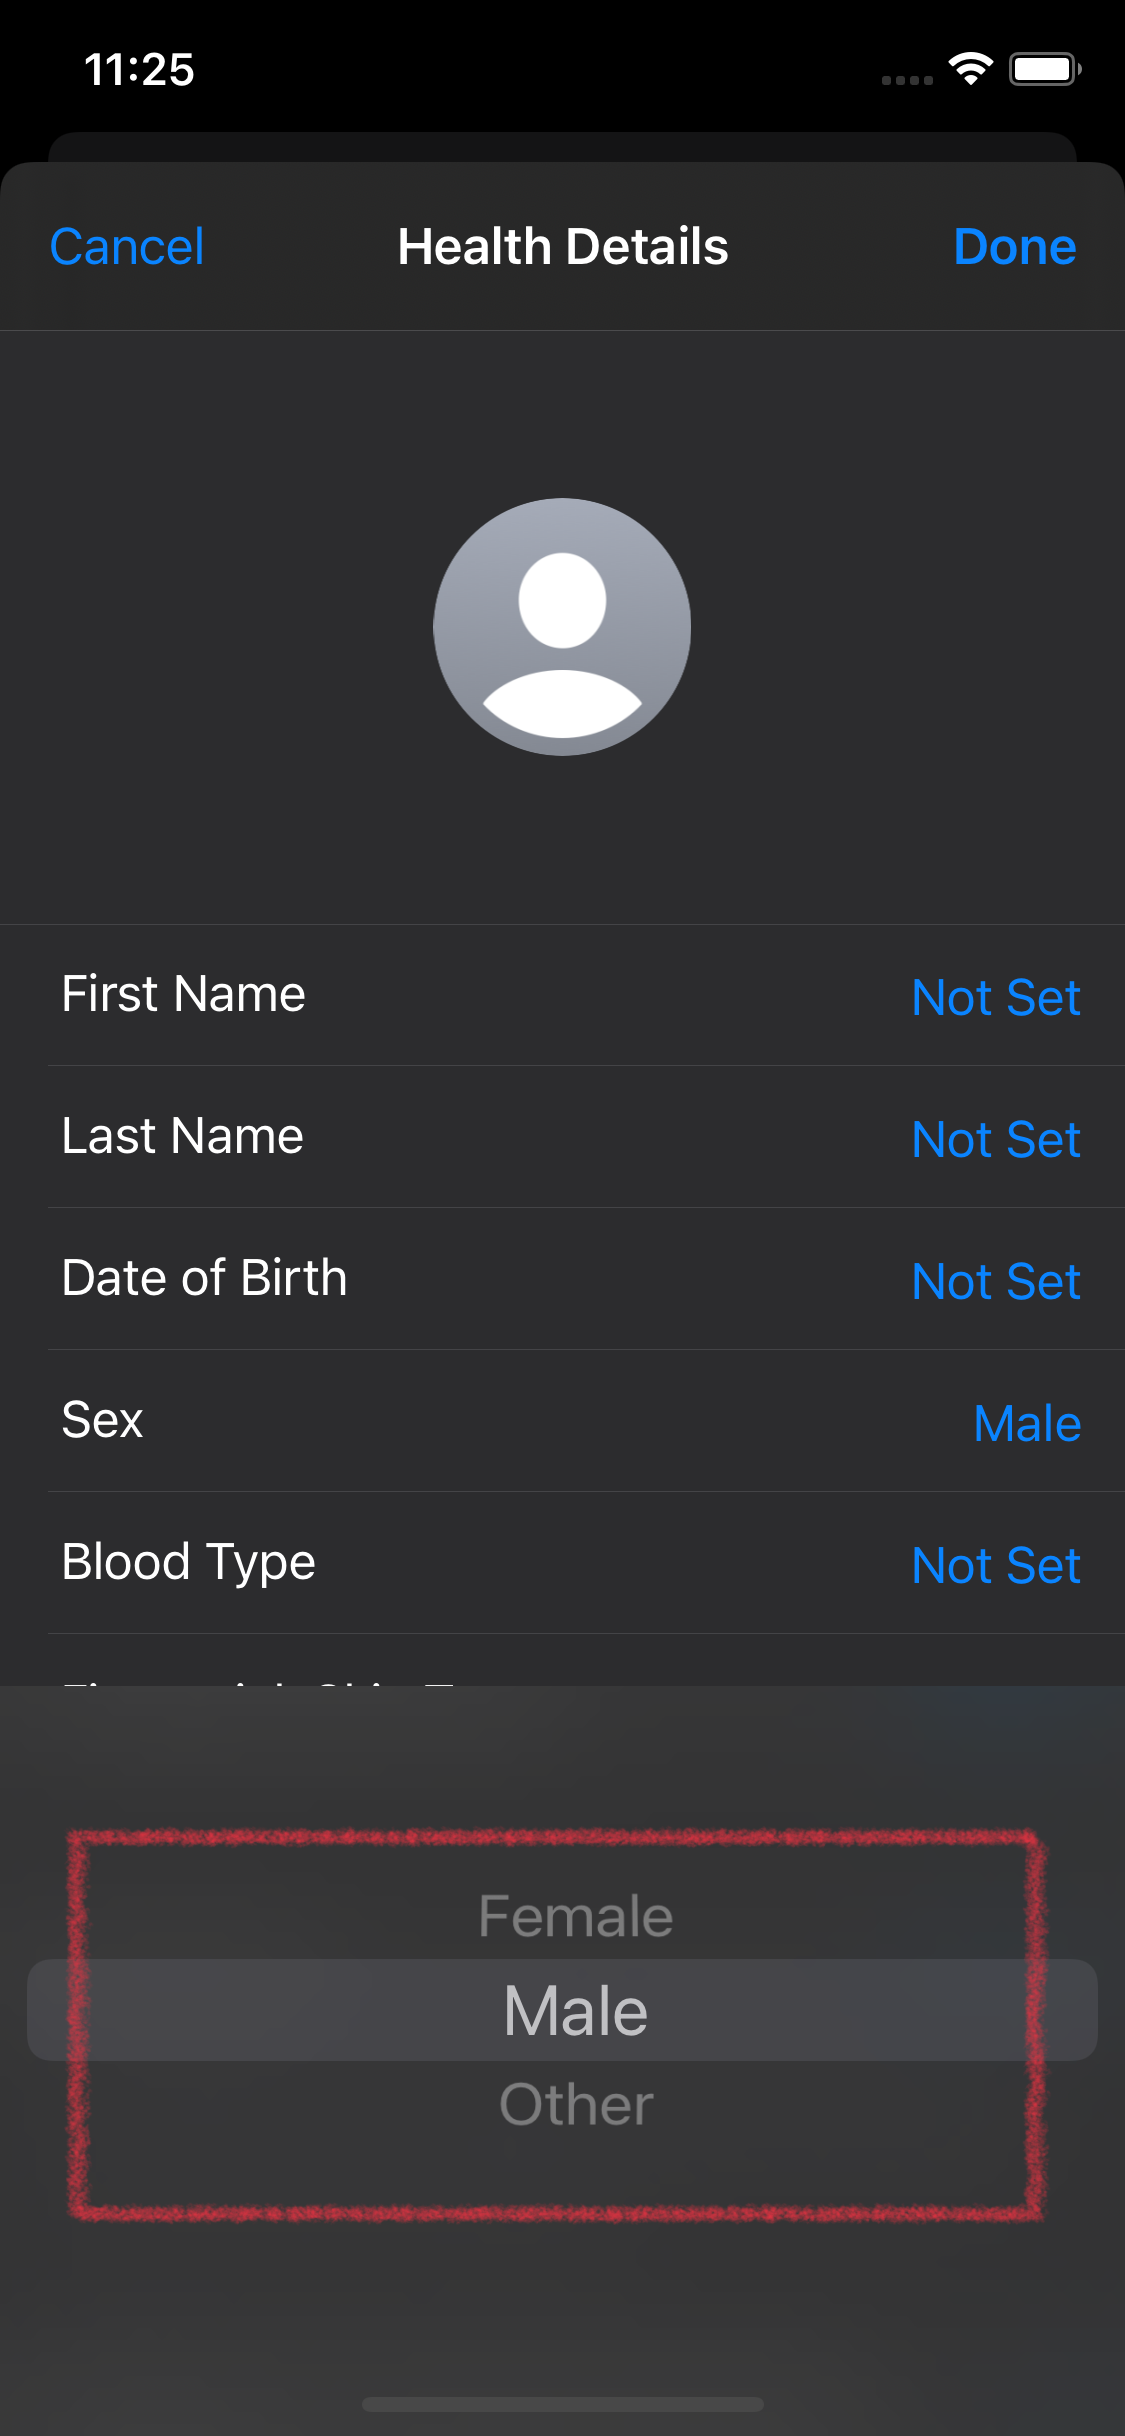
날짜를 선택하는 DatePicker와 항목을 선택하는 PickerView다.
DatePicker는 사용하기 원하는 모드를 선택하면 데이터와 UI가 자동으로 구성되는 반면,
PickerView는 데이터를 직접 지정해야 하고, 때에 따라 UI도 직접 구성해야 하는 경우가 있다.
Picker View 추가

제약 추가

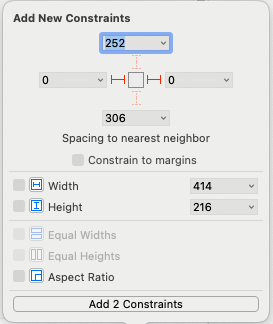
위와 같이 제약을 추가하면 수직 상에서 항상 가운데에, 좌우는 여백 없이 꽉 채우는 picker가 된다.
Picker VIew 설정
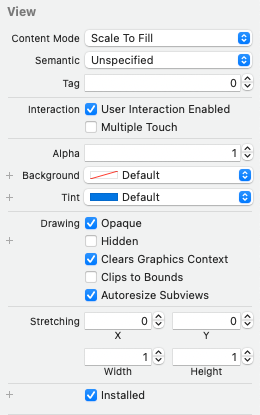
pickerView에 관한 모든 설정은 코드를 통해 진행해야 한다.
코드를 작성함에 있어 중심이 되는 것은,
UIPickerView DataSource와 UIPickerView Delegate Protocol이다.

UIPickerViewDataSource에는 두 가지 필수 메서드가 선언되어 있고,
이 둘은 모두 정수를 반환하도록 되어있다.

PickerView에서 데이터 출력을 담당하는 메서드는,
UIPickerViewDelegate의 pickerView(titleForRow:)와 pickerView(viewForRow:) 메서드로,
pickerView(titleForRow:)는 텍스트를 표시할 때, pickerView(viewForRow:)는 커스텀뷰를 표시할 때 사용한다.
둘 중 어느 것도 필수 메서드는 아니지만 둘 중 하나는 반드시 구현해야 한다.

PickerView에서 항목을 선택했을 때 이벤트를 처리하기 위해서는 pickerView(didSelectRow:inComponent:) 메서드를 사용한다.
파라미터로 전달하는 didSelectRow와 inComponent를 index 삼아 데이터에 접근한다.
즉, Picker View를 구성할 때는
UIPickerViewDataSource의 두 가지 필수 메서드,
UIPickerViewDelegate의 pickerView(titleForRow:)와 pickerView(viewForRow:) 메서드 중 하나,
PickerView 선택 시 이벤트를 처리해야 한다면
pickerView(didSelectRow:inComponent:) 메서드까지 구현해야 한다.
Picker View 연결

PickerView의 ConnectionPannel에서 dataSource와 delegate를 모두 해당 씬에 연결해 준다.
표시할 데이터 구현
//
//  PickerViewController.swift
//  controltest
//
//  Created by Martin.Q on 2021/08/10.
//

import UIKit

class PickerViewController: UIViewController {
    let sampleX = ["A","B","C","D","E","F","G","H"]
    let sampleY = ["1","2","3","4","5","6","7","8","9","0"]

    override func viewDidLoad() {
        super.viewDidLoad()
    }
}
이후 씬에 연결된 클래스 파일로 이동해 표시할 데이터를 작성한다.
지금은 임시 데이터기 때문에 직접 작성하지만 실제로는 필요한 항목을 받아 오거나,
읽어오는 방식으로 구현된다.
PickerViewDataSource 구현
//
//  PickerViewController.swift
//  controltest
//
//  Created by Martin.Q on 2021/08/10.
//

import UIKit

class PickerViewController: UIViewController {
    let sampleX = ["A","B","C","D","E","F","G","H"]
    let sampleY = ["1","2","3","4","5","6","7","8","9","0"]

    override func viewDidLoad() {
        super.viewDidLoad()
    }
}

extension PickerViewController: UIPickerViewDataSource {
    func numberOfComponents(in pickerView: UIPickerView) -> Int {
    }

    func pickerView(_ pickerView: UIPickerView, numberOfRowsInComponent component: Int) -> Int {
    }
}
extension으로 UIPickerViewDataSource를 채용한 뒤,
필수 메서드를 작성한다.
func numberOfComponents(in pickerView: UIPickerView) -> Int {
    return 2
}
첫 번째 메서드인 numberOfComponents에서 반환되는 수만큼 PickerView에서 표시하는 SpiningWheel의 수가 결정된다.
위와 같이 2를 반환하게 되면,
결과

표시하는 SpiningWheel은 위와 같이 두 개가 된다.
SpiningWheel에 표시되는 각각의 그룹은 Component라고 부른다.
func pickerView(_ pickerView: UIPickerView, numberOfRowsInComponent component: Int) -> Int {
	return smapleX.count
}
각 컴포넌트에 표시될 항목의 수는 pickerView(numberOfRowsInComponent:) 메서드로 전달한다.
앞서 생성한 sampleX의 요소의 수를 전달하도록 작성했다.
UIPickerViewDelegete 구현
extension PickerViewController: UIPickerViewDelegate {
    func pickerView(_ pickerView: UIPickerView, titleForRow row: Int, forComponent component: Int) -> String? {
        return sampleX[row]
    }
}
표시할 SpiningWheel이 생겼으니 어떻게 표시할지를 구현해야 한다.
extension으로 UIPickerViewDelegate를 채용하도록 한 후,
pickerView(titleForRow:) 메서드를 사용해 텍스트를 표시할 수 있도록 한다.
표시할 텍스트는 sampleX 배열의 내용이다.
결과

이렇게 sampleX 배열의 내용이 pickerView에 표시되는 것을 확인할 수 있다.
가운데의 회색 부분은 Slection Indicator가 현재 선택 중인 항목을 표시하며,
해당 인디케이터는 수정할 수 없다.
선택 이벤트 구현
사용자의 선택을 입력하는 방법은 두 가지가 있다.
func pickerView(_ pickerView: UIPickerView, didSelectRow row: Int, inComponent component: Int) {
}
첫 번째로 앞서 언급했던 pickerView(didSelectRow:inComponent:)를 구현하는 방법이다.
해당 메서드는 사용자가 항목을 선택할 때마다 반복되어 호출된다.
extension PickerViewController: UIPickerViewDelegate {
    func pickerView(_ pickerView: UIPickerView, titleForRow row: Int, forComponent component: Int) -> String? {
        return sampleX[row]
    }

    func pickerView(_ pickerView: UIPickerView, didSelectRow row: Int, inComponent component: Int) {
        print(sampleX[row])
    }
}
결과

코드를 위와 같이 수정해 현재 선택한 항목을 콘솔에 표시하도록 수정하고, 시뮬레이터를 확인하면
초기값을 제외하고는 사용자가 SelectionIndicator에 항목을 위치시킬 때마다 콘솔에 출력되는 것을 확인할 수 있다.
이 방법은 사용자가 항목을 직접 선택해야만 메서드가 호출된다는 한계점이 존재한다.
두 번째 방법은 UIPickerView에서 제공하는 메서드를 사용하는 방법이다.
해당 메소드를 사용하기 위해 버튼을 하나 추가한다.
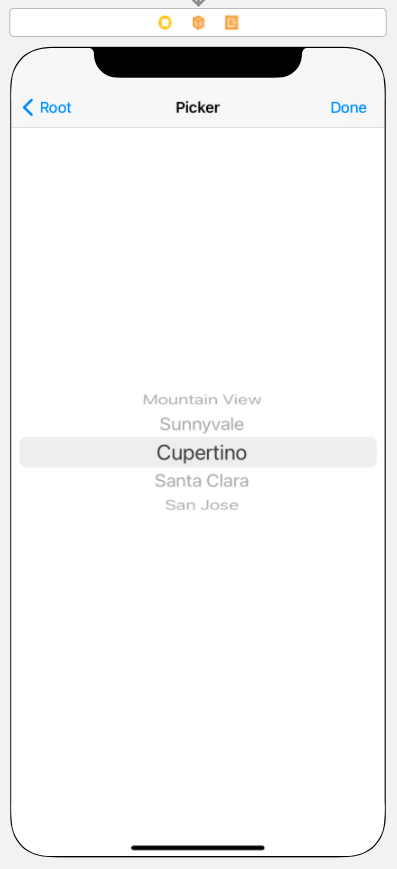
NavigationBar에 Button을 추가했지만 화면 어디에 추가하던 상관없다.
Button을 추가하고 코드에 Action으로 연결하고,
PickerView는 Outlet으로 연결한다.
@IBAction func doneBtn(_ sender: Any) {
    let row = picker.selectedRow(inComponent: 0)

    if row == -1 {
        print("Not Found")
    } else {
        print(sampleX[row])
    }
}
@IBOutlet weak var picker: UIPickerView!
이후 Action으로 연결된 Button에서 Outlet으로 연결된 picker의 selectedRow메서드를 호출한다.
해당 메서드는 inComponent는 현재 선택된 항목의 index를 반환하고, 선택하지 않았다면 '-1'을 반환한다.
이때, inComponent 파라미터에 전달되는 값은 확인할 컴포넌트의 index 값이다.
위와 같이 incomponent에 0을 전달할 경우 첫 번째 컴포넌트의 값을 반환하게 된다.
이후 원하는 조건문을 사용해 -1일 경우 예외 처리를 진행하고, 외에는 선택된 항목을 출력하도록 한다.
결과

이젠 초기값인 상황에서도 값을 반환할 수 있다.
선택 직후 어떠한 동작을 실행해야 한다면 첫 번째 방법을 주로 사용하고,
이외의 경우라면 두 번째 방법을 주로 사용한다.
지금까지는 두 개의 Component를 출력하긴 하지만,
출력하는 데이터는 sampleX 배열이 전부였기 때문에 두 개의 컴포넌트가 서로 같은 데이터를 출력하고 있었다.
func pickerView(_ pickerView: UIPickerView, numberOfRowsInComponent component: Int) -> Int {
	switch component {
	case 0:
		return sampleX.count
	case 1:
		return sampleY.count
	default:
		return 0
	}
}
일관되게 sampleX 항목의 수를 전달하던 코드를 위와 같이 각각의 컴포넌트에 sampleX와 sampleY로 분리해서 반환한다.
func pickerView(_ pickerView: UIPickerView, titleForRow row: Int, forComponent component: Int) -> String? {
	switch component {
	case 0:
		return sampleX[row]
	case 1:
		return sampleY[row]
	default:
		return nil
	}
}
결과

컴포넌트에 따라 출력할 데이터를 분기하도록 코드를 바꿔 준다.
첫 번째 컴포넌트에는 sampleX의 항목을, 두 번째 컴포넌트에는 sampleY의 항목을 출력한다.
출력하는 데이터들이 바뀌었으므로 기존의 선택한 항목을 확인하던 코드도 변경해야 한다.
func pickerView(_ pickerView: UIPickerView, didSelectRow row: Int, inComponent component: Int) {
	switch component {
	case 0:
		print(sampleX[row])
	case 1:
		print(sampleY[row])
	default:
		break
	}
}
pickerView(didSelectRow:inComponent:)를 수정하는 방식은 이전의 코드를 수정하는 것과 같은 방식이다.
@IBAction func doneBtn(_ sender: Any) {
	let row1 = picker.selectedRow(inComponent: 0)
	let row2 = picker.selectedRow(inComponent: 1)

	if row1 == -1 || row2 == -1 {
		print("Not Found")
	} else {
		print(sampleX[row1] + sampleY[row2])
	}
}
Button의 selectedRow를 사용하는 방식은 조금 다르게 구성한다.
다른 방식들처럼 함수 자체에서 인덱스를 반환하지 않기 때문에 각각의 인스턴스를 생성해 이를 출력해야 한다.
결과
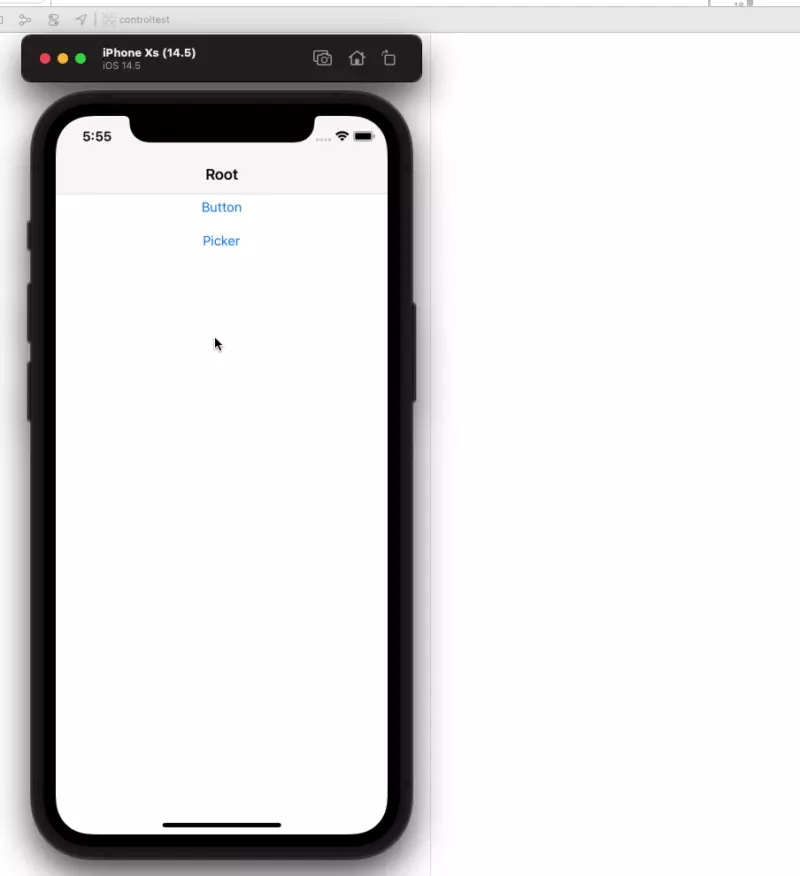
Image Picker
image를 표시하는 PickerView를 사용해 슬롯머신과 같은 UI를 구현해 본다.
PickerView 씬과 동일한 화면으로 구성한 뒤
delegate와 dataSource를 해당 씬에 연결하고,
button은 Action으로, picker는 outlet으로 연결한다.
PickerView 이미지 로드

//
//  ImagePickerViewController.swift
//  controltest
//
//  Created by Martin.Q on 2021/08/10.
//

import UIKit

class ImagePickerViewController: UIViewController {
    lazy var image: [UIImage] = {
        return (0...5).compactMap {
            UIImage(named: "slot-\($0)")
        }
    }()


    @IBAction func randomBtn(_ sender: Any) {
    }

    @IBOutlet weak var picker: NSLayoutConstraint!


    override func viewDidLoad() {
        super.viewDidLoad()
    }

}
이후 출력할 이미지를 assets에 저장한 뒤 배열에 순차적으로 저장한다.
목표는 pickerView에 이미지 배열의 컴포넌트를 생성하고,
버튼을 누르면 pickerView를 랜덤으로 선택하도록 한다.
UIPickerViewDataSource 구현
//
//  ImagePickerViewController.swift
//  controltest
//
//  Created by Martin.Q on 2021/08/10.
//

import UIKit

class ImagePickerViewController: UIViewController {
    lazy var image: [UIImage] = {
        return (0...5).compactMap {
            UIImage(named: "slot-\($0)")
        }
    }()


    @IBAction func randomBtn(_ sender: Any?) {
    }

    @IBOutlet weak var picker: UIPickerView!


    override func viewDidLoad() {
        super.viewDidLoad()
    }

}

extension ImagePickerViewController: UIPickerViewDataSource {
    func numberOfComponents(in pickerView: UIPickerView) -> Int {

    }

    func pickerView(_ pickerView: UIPickerView, numberOfRowsInComponent component: Int) -> Int {

    }


}

extension ImagePickerViewController: UIPickerViewDelegate {

}
이전처럼 UIPickerDataSource와 UIPickerViewDelegate를 extension으로 추가한다.
extension ImagePickerViewController: UIPickerViewDataSource {
    func numberOfComponents(in pickerView: UIPickerView) -> Int {
        return 3
    }

    func pickerView(_ pickerView: UIPickerView, numberOfRowsInComponent component: Int) -> Int {
        return image.count * 3
    }
}
UIPickerViewDataSource은 image배열의 원소의 수와 spiningWheel의 수를 반환한다.
원소 수에 3을 곱하는 것은 시작적인 효과를 주기 위함이다.
UIPickerViewDelegate 구현
extension ImagePickerViewController: UIPickerViewDelegate {
    func pickerView(_ pickerView: UIPickerView, viewForRow row: Int, forComponent component: Int, reusing view: UIView?) -> UIView {

    }
}
UIPickerViewDelegate를 구현할 때는 텍스트가 아닌 image를 표시하기 때문에,
pickerview(viewForRow:) 메서드를 추가한다.
extension ImagePickerViewController: UIPickerViewDelegate {
    func pickerView(_ pickerView: UIPickerView, viewForRow row: Int, forComponent component: Int, reusing view: UIView?) -> UIView {
        if let imageView = view as? UIImageView {
            imageView.image = image[row % image.count]
            return imageView
        }

        let imageView = UIImageView()
        imageView.image = image[row % image.count]
        imageView.contentMode = .scaleAspectFit

        return imageView
    }
}
이미지는 문자열이나 다른 자료형보다 큰 데이터기 때문에 재사용 방식을 구현하는 것이 효율적이다.
pickerview(viewForRow:) 메서드의 핵심은 파라미터인 reusing view다.
let imageView = UIImageView()
imageView.image = image[row % image.count]
imageView.contentMode = .scaleAspectFit

return imageView
picker에 처음 이미지가 표시될 때는 reusing view가 nil인 상태이다.
따라서 재사용할 이미지가 없으므로 새롭게 ImageView를 생성하게 되고,
spiningWheel을 돌려 사용자의 시야에서 벗어날 경우 이를 삭제하는 것이 아닌 reusing view로 전달된다.
if let imageView = view as? UIImageView {
	imageView.image = image[row % image.count]
	return imageView
}
다시 사용자의 시야에 표시될 때는 reusing view에 저장된 값이 있으므로
새로 생성하는 대신 저장된 view를 불러와 사용하게 된다.
슬롯머신 기믹 구현


크기를 키우고, 시작 지점을 처음이나 끝이 아닌 중간 지점을 표시하게 되면 오른쪽 사진과 같이 슬롯머신의 느낌을 줄 수 있다.
또한, 사용자가 임의로 조작하지 못하도록 설정할 필요가 있다.
override func viewDidLoad() {
	super.viewDidLoad()

	picker.isUserInteractionEnabled = false
}
해당 씬이 표시되면 pickerView의 터치 조작을 비활성화하거나,
pickerView의 attribute inspector에서 user interaction 항목을 해제해도 된다.
func pickerView(_ pickerView: UIPickerView, rowHeightForComponent component: Int) -> CGFloat {
        return 90
}
크기를 키우기 위해 pickerView(rowHeightForComponent:) 메서드를 추가한다.
결과

항목의 높이를 설정하게 되고, 해당 imageView는 scaleAspectFit으로 설정되어 있으므로,
높이의 크기에 비례하여 항목의 크기가 커지게 된다.
@IBAction func randomBtn(_ sender: Any?) {
	let index1 = Int.random(in: 0...image.count) + image.count
	let index2 = Int.random(in: 0...image.count) + image.count
	let index3 = Int.random(in: 0...image.count) + image.count
}
Button을 눌렀을 경우 무작위로 항목을 선택하면 된다.
단, 화면에 표시되는 항목은 반복되는 12345|12345|12345 중 가운데에 위치해야 의도한
슬롯머신과 유사한 시각효과를 유도할 수 있다.
따라서 0부터 배열의 요소의 수 사이에서 무작위로 선택한 뒤, 요소의 수를 다시 더하면,
직접 배열의 수를 고려해 범위를 지정했을 때 보다 유지보수 면에서 유리하고,
범위를 잘못 입력해 생기는 충돌을 미연에 방지할 수 있다.
@IBAction func randomBtn(_ sender: Any) {
	let index1 = Int.random(in: 0...image.count) + image.count
	let index2 = Int.random(in: 0...image.count) + image.count
	let index3 = Int.random(in: 0...image.count) + image.count

	picker.selectRow(index1, inComponent: 0, animated: true)
	picker.selectRow(index2, inComponent: 1, animated: true)
	picker.selectRow(index3, inComponent: 2, animated: true)
}
이후엔 picker에서 해당 인덱스에 해당하는 항목을 선택하도록 하면 된다.
동작을 수행하는 메서드는 selectRow(index:inComponent:animated:)로,
순서대로 항목의 인덱스, 컴포넌트 선택, 애니메이션 여부를 담당한다.
override func viewDidLoad() {
	super.viewDidLoad()

	picker.isUserInteractionEnabled = false
	randomBtn(nil)
}
결과


해당 동작은 버튼을 터치했을 때뿐 아니라 뷰에 처음 진입했을 때도 한 번은 동작해야
우측 사진과 같은 의도한 시각효과를 줄 수 있다.
따라서 viewDidLoad에서 한 번 호출하도록 하는데,
해당 메서드가 진행되기 전 pickerView의 데이터가 모두 로드된 상태가 아닐 수 있기 때문에
picker를 새 로고 침해 데이터를 미리 로드할 수 있도록 유도한다.
override func viewDidLoad() {
	super.viewDidLoad()

	picker.isUserInteractionEnabled = false
	picker.reloadAllComponents()
	randomBtn(nil)
}
결과
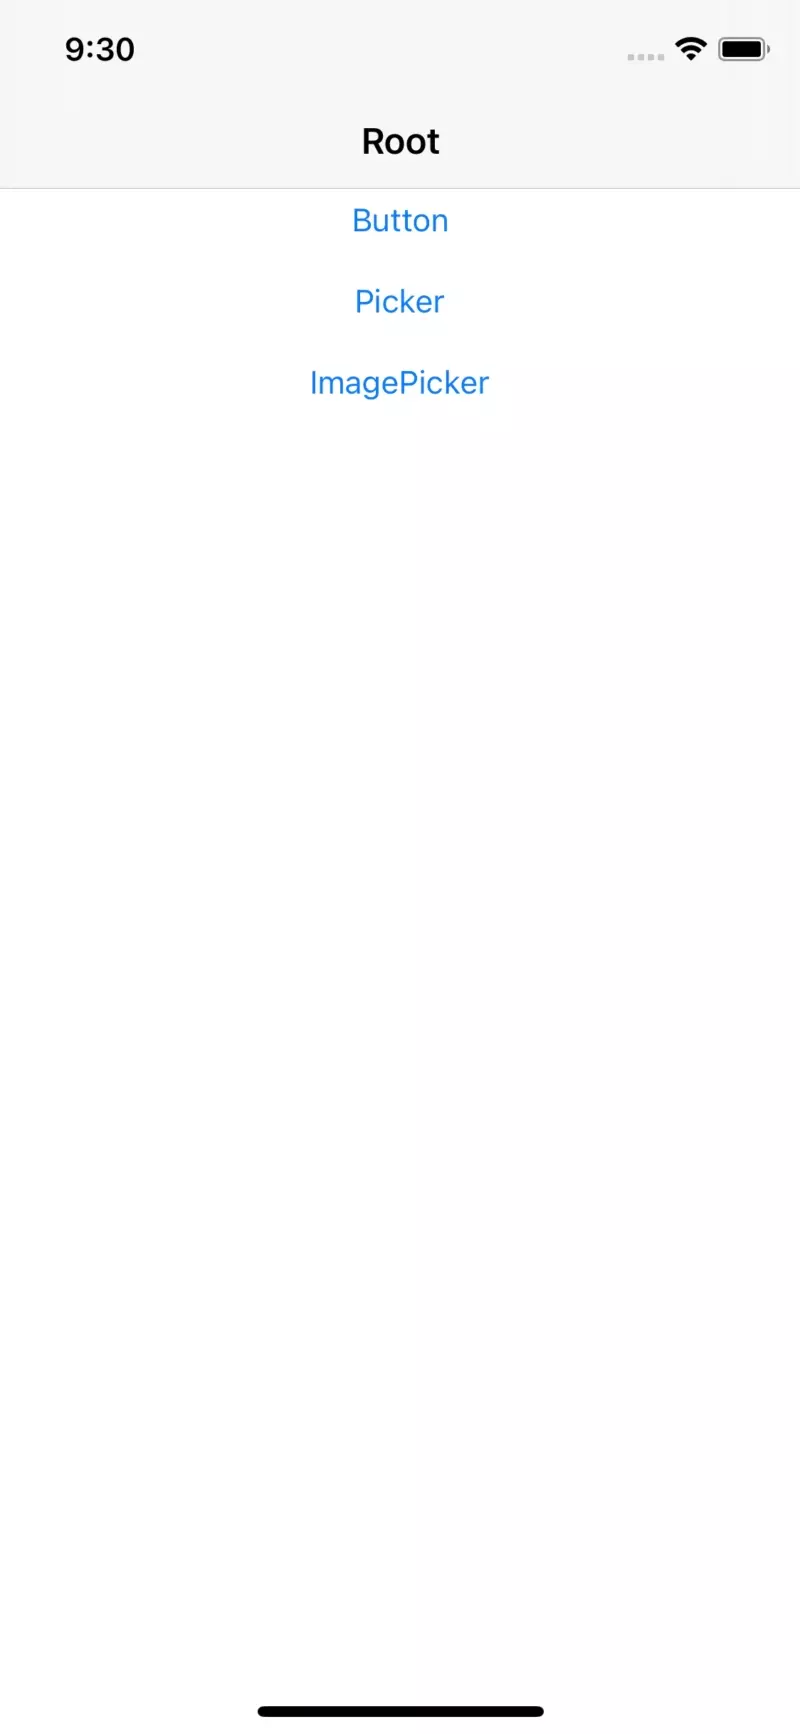
Page Control

iPhone의 스프링보드와 같이 하단의 점을 이용해 페이지를 구현하는 인터페이스를 Page Control이라고 한다.
또한 페이지를 구성하는 점은 page Indicator라고 부른다.


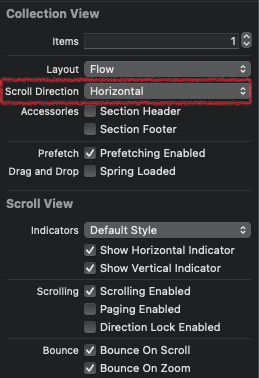
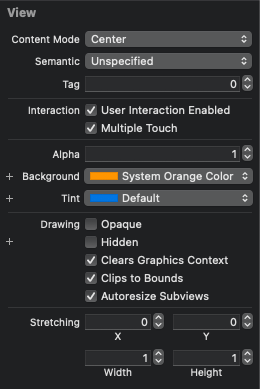
화면 구성은 위와 같다.
ViewController에 CollectionView를 하나 추가하고, Scroll Direction을 Horizontal로 변경한다.
이후엔 셀을 선택한 다음 구분이 쉽도록 Background를 변경해 줬다.
CollectionView는 delegate와 dataSource를 씬으로 지정하고,
outlet으로 코드에 연결한다.
더미 데이터 구현
//
//  PageControlViewController.swift
//  controltest
//
//  Created by Martin.Q on 2021/08/10.
//

import UIKit

class PageControlViewController: UIViewController {
    @IBOutlet weak var pageControl: UICollectionView!

    let list = [UIColor.orange, UIColor.green, UIColor.black, UIColor.blue, UIColor.yellow]


    override func viewDidLoad() {
        super.viewDidLoad()
    }

}
list엔 순차적으로 변경할 UIColor를 저장한다.
UICollectionViewDataSource 구현
extension PageControlViewController: UICollectionViewDataSource {
    func collectionView(_ collectionView: UICollectionView, numberOfItemsInSection section: Int) -> Int {
        return list.count
    }

    func collectionView(_ collectionView: UICollectionView, cellForItemAt indexPath: IndexPath) -> UICollectionViewCell {
        let cell = collectionView.dequeueReusableCell(withReuseIdentifier: "cell", for: indexPath)
        cell.backgroundColor = list[indexPath.item]
        return cell
    }
}
첫 번째 필수 메서드는 collectionView(numberIfItemsInSection:) 메서드로,
몇 개의 섹션을 가질 건지를 판단한다. 따라서 list의 원소의 수를 전달했다.
두 번째 필수 메서드는 collectionView(cellForItemAt:) 메서드로 셀을 디자인해 반환하게 된다.
따라서 list에 들어있는 UIColor로 셀의 배경색을 변경해 반환하도록 했다.
UICollectionViewDelegateFlowLayout 구현
extension PageControlViewController: UICollectionViewDelegateFlowLayout {
    func collectionView(_ collectionView: UICollectionView, layout collectionViewLayout: UICollectionViewLayout, sizeForItemAt indexPath: IndexPath) -> CGSize {
        return collectionView.bounds.size
    }
}
extension으로 UICollectionViewDelegateFlowLayout을 구현한다.
해당 delegate의 collectionView(sizeForItemAt:) 메서드를 사용해 Layout를 설정한다.
결과

list의 원소만큼의 cell이 수평 방향으로 나열하게 된다.
PageControl 제약 추가


해당 화면에 pageControl을 추가하고 horizontal과 아래쪽에 제약을 추가해 레이아웃을 고정한다.
PageControl 속성 설정

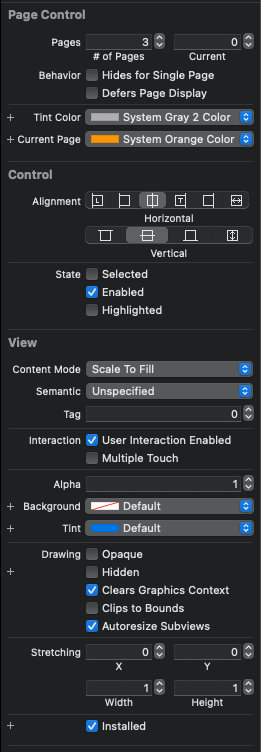
pageControl의 기본 색은 흰색이지만, 기호에 따라 바꿀 수 있다.
tintColor는 page를 나타내는 색, CurrentPage는 지금 페이지를 표시하는 색으로 사용된다.
또한 총페이지의 수와 초기 페이지의 위치는 pages 속성을 수정한다.
//
//  PageControlViewController.swift
//  controltest
//
//  Created by Martin.Q on 2021/08/10.
//

import UIKit

class PageControlViewController: UIViewController {
    @IBOutlet weak var CollectionView: UICollectionView!
    @IBOutlet weak var pageControl: UIPageControl!

    let list = [UIColor.orange, UIColor.green, UIColor.black, UIColor.blue, UIColor.yellow]


    override func viewDidLoad() {
        super.viewDidLoad()
    }

}

extension PageControlViewController: UICollectionViewDataSource {
    func collectionView(_ collectionView: UICollectionView, numberOfItemsInSection section: Int) -> Int {
        return list.count
    }

    func collectionView(_ collectionView: UICollectionView, cellForItemAt indexPath: IndexPath) -> UICollectionViewCell {
        let cell = collectionView.dequeueReusableCell(withReuseIdentifier: "cell", for: indexPath)
        cell.backgroundColor = list[indexPath.item]
        return cell
    }
}

extension PageControlViewController: UICollectionViewDelegateFlowLayout {
    func collectionView(_ collectionView: UICollectionView, layout collectionViewLayout: UICollectionViewLayout, sizeForItemAt indexPath: IndexPath) -> CGSize {
        return collectionView.bounds.size
    }
}
설정이 끝났으면 pageControl을 코드에 outlet으로 연결한다.
override func viewDidLoad() {
	super.viewDidLoad()

	pageControl.numberOfPages = list.count
	pageControl.currentPage = 0

	pageControl.pageIndicatorTintColor = UIColor.gray
	pageControl.currentPageIndicatorTintColor = UIColor.red
}
pageControl의 초기화를 위해 뷰가 로드되면 pageControl의 설정을 진행한다.
numberOfPages로 총페이지의 수를 설정한다. list의 원소의 수를 전달했다.
currentPage로 초기 페이지를 지정한다. 0을 전달했다.
pageIndicatorTintColor로 PageIndicator의 기본 색상을,
currentPageIndicatorTintColor로 현재 pageIndicator의 색상을 지정한다.
결과

list의 수 대로 5개의 page indicator가 표시되고,
초기 값은 첫 번째 페이지, 색상은 회색에 현재 페이지는 붉은색으로 나타내는 것을 확인할 수 있다.
Collection View의 이동과 Page Control을 동기화하기 위해선 별도의 작업이 필요하다.
UIScrollViewDelegate 구현
extension PageControlViewController: UIScrollViewDelegate {
	func scrollViewDidScroll(_ scrollView: UIScrollView) {

	}
}
UIScrollViewDelegate를 채용하고 scrollViewDidScroll 메서드를 추가한다.
해당 메서드는 scrollView가 스크롤될 때마다 호출되는데 여기서 페이지를 계산해 pageControl을 업데이트하면 된다.
extension PageControlViewController: UIScrollViewDelegate {
    func scrollViewDidScroll(_ scrollView: UIScrollView) {
        let width = scrollView.bounds.size.width
        let x = scrollView.contentOffset.x
    }
}
scrollView 한 칸의 너비를 width에 저장하고,
현재 스크롤된 좌표를 x로 저장한다.
extension PageControlViewController: UIScrollViewDelegate {
    func scrollViewDidScroll(_ scrollView: UIScrollView) {
        let width = scrollView.bounds.size.width
        let x = scrollView.contentOffset.x + (width / 2.0)

        let current = Int(x / width)
        if pageControl.currentPage != current {
            pageControl.currentPage = current
        }
    }
}
이후 스크롤된 좌표를 scrollView의 너비로 나누면 page가 된다.
이 값을 pageControl의 현재 page와 대조해 일치하지 않는다면, 지금의 값으로 대체하게 된다.
결과

콘솔에 출력되는 값은 순서대로 current, width, x의 값이다.
PageControl touch event 구현
@IBAction func pageControlAction(_ sender: UIPageControl) {
}
pageControl을 터치해서 다음 페이지로 이동할 수도 있어야 한다.
따라서 pageControl을 Action으로 한 번 더 연결해 준다.
이때, sender는 UIPageControl로 설정한다.
@IBAction func pageControlAction(_ sender: UIPageControl) {
	let index = IndexPath(item: sender.currentPage, section: 0)
	CollectionView.scrollToItem(at: index, at: .centeredHorizontally, animated: true)
}
index에는 pageControl에서 반환하는 현재 페이지의 index를 저장한다.
이후 CollectionView의 scrollToItem 메서드를 사용해 해당 index로 이동하기만 하면 된다.
at은 이동할 index를, at은 스크롤할 방향을, animated는 애니메이션 여부를 결정한다.
결과

이젠 PageContol을 터치해도 화면을 넘길 수 있다.
PageControl은 중앙을 기준으로 왼쪽은 이전 페이지, 오른쪽은 다음 페이지로 이동하는 동작을 수행한다.
'학습 노트 > iOS (2021)' 카테고리의 다른 글
| 036 ~ 042. Image and Color (0) | 2021.08.19 |
|---|---|
| 026 ~ 035. Activity Indicator, Progress View, Stack View and Alert Controller (0) | 2021.08.16 |
| 020 ~ 025. Slider, Segment Control, Switch and Stepper (0) | 2021.08.11 |
| 007 ~ 013. View & Window (뷰와 윈도우)) (0) | 2021.08.06 |
| 001 ~ 006. Interface Builder, Outlet and Action, Delegate Pattern (0) | 2021.08.04 |


